Driftin’ Along

Tony F builds a shuttle craft…

Inspired by the imminent arrival of Osprey’s new Stargrave rulebook, Marcus suggested that we have a shuttle scratchbuilding contest (this was several months ago, the book is of course out now). Although the rules are aimed at 28mm figures, this very loose ‘contest’ was for 15mm models.

A while ago I saw a 15mm scale spaceship made from a Nerf rifle on Facebook – it was probably the size of a corvette or small frigate. While I had no desire to make anything that big, the idea still seemed sound for a much smaller vessel made from a pistol or similar. So I picked up an X-Shot branded gun from a supermarket for a fiver … which then sat untouched in its box for over a year. The shuttle building competition seemed like the ideal time to dig it out and make something of it.

I started by dismantling it (it was held together by screws) and removing the trigger, grip and the spring mechanism that propelled the rubber projectiles. This left me with just three pieces – the triple barrel and the two body halves, which I superglued back together. The screw holes were filled with green stuff which I tried to hide as best I could by sculpting in detail to match the surrounding area. The plan was to turn the pistol round so that the gun barrels became the engines and the cockpit would somehow be grafted onto the trigger end. This was all a very vague concept, since I had no idea of the details and what I was going to use to make it all (this make-it-up-as-I-went-along theme ran through the whole build…).

I had to tidy up a couple of bits – I took a razor saw to what would be the nose and removed a protruding bit of plastic, which I covered with a hatch from a Games Workshop vehicle. The hole where the grip came out was boxed in with plasticard with a view to becoming a well for the nose landing gear.

After hunting through my spares box for a suitable aircraft cockpit I came up blank, so in the end I built a simple frame around a curved protrusion which should look like a cockpit when painted up.

Engines were my next issue. Try as I might, in my extensive pile of half-built kits I could not find three identical engines to cover the three muzzles of the original gun. I did find two Mirage-III engines which I used for the lower two. For the upper, central engine I found a rather odd finned one which came from a Japanese spaceship kit. I rationalised the different designs by designating the lower two as the sublight drives, while the upper one is the ship’s FTL or Jump drive.

The final major subassembly that I had to work out was the landing gear – it would have to be robust enough to hold the weight of the ship and stand up to the rigours of gameplay. I’d originally planned to scratchbuild something with skids or feet along the lines of the Millennium Falcon, but during my various delves through my kit pile I came across the landing gear of a 1/48th Rafale which looked like it would work. Having wheels rather than skids also made sense as it would make the shuttle easier to manoeuvre in the tight confines of a carrier bay or hangar. The nose wheel fitted perfectly into the well I’d made earlier – I just superglued it solidly to the back of the well. I drilled holes in the fuselage sides to secure the two larger rear wheel struts and added some extra supports to make them even more secure.

The forward hull had a circular recess on each side – on the left I put the main hatch, originally from a GW Rhino. I gave it some hinges and a grab rail from various kits, and an entry keypad which is the only 3D printed piece on the ship. On the right is the ship’s main armament – when the shuttle was originally built this would have been a second hatch, but now it’s in private service the captain has added a twin heavy cannon mounting, which came from a GW dreadnought. I’ve never played Warhammer 40k, but once upon a time I worked on a video game project for Games Workshop and ended up with number of WH40K sprues in my bits box, which have finally proved to be very handy.

Then I was into full-scale greeblie mode, covering much of the surface of the vessel with all manner of bits and pieces – there are aircraft weapon pylons, bits of superstructure from 1/1200th battleships, a metal radome, some windows and shutters from model railway buildings, helicopter rocket pods and many other unidentifiable bits. There’s also a small defensive gun turret under the main hatch. The engine body got lots of pipes and valves made from plastic rod and strip, and a couple of lengths of old bass guitar strings.

Eventually I called a halt and declared the build finished, and moved onto painting. The overall colour scheme reversed the original colours of the plastic gun, with the main body in white and the nose in orange, and the engines bare metal. I sprayed it overall with Halfords’ white car primer and then washed it with light grey acrylic paint thinned with Johnson’s floor polish (I had planned to use Citadel Apothecary White contrast paint but I’d run out and had to improvise…). This was then heavily drybrushed with pure white with some edge highlights thrown in. The nose was painted with Gryph Hound Orange (another contrast paint) and drybrushed up, and then the engines painted with Citadel Leadbelcher before washing black and drybrushing silver. Contrast paints can be a bit patchy on large flat areas, which just what I was after – this is meant to be an well used, battered vessel that has seen plenty of use.

I painted the gun housing in dark blue-grey, along with the numbers etched into the sides of the fuselage, the cockpit glass in a variety of blues to give a graduated shade and the undercarriage in silver. I then picked out lots of details in different spot colours – a red and white striped probe, yellow emergency gas tanks, grey sensors, a green radome and orange and blue dorsal fins. I even had a go at a rainbow-like heat distortion effect on the engine using washes.

Finally I raided my collection of decals to finish things off – a mixed selection of aircraft markings and GW Tau symbols.

So that’s it – the Empyrean Drifter takes to the spacelanes. Of course it needs a crew, which I’m currently pulling together from various sources. And I’ve now started to think that they need a base to operate the Drifter from, which is a whole new rabbit hole…

Dreadball Extreme – What do you get?

During a recent discussion over Stagrave and making scenery Marcus mentioned a cheap set of terrain available from Mantic Games for the game Dreadball. Further browsing of the Mantic Games site showed a box set called Dreadball Xtreme for £9.99.

Club member Jeremey took the plunge and bought a set for evaluation:

This all started when I saw the Dreadball set of Free Agents that I thought would be good for converting into a Stargrave crew. The Free Agents set was £9.99 but I discovered the Dreadball Xtreme set for £9.99 included the Free Agents set, it also contained some terrain in the form of crates, perfect terrain for any Sci-fi games; so I thought I might as well pick up a set.

I had to pay postage so the whole thing cost me £16.99, and this is what I got.

Contents of the complete set

I will say straight away this is not a review of the actual game. I had no interest in playing it. I bought the set for use in other games.

This is what you get in the set. First up were the 9 Free Agent miniatures that first led me to the set. The miniatures in the game are all hard plastic. The quality varied, some had sharp details others were very soft. Also the painted miniature pictures on the Mantic Games site gave me the impression that some of the miniatures were larger. For example the Treeman looked tall but is the same height as the other humanoid miniatures. Mould lines were quite pronounced on some of the miniatures, those needed to be cut off, filing on this type of plastic just roughs up the surface of the miniature.

The Free Agents

Next came the female team for the game. The miniatures are quite slight and of all the miniatures these were the softest and worst mould lines.

First team in the set, Female players

This was a shame because I wanted a number of female characters in my Stargrave crew. You get two copies of five different miniatures in this set, although two are wounded. But these could be good for rescue scenarios in games.

Here is a close up showing the size of the mould lines on the female miniatures.

Some figures are very slight compared to other sci-fi miniatures

The second team are convicts and these had better castings. You get more variety with this team (they are convicts apparently), they are nice post apocalyptic looking. there are three miniatures where you get two copies. One pose being wounded as with the  female team. There are two other miniatures and then the larger ogre/thug miniatures that come with different arms and heads so they don’t have to look the same.

Second team from the set

The Dreadball Xtreme set comes with two figures to represent team sponsors. The suited miniature would be good as a boss to be protected or assassinated in games, with the other one potentially being a gang leader.

The team Sponsors

Now we come to the terrain which is one of the reasons I wanted to get the set. These are quite good with four power unit pieces, six square crates, four lighting units and 16 hexagonal crates. These were all nice clean castings with few mould lines.

The terrain set

I should also mention the other bits from the box that I might find a use for. The rules, counters and cards for the game don’t hold much use for me. But the game mat from the set is about 24″ x 24″ and a hefty piece of rubber (mousemat?) style fabric. You could probably use it as a door mat it feels so tough. But I’m probably going to cut it up as the design will work for landing pads, storage areas or to represent the interior of a starship. There were also 24 plastic hex bases in two colours. These could be good for various terrain projects of bases for other miniatures.

So was it all worth it? I must say I was hoping for more from this set, the casting is a bit poor on some of the miniatures and the detail very soft. I will have to see how these look once I apply the spray undercoat. That often highlights the detail a bit better. But for my £16.99 I got enough miniatures to create a fairly good crew of 8 or so miniatures, some creatures and characters for scenarios, 30 terrain objects and a mat that will make several pieces for games/terrain, all that considered it was probably worth it. But I do wonder why the Dreadball Xtreme set is £9.99 when the contents if bought separately on the Mantic Games site would be over £60 just for the miniatures. Are the individual team sets at £25 each better cast? Who knows the reason behind it. But I’m happy enough with the amount of material I got from this set.

Close up of the softer details and mould lines

What A (Grav) Tanker! (Part 2)

Marcus gives us the next instalment of his Sci FI adaption of What a Tanker!

I have continued to develop my WA(G)T ideas since the first outing and this is the third time on the table. Well actually on the floor again, but I did at least get to use the table for game 2.

I have introduced some changes, and there are more ideas to come. Firstly, I went back to the original Lardy allocation for the dice orders. On reflection I didn’t feel much was gained by that change.

Secondly, this time I added in a command group each. I tried this in the first game but adjusted how they worked this time.  For simplicity I gave both command groups four dice. The idea behind these is that they can (apart from making nice objectives for the enemy maybe…) use their dice to cancel enemy orders or supplement their own units die rolls. I played it that the command units needed to roll at least one 6 to use as a comms/data link. At first it was too easy to disrupt enemy shooting by allowing any dice rolled by a command unit to cancel an enemy order dice. This time I went for the following options:

      1. Cancel one enemy move dice or substitute a friendly unit dice
      2. Cancel or add an acquisition dice
      3. Add/Improve aim
      4. Add a shoot dice
      5. Add a defensive dice
      6. Comms/data link

I also added in missiles in both games. However, in the first game they didn’t work satisfactorily. In the second, well, you’ll see.

I added in a wider selection of cards than in the original WAT game, to add some sci-fi flavour. Some were successful, although those relating to missiles need to be revised.

Finally, influenced by PSC’s “Red Alert” which I have written about previously, the biggest change in this iteration was the number of vehicles on the table (sorry, floor!) with a shift to multiple element units. Essentially these employed the same stats as used previously with a hit just removing one vehicle.

There were a few new or adjusted vehicles. The “attack boats” were a Callisto class boat, as seen in the previous game, but with a change to a missile launcher in place of the forward twin gun. It is a modular design (the turrets on the models are magnetised). The two smaller boats notionally have vertical launch cells under the bow cover. These still acted like one unit, although in retrospect I think I should have upped the defence value and/or the hits that could be taken, especially on the larger Ganymede.

Additional units:

Core Dice Max Attack Defence Movement
Attack Boats 6 Ganymede 8 missiles; Leda & Ersa 4 each 8 6
Pz 35 “Hornisse” 5 15 9 9
Command Units 4 0 8 7

The British started with 2 groups of 4 Chieftains, one of 4 Ferret’s and the naval group of Ganymede, Leda and Ersa plus the command group, see the header picture.

The NAU had 3 groups of 4 Wespe, 1 group of 4 Hornisse  and the command group.

The Hornisse models are envisaged as earlier models which have not been completely replaced by a later version, but are ideal for service in a riverine/swamp environment (maybe they should be better than grav vehicles over this kind of terrain. I always envisaged grav vehicles having more “mushy” responsiveness over wide stretches of water)

Ersa and Leda are also from GZG. The Hornisse is from the Osario from the Scotia range. As an objective I thought about both making this the command groups or taking the previous route; the British was to get the Callisto off the far river edge with the NAU needing to prevent this. In the end I went for just targeting the naval group and playing out a few turns.

Activation worked as previously, but I forgot about the “exploding 6’s” for hits. It seemed likely to be a more destructive game anyway…

Here is an “drone” shot of the initial set up:

With shots from the British perspective:

And the NAU positions:

Turn 1:

The NAU took the initiative moving the green Pz 37 unit up, seen at the bottom of the drone recce photo,  and the corresponding yellow unit to the top. The yellow unit benefited from a stealth card requiring an additional 2 acquisition dice. The British Ferrets activating next were unable to move, but prepped for future activation with the idea that they would designate targets for the missiles on the naval units if possible. The Ganymede group also moved up and were able to acquire and aim at the NAU yellow group having rolled three 6’s.

The cautious positioning continued since the British had no data link and the GBR yellow group were therefore unable to acquire the stealthed NAU yellows. No firing took place this turn.

Turn 2:

The NAU again gained the initiative (on exactly the same number of dice as the GBR), continuing a theme from the last game.

NAU command had rolled two 6 (one of which could be used as data link) and two “shoot” dice last turn. The dice rolled for the last turn continue to be available until a unit activates in the subsequent turn and rolls a new “hand” of dice.

The NAU orange “Hornisse” hover tanks moved forward in the centre, but were unable to find a target in line of sight. However, NAU blue had no such difficulty. Moving to acquire the naval group they launched a 15 dice attack. Despite the GBR side using a card for a D6 firer systems down, resulting in a reduction of only 1 attack dice to 14. A roll of 6655 didn’t seem too threatening, until the 8 defence dice yielded no blocks! A further desperate defensive systems card for the GBR took out one of the critical hits, but under the new rules either critical (6) or a double hit (55) would destroy a target. While the card saved the Ganymede the Ersa and Leda were destroyed.

In response the GBR yellow Chieftain unit moved out of cover and launch a retaliatory attack on the more exposed NAU yellow unit.  With 13 attack dice -1 for range attenuation, the Brits roll 666655. Despite playing an “All power to shields” card, the NAU rolls only a 65 against the incoming fire, seeing three of the four vehicles in the unit destroyed. The remaining vehicle rolled a test and stayed in the fight (D6 higher than the number of vehicles destroyed)

GBR orange Ferrets attack the “Hornisse” unit, having rolled 6543 (using the wild 6 as a 2 to acquire), but hits of 665 were all blocked . The Ganymede went into stealth mode with a card.

Both command units now activated successively and maintained comms/data links.

The turn concluded with a GBR Green Cheiftain attack on the exposed NAU yellow over the river with a 6555 on 13 dice. With only a defence of 4 the unit still blocked with 65 resulting in one tank destroyed.

Turn 3:

This proved to be the final round of a vicious confrontation.

The NAU maintained the initiative and their yellow unit used an extra command unit acquisition dice to make 3 allowing them to target the Ganymede in stealth mode. 15 dice resulted in a 66666. A defensive systems card d4 roll resulted in two of these being cancelled. The Ganymede’s defence dice only took out one of the remaining hits, resulting in a mighty explosion as the last two critical hits crashed home. BOOM!

The NAU red Hornisse unit rolls 65511. However, despite being unable to acquire or aim, using a “snapshot” card, they are able to make a reduced level attack. A ten dice attack results in an unlikely 66655. The green unit with all power switched to attack is unable to stop any of these critical hits, although a damage control card cancels the non-criticals.

NAU command rolls a 5321. Without a data link it cannot use any of these dice to support its units. NAU Green rolls 633322  continuing the paralysis on the NAU left flank as without a shoot order, they cannot get into the fight.

The GBR command group still has data link and the GBR yellow unit uses a command unit 2 to acquire NAU yellow. With a 13566 and the 2, the GBR unit can make two attacks using the wild 66 as 44 shoot orders.  A 66655 followed by 65555 leaves the NAU unit doomed, having only two for defence against each attack.

That effectively ended the action for the round and the game, with both sides more or less suffering equal damage and choosing to retire.

As alluded to earlier, the missile rules didn’t get tested and the cards need further development given the rule changes. Overall though, I like the changes; having the extra vehicles on the board “Red Alert” style and the command unit rules, although these could evolve further.  While the game was excessively destructive I think that was a function of the lack of defensive allocation and a need to restructure the cards  to reflect rule developments. The cards are a key thing to work on going forward.

However, missiles still need work. I am thinking of rolling one dice (probably a D6 but maybe others depending on missile characteristics) per missile and in the spirit of using the same dice in a different way, rolling the defence dice to block the specific number rolled (i.e. a defensive 6 would take out any attacking rolls of 6, a 2 would take out any attack rolls of 2 etc.)

I hope to develop the command group idea and use multiple groups (2/3 perhaps depending on the size of game).

I have an idea that I might do an Antarctic game going forward. I have a suitable shower curtain that I used as a mat for a club show game. However, I have no suitable vehicles or other terrain. In the interim I may break out my island terrain (a couple of pictures of which can be seen here) for the next game and hopefully some future blogs might cover painting vehicles (probably striping and re-painting old vehicles) in snow camo and creating some terrain.

Look out for further developments!

KONTRABAND – A ZONA ALFA EXPANSION

John gives a the low down on the Kontraband expansion for Zona Alfa, and a prize winning battle report on one of the scenarios from the book.  

John tells us “There’s a competition on the F/B page for battle reports. I sent a copy of the article to the rules author and I’ve won a copy of the rule book signed by the author and illustrator.”

Zona Alfa was published by Osprey in early 2020. It’s a skirmish game set in the Chernobyl exclusion zone where teams battle for salvage and hope to survive. I’d hoped to play it at the club, then along came the pandemic. The author supports the game well via the Stalker 7 website and solo or Coop rules were soon developed, where the player games against the zone itself rather than a physical opponent. I’ve posted 3 battle reports here and you can check out Guerrilla Miniature Games U Tube channel where a full 7 game campaign is played out. These rules are highly recommended.

Kontraband is an 80 page expansion to the Zona Alfa ruleset (which you will need to play Kontraband), available through Amazon as hardcopy or Wargames Vault as a pdf. It develops the ideas above to take the game in a different direction, recommending a play area of 3’ x 3’ and a crew of 4 veterans. It is set deep in the Exclusion Zone at high threat level so it’s worth playing through a few standard Zona Alfa games before diving in. Here’s what’s in the book.

Crew Members.

Crew members can either be Stalkers – good at combat or Scientists – good at technical tasks, a further option is to include a dog companion for which there are detailed rules and additional rules for Hazmat suits. Each crew member can have different equipment or skills so it’s worth spending the time to make them complementary.

Zone Setting.

The play area is populated with a recommended nine searchable locations (points of interest). The crew have to live off the land so these need to be searched for food, drink, ammo etc. to sustain the crew for the next game. There are 20 points of interest cards from which the 9 are randomly selected, shuffled and placed as an Incident Deck, the top card being revealed when a point of interest is searched. These cards are nearly all bad news and may spawn a zone hostile within close combat distance, dangerous plants or booby traps. There is a greater emphasis on melee combat than in Zona Alfa.

The objective of the game is to search Anomalies to retrieve artifacts (the recommended goal for a campaign being 12 artifacts). It is recommended that the play area for a game has 3 Anomalies to search. The rules for anomalies are fleshed out and there are options for different area effects if the anomaly search goes wrong – four ways to die. Models can be caught in a gravity force field, electrocuted, blasted or teleported away from the anomaly.

There is no game turn limit, the risk of staying in a dangerous area is handled by zone events. Starting on the second move, and becoming more likely with each subsequent move, there is a risk of a zone event, for example: an energy wave, vermin stampede, security patrol, angry mutant or anomaly movement to ruin your day.

New Stuff

This covers a better way of dealing with wounds than the original rule book, there are new weapons and accessories with better options for melee combat. Zone hostiles can be made more dangerous and the concept of fatigue and obsessions are introduced. In Zona Alfa, progression is covered from Rookie through to Veteran. In Kontraband, crew members can add sixth sense, extra toughness, and an additional skill after a number of survived missions.

Missions and Expeditions.

There are 6 separate mission ideas for pick- up games or to link together to form an expedition and a sample expedition of 5 missions in the rulebook. So whilst waiting for some new figures, I decided to try out the reconnaissance mission.

Here is the table layout with 9 POI (blank dice) and 3 anomalies (Spheres), the crew will enter at the bottom RH  corner. Their mission is to search the 4 POI at the corners as a minimum, destroying all Zone Hostiles and retrieving samples from any of the corner POI which contain a hazard. I selected a crew with 3 Stalkers and 1 Scientist.

Turn 1.

For the first turn the crew will check out the POI closest to their entry point, the abandoned farm equipment. Each crew member can have three actions per turn and it’s worth using one action “alert” to provide overwatch for the Searcher. The top card from the Incident deck is revealed.

Here the vermin swarm is spawned by using a D10. The dice roll number is the distance in inches/2 from the POI and the facing gives the direction. The Leader (Nimzo), with the steady hands skill and a red dot sight has one action before the swarm can charge into the nearest model and attack it. They are destroyed.

Had the incident card been a bandit ambush, it’s likely that one or more crew members would have been out of action on turn one, unless crew members are on alert to take pre-emptive action.

The Searcher (Ali) has the scrounger skill so can search the POI twice, He secures rations, water and ammo which the crew will need for the next mission – in the game you have to think about the future as well as the present.

Turn 2

At each turn after turn 1 a D10 is rolled. The die roll is added to the turn number and if the result is greater than 10, a zone event occurs the subsequent turn. No zone event for turn 3.

The crew head up the board and Sukova (a Scientist) is best equipped to search the anomaly, which she does.

Here, a skill roll of 8 would normally fail but Sukova is equipped with a Detector which gives her a +2 bonus and she recovers an artefact, which would count towards a campaign goal.

Turn 3

A zone event, an anomaly shift will take place at the start of turn 4. The crew move up to the top RH corner of the board to search the POI, next turn. This will not affect the crew as they will be out of range.

Turn 4

No zone event is rolled. Spassky (Bounty Hunter) checks the POI – not the best option. The card reveals a zone hazard ‘Spores and Spitters’. He survives one attack and retrieves a sample from the POI.

Turn 5

The zone event roll results in an Alpha Predator entering the board at the start of turn 6.

The crew move towards the POI at the top left hand corner of the board but reserve an alert action to use against the Predator when it enters the board. Where possible, they move into cover, this will give protection against the attacking Predator which has Ranged and Melee combat abilities

Turn 6

An area emission effect will arrive at the start of turn 7

The predator enters, this is a dangerous opponent with high armour value. Ruined buildings prevent a direct attack route and it is forced wide and after 3 movement actions it has none left to attack the crew. It’s the crew’s turn and Ali fires the grenade launcher and scores one wound. The Leader gives him an extra action to get into cover. Spassky with Steady hands and a Red Dot sight on his battle rifle fires at the predator. It takes 3 firing actions but the predator is downed. Spassky is stuck in the open.

Turn 7

The Zone event roll results in another Alpha predator arriving. Things are not good for Spassky. He takes the full force of the Zone emission, he’s pinned and wounded and it takes all his actions to recover. Nimzo gives him an action to go on alert. The rest of the team move round to deal with the Predator when it enters.

Turn 8

The zone event roll brings up another zone emission at the start of the next turn.

The Predator enters, Ali fires a grenade which causes one wound, whilst Nimzo causes another. Spassky lobs a smoke grenade at the Predator which has to take a will check. It rolls a 10. This is an automatic pin and the will failure adds another. It will take 2 actions to remove the pinned counter but the Predator will still be able to attack Spassky once when it emerges from the smoke.

It’s a straight roll off, Spassky has the knife man skill and is armed with a Trench knife. Both adversaries roll a hit. Spassky could use his roll to parry the attack from the Predator but he’s a Bounty Hunter. Both take a wound and the Predator is destroyed.

Ali makes it to the thicket which holds the POI they must search for. Sukova manages to search a second anomaly and  grab an artefact before ducking into cover. Nimzo orders Spassky to seek cover under farm machinery. Nimzo joins him there to apply a med kit.

Turn 9

The zone event for the next turn is another Alfa Predator

This turn, the effect of the zone emission is negated because all crew members are in cover. Nimzo and Spassky go on alert whilst Sukova searches a POI, which reveals a mutant.

The mutant spawns 4 inches away from the POI and is downed by Spassky. Sukova retrieves some ‘hotload’ ammo for the crew.

Meanwhile Ali’s search triggers a Zone Hazard  – cobwebs.

Ali avoids the effect of the Zone Hazard, collecting a sample and retrieves a Lithium battery, Med Kit and heavy weapons reload. He will need this for the grenade launcher next mission.

Nimzo gives Ali an extra action so he can go on alert and get in position to attack the Predator the next turn

Turn 10

The zone event for move 11 is another zone emission.

The Predator enters but the crew are ready. Ali fires a grenade causing one wound and Spassky finishes it off with two shoot actions, the extra damage from his AS Val battle rifle proving crucial. In their move, the crew race towards the final POI that needs to be searched to complete the mission. They duck into cover to avoid the effect of the emission. Ali moves slower as he is slowed down by the heavy weapon.

Turn 11

The zone event for move 12 is the arrival of a Spetsnaz zone patrol

The zone emission has no effect and the crew continue towards the final POI. Spassky searches the POI – Marsh gas, if he fails the will check, he will fire at the nearest crew member! He passes and collects a sample having an action to clear the board. The rest of the crew follow, Ali needs to take a swig of Electric Juice to give him the extra action before the Zone Patrol enters.

The incident packed game had taken just over 90 minutes, a bit longer to make commentary notes and photos. I really enjoyed the game which adds extra detail to the Zona Alfa ruleset. I’ve played this scenario 4 times now, each game was different and challenging. I’d recommend this game to all players- whether you are a regular player or a sceptic who felt the original game wasn’t for them.

Reflections

Zona Alfa and Kontraband are well supported by the author who has answered any queries or clarification promptly. The Facebook page is an excellent and supportive source for the game, no bitchy point scorers on this site which is refreshing compared to other wargaming Facebook pages I subscribe to.


The 3 S’s: Stargrave, Space: 1999 and Serenity

Andy tells a story of repurposing an Eagle…

With the announcement of the release of Stargrave last year one of our members suggested that as a lockdown project those interested might like to kitbash or scratchbuild a shuttle or spaceship and paint up a 15mm crew for the game, with a target date of early 2021 when we hoped we might be able to resume meetings. The due date was of course extended.

A long time ago in a galaxy far, far away…

Actually, no, it was in the 1970’s in Rochester, I bought and made up an Airfix Space 1999 Eagle Transporter. Said model has followed me around various student lodgings, digs, flats and finally my current home.

So, I had a search in the loft and found the Eagle. It’s not had very much use, but at one point I completely repainted it into a non-cannon scheme.

Eagle as found

I noticed that the thruster units were missing, I have a vague recollection that I removed them for the last repaint, and put them in a ziplock bag somewhere. Exactly where I don’t recall, hopefully they will turn up at some point.

Having found the model I decided I didn’t want to do a full strip and repaint, but I wasn’t that keen on the colour scheme I had used for the doors on the cargo pod or cockpit.

I decided to just touch up the grey and repaint the cargo pod and cockpit panels. I started off by giving the doors and the cockpit panels a couple of coats of Foundation White. Once dry I then repainted the doors and panels with Fluorescent Orange, with some black lining. The instrument panels at the top of the doors were painted Gunmetal Grey.

I also decided that the main engine nozzles need a touch-up, matt black inside and Gunmetal Grey outside. I also repainted the black panels on the cockpit section. I suspect my decision to use a grey and orange scheme may have been influenced by old Royal Navy SAR helicopters.

I had a rummage through my spare transfer box and found quite a few sheets from some Hasegawa 1:72nd scalexe UH-1D Helicopters I’d built for Vietnam games. This gave me a load of duplicate registration numbers, plus some Japanese Kanji characters. I gloss varnished the areas I to which I was going to place the transfers, added some 5-digit numbers to the front and sides, and larger two-digit numbers to the sides and top surfaces. I also added a Kanji block to the sides of the cargo pod, these actually read Rikujōjieitai or “Japan Ground Self Defence Force”. The reasons for adding some Kanji characters will become clearer later.

Eagle repainted

While I was working on the Eagle and posting WIP pictures on the MWS groups.io discussion page a debate arose about whether I should give the Eagle some weapons. There were arguments in favour and against, some of which were quite passionate.

I decided to try and have the best of both worlds, and make the guns detachable. Looking at the Eagle the spinal lattice work had gaps of approximately one inch. I thought I could make some inserts to fit this lattice to hold the guns.

I started by cutting some 25mm square sections of 5mm foamboard, then trimming about 2 mm off each edge of one of the cardboard faces and the underlying foam. This needs to be done carefully so as not to cut through the second face. This results in a roughly 21mm square “plug” with a 25mm square upper face. I made two of these.

Left to right: 25mm square foamboard, markings for the edge cuts, the roughly 21mm square plug with 25mm upper face.

I obtained a selection of spare guns from Brigade’s 15mm Accessories range, and made two gun packs, one fixed gun firing forward using a Triple Powergun and one with four Remote Weapons Mounts, think of some small Vulcan Phalanx systems.

I painted the guns Gunmetal grey and the body of the pack as close a match to the Eagle’s grey as I could mix. I then gave the guns a liberal coat of Army Painter Dark Tone wash.

Eagle Guns (L to R) Chin gun from a Kirin walker, Triple Powergun, Remote Weapon Mount

These gun packs just push fit into the spinal lattice, the foam is flexible enough to deform as they fit into place and expand again to hold them solid. The separate twin turret just fits into a recess in the cockpit section.

Eagle guns mounted

Now onto the crew.

A while ago I was tempted by a couple of GZG figure packs that bore an uncanny resemblance to the cast of a certain 2000’s Sci Fi TV show and film. Shiny. So, these would become the crew of the Eagle.

I mounted these on some 16mm diameter washers, built up the bases with Polyfilla and undercoated them with grey primer.

I found a few pictures of the cast on the web and used those as inspiration for the colour scheme, or as close as I could get with the mostly Valljeo paints I had available. The bases were then finished off with basetex and the figures varnished.

Three of the cast had duplicate figures, either different clothing and / or weapons, so I painted the second version in slightly different colours so that they could be used as different characters if required.

Left to right: two versions each of the Captain, Enforcer and First Mate.

The other six members of the crew only had a single casting each:

Left to right: Telepathic teenage ninja girl and her brother the Doctor; Pilot (husband of the First Mate), Engineer, Shepherd (sort of a priest) and Courtesan.

Oh, and the use of the Kanji script on the Eagle? In the TV show the characters speak a mixture of American English and Mandarin (the latter usually mild profanities) and the latter also appears in company names and logos, the Kanji decals were the closest I had to Mandarin.

I originally thought that the Airfix kit was 1:72nd scale, but if so, the crew would have to be contortionists to fit in the cockpit.

Off to Google. There’s quite a few websites dedicated to Space: 1999. I found one website that states that the Eagle is 76 feet (23.16m) long which, given the model length of 300mm nose to engine nozzles, would make the kit  approximately 1:77th scale; another  compares the Airfix kit to the different Eagle models used in the TV series, which were not necessarily consistent with each other.

This suggests that the Airfix model is likely to be closer to 1:96th scale. I could probably start some arguments if I started making pronouncements that 15mm = 1:100 scale (personally I reckon it’s closer to 1:120), but the bottom line is I think that the Eagle looks OK next to 15mm figures, and the crew could get into the cockpit without scraping their heads on the ceiling.

Unarmed Eagle and crew

Wherever you have protagonists you need antagonists. As far as I could see GZG didn’t do any of the TV show’s “baddies”, the Alliance, so I went elsewhere.

Brigade models do some Uniformed Starship Crew and some Tank Crew in helmets. I got a pack of each. Unfortunately, the bases on these were too small to glue directly to the washers, so I had to cut some suitably sized cardboard fillers to bridge the gap. These figures got a generic mid grey uniform with some red and silver highlights here and there. Depending on your viewpoint these are the heroes of justice, or the lackeys of the oppressive state.

Alliance Officers: The Commander (2nd left) and her Lieutenants.
Alliance Grunts

These chaps don’t have a ship of their own, but I do have a vehicle, a Brigade Javelot scout car, for them.

Grunts and car

It might be a bit tight for all 8 of them in there, so I might need to get them more transport!

Stephen’s Stargrave Crew

Stephen enthuses about Stargrave and describes a couple of crews he has put together.

Image backdrops are used under the Creative Commons Attribution-Noncommercial-Share Alike 3.0 License from Deviant Art user Moodyblue https://www.deviantart.com/moodyblue

I’m really excited about Stargrave.

I can see myself wanting to play it loads (mind you, there’s loads of other games I want to play as well – currently undergoing bad Saga withdrawal symptoms).

Lucky for me, I have enough figures and scenery to get started with Stargrave, no need to paint before play, etc.

So what I have here is an introduction to two crews I have put together.

The first group are a party of scavengers from the Candolorian system. They are led by Elias Dante, captain of The Devastator, and a rogue who has been one side of the galaxy to the other. With Elias is Imjin Tik-tok, a Tuncoul and experienced tekker who looks after Elias’ droids.

Captain Elias and Imjin

The droids themselves are TT-1B and CLN-T 35TWD. 1B is an old sentry bot who’s had his software updated. CLN-T is of unknown origin.

TT-1B and CLN-T 35TWD

The rest of the crew are made up of Mackenzie Talian, Quill Raiker, and Murch Nagu. Mac and Quill have known each other for years and have worked on many heists and smuggling jobs. Murch is a Thecan and a heavy trooper from the wars.

Mackenzie, Quill, and Murch

Next up is Madam Sholay, a psionicist and owner of The Monsoon – a converted Hauler class light freighter. First mate on The Monsoon is a biomorph called Shoggoth, who never strays far from Sholay’s side.

Madam Sholay and Shoggoth

The crew of The Monsoon is made up of ex-military personnel. There’s Aidan Kenver and Yammet de la Cruz, a pair of advance party pathfinders.

Aidan and Yammet

And rounding off the group are Mallias Bygrove and Zanford Schneider, two snipers who have a long list of kills to their names.

Mallias and Zanford
The crew of the Monsoon

Creative Commons License
This work is licensed under a Creative Commons Attribution-NonCommercial 4.0 International License.


What a (Grav)Tanker!

Marcus presents a Sci Fi rules adaption and game report…

Ever since I picked up “What a Tanker” (WAT) from Two Fat Lardies I have been thinking about a sci-fi adaptation. I have always felt something lacking in the various large-scale sci-fi sets I have played. Ground Zero’s Dirtside Two was the first, and is probably still my favourite, but none quite deliver what I want. This may have more to do with my personal tastes than any merit in the various rule sets I have tried.

I have been playing WAT with my children using sci-fi vehicles as my 15mm World War Two western desert tanks have languished un-painted for years. The boys really like this game and we have played it a few times with around three vehicles a side. The time now seemed right to try out my sci-fi ideas.

My inspirations for this version stem from two sources. Firstly, Jon Tuffley’s “Full Thrust” source book “More Thrust” which contains the first rules for the Sa’vasku aliens. From the first time I read them I was intrigued by these. They feature a simple system of power allocation based on a number of dice rolled for the size/power plant of these “living bio-ships”. Perhaps because my first exposure to Sci-Fi was “Star Trek”, the idea of switching power between the three core systems; attack, defence and movement resonates strongly with me.

Secondly, “Silent Death” a system for space fighter combat by Iron Crown Enterprises utilizes a system in which the same dice are read in different ways to determine hits and resolve damage.

I set up a very rough proof of concept game based on these “back of a postcard” ideas. One minor difference was to change the roles allocated to the dice in the WAT “hand”. I didn’t want 6 to be wild; rolls of multiple sixes would be increasingly powerful. I opted for the following:

        1. Wild
        2. Acquire target
        3. Aim
        4. Shoot
        5. Reload
        6. Move

For Sci-Fi games, I am not sure reload is the right option, but for the moment I left it in.

Vehicle stats:

For my previous games, I just chose the stats from particular WW2 and assigned them to Sci-Fi models. This time each vehicle would have a max level of power that could be used by each system with a +/- “free” bonus. The concept was that the bonus applied as soon as any power is allocated to that system. In fact, I somehow ended up playing it that the bonus applied only when the maximum allocation was applied. Special characteristics can also be added, but in this game, I only assigned one.

British:

Core Dice Max Attack Defence Movement
“Callisto” Gunboat 6 15 (+5 bonus) 8 6
Chieftain 5 13 (+2 bonus) 7 11
Ferret* 4 8 5 (-1) 15 (+3)

*Manoeuvrable. Doesn’t pay for turns

New Aryan Union (Sci-Fi Nazi’s):

Core Dice Max Attack Defence Movement
Pz. 37 “Wespe” 6 15 (+2 bonus) 10 (+2) 10

The British started with 3 Chieftains, 2 Ferrets and the Callisto.

The British forces, the Chieftains follow up Callisto flanked by the Ferrets.

The NAU with 2 sections of three Wespen.

The NAU Pz 37 Wespen

The notional objective for the British was to get the Callisto off the far river edge. The NAU needed to prevent this.

To decide activation order I used a set of dice, one for each vehicle on each side. All vehicles were marked with a coloured sticker which corresponded to a dice. Each side rolled its individually coloured dice to determine precedence. In the spirit of reading the same die in two different ways. I added up each sides dice. This determined initiative. In the case of any draw (e.g., vehicles on both sides rolling 6’s) the side with the initiative would move first (or defer, although I didn’t choose to use this option in the game)

As I was using a simplified system, the defence dice were considered energy shield which had the same effectiveness from any angle. I would probably develop this along the lines of Full Thrust and say that due to drive mechanics, the rear cannot be as effectively shielded, but not this time.

Vehicles were considered to be able to take up to half their core dice value in critical hits (6’s), although I didn’t give critical hits specific locations/effects this time in aid of simplicity. More than half the core value in critical hits destroys the vehicle. A hit of 5 would just reduce the current core dice level. 5’s could be repaired but not 6’s. In addition, any 6 rolled could “explode”. Each was re-rolled to see if a further 6 resulted. If so, a further roll would be required, and so on.

Firing within 6 hexes resulted in a close-range bonus of +1 to each die rolled.

The mat I used for this game was a present bought for me a couple of years ago. Unfortunately, I haven’t previously used it as my table isn’t big enough. Today it was pressed (apologies that it wasn’t pressed beforehand, and you can see the fold lines. It was an impromptu game!) into service on my eldest son’s bedroom floor while he was at school. It is from Tiny Wargames. I hoped it would be a useful generic mat for air games either around the Pacific or Far East. I also had half an eye on games like this where I could use my gunboats.

A note on the models. They are a bit vintage. The Callisto is from GZG (slightly modified with a turret from Ral Partha which has again been converted from a single to dual cannon). The other vehicles are all from grav versions of miniatures from Scotia Micro Models sci-fi range. The Chieftains are Abrams 4000 (SF0022); Ferrets are Merkava 4000s (SF0031) with Bradley 4000 turrets (SF0049). The Wespen are Challenger 4000s (SF0028). The stands were home made many years ago. I usually use clear Lego or clear acrylic bases now.

A drone shot over the delta at the start of the game.

A drone shot over the delta at the start of the game. British forces on the left, NAU on the right.

And from the British perspective.

The British Ferrets leading the Chieftains and Callisto

Turn 1:

The NAU took the initiative and on their third activation “red” Wespe opened fire on the British orange Ferret achieving a 665, however, these were all blocked by defensive die rolls. Subsequently the “Callisto” opened fire on the white Pz37. A 66665 from 20 destroyed the target. However, the NAU hit back with the green Pz37 destroying the British blue Ferret.

Blue Ferret destroyed

NAU orange gets a 6555 on British red Chieftain, of which two are blocked leaving 2 hits. The NAU blue Wespe gets a very big roll of 30 (665544), but with no acquisition or aim dice it is not worth much except to power a solid defence. By contrast, British yellow Cheiftain rolls a 66111. With 3 wild dice, and a total of just 15 energy points, the Brit can post Att: 9 Def: 4 Move: 2. Those 9 dice yielded a 66665. Despite a defensive roll of what would normally be a respectable 6555, NAU blue loses 3 core dice.

At the end of turn one it’s about even. Only the Brits have lost a vehicle but also have one damaged, while NAU have two damaged.

Situation at the end of turn 1

Turn 2:

Early on neither NAU orange Wespe nor the “Callisto” make significant actions despite big rolls. British green Cheiftain then gets four hits on the red Pz37 with a 6655, but these are all blocked. This then launches a fierce attack on the British red Chieftain with a 6665. The Chieftain can’t block any and explodes into an incandescent ball of gas. Neither NAU green nor yellow can engage a target, but the little orange Ferret moves within 6 hexes of a target to get a bonus of +1 per dice and 6655 for 4 hits, but these are all blocked! The yellow Chieftain inflicts 2 hits on the yellow Pz37 to wrap up the turn, although NAU blue Wespe manages to repair a core die at the end.

The turn ends with another loss for the Brits; now down to a Ferret and 2 Chieftains plus the “Callisto”. The NAU have taken damage though, but it isn’t enough when some of that is being repaired. It’s not over yet though.

Situation at the end of turn 2

Turn 3:

The green Wespe is blocked from targeting the British yellow Chieftain and turns on the orange Ferret: A roll of 555211 gives two wilds allowing an acquisition, aim and shot. With an attack of 17 (max dice of 15 plus 2) the NAU gunner gets a statistic busting 66666555. The target can only block a 6/5. BOOM! Another Brit gone. NAU Wespe blue now acquires and aims at the “Callisto”, but can’t open fire. It is a similar story for The British green Cheiftain. NAU red inflicts a 66555 on the British yellow Chieftain. It blocks 2 hits but leaves the 2 crits and another hit!

British Yellow Chieftain takes damage

“Callisto” now gets to respond with a 665421. The wild is used as a 3 to aim with a shot of a maximum 20 dice (15 max allocation +5 bonus; it’s a twin turret!)  But the 666555 are all blocked by the maximum 12 defensive dice.

As the turn ends there is finally something to cheer for the Brits. Yellow Cheiftain, already having an acquisition and aim on his NAU opposite, adds an additional aim for a bonus. A 15 dice attack results in an astonishing 666666 5555. 6 defensive dice just aren’t going to be enough…BOOM!

NAU Yellow Wespe brews up

Turn 4:

Despite the earth-shaking destruction of NAU yellow Wespe, things are slowly deteriorating for the Brits.  As turn four begins NAU orange, having previously acquired the Brit yellow Chieftain rolled a hand of 533311. Using both wild dice as 4’s allowed a shoot, reload, shoot action. Amazingly, of the 20 dice rolled resulting in 6666 5555, only one 5 wasn’t blocked for one damage on the Brit. And now Callisto responded in kind. Having previously acquired the orange aggressor a 655443 allowed another double shot, but this time at 20 each. Of the 66 5555555 resulting hits, only two were blocked for another titanic explosion!

For a moment it seemed like the Brits could claw their way back into the fight as NAU greens attack on the Callisto is blocked and red can’t get a shot. However, NAU blue rolls up a 543221. This means that blue can acquire, aim, shoot, reload and shoot again with the wild die as an additional 4. Two crashing volleys later, although the Callisto blocked 7 hits, 2 criticals and another hit landed.

Turn 5:

With the Callisto damaged and the initiative never having left the NAU, the red Wespe weighed in with a 655443, and having already acquired and aimed last turn the inevitable double shot resounded across the turgid green waters. Callisto was able to block the only two hits from the first volley and generate a repair, but hope turned to despair for the Brits when the second round of fire resulted in 666 5555. Could Callisto’s 8 defence dice hold up? BOOM! That would be a no.

Callisto is hit and destroyed.

I think that was a very interesting and quite exciting test of the basic mechanics of this variation on the Lardy rules. There are some things I might like to add; Range attenuation for the powerguns. I was thinking maybe reducing the power by one for each increment of range beyond the power level (i.e., Attack power 17. At 18 range the power would reduce by 1. At 19 by 2.) Also, WAT has some cards which are awarded for on table success. I didn’t use them this time but this feature could be used to add sci-fi flavour. Finally, Full Thrust utilises a capacitor where some power, probably equivalent to core dice level, can be held over to the next turn.

I remain unsure about the reload option, but less so. It worked quite well in the game, and I saw it each attack not as a single shot, but as a volley, which would fit in with automatic reloads. So, the reload is less actually reloading than preparation to fire another fusillade.

The three surviving NAU Pz 37 Wespen

As I failed to clearly define in my own mind whether vehicles could take half their core dice value or need to take more than half, this was an error on my part that impacted on the game. Deciding at the point in turn 1 where the NAU blue took 3 hits that it would survive (that hits should exceed half the core dice level) weighed significantly in the NAU’s favour.

The game came in around the three-hour mark, but then I was having to work it out as I went along and write it up, while moving about on the floor instead of a table. Overall, I was very pleased with how this variation on the rules worked. Maybe another test soon. Hopefully on a table…

Having a Blast!

Jeremey takes us through some home made blast markers.

Having recently started repainting my old 6mm Sci-Fi forces my thoughts turned to the different types of blast markers used in various wargames, you know the ones, they are often made of hard translucent plastic in the shape of a flame. Wargamers use them for marking the spot they are calling artillery down on or even to show destroyed and burnt out vehicles.

The first thing I thought of was could I make my own? Having made many things out of EVA foam for my gaming I turned to that first as a very simple material to work with. I knew you could get the foam in thin sheets and in bright colours. As luck would have it I popped into a local Poundland store to pick up some things for a bit of DIY I had to do, and discovered in the crafts section a packet of foam rocket shapes.

The packet had 5 foam rockets shapes for each colour

So I bought a packet at the predictable price, thinking I could make blast markers out of the red and yellow rockets.

Blast marker templates cut from a piece of cardboard

I made myself two flame shaped templates out of cardboard. One smaller than the other and made sure the smaller one fitted inside the silhouette of the larger one.
It was then just a matter of drawing round the templates, trying to fit in as many of the markers as I could. To make 3 blaster markers I would need 3 of the bigger flames in red and 6 of the smaller yellow flames to go on either side.

The first cut out flames, bit short on the yellow bits though

of course at first I completely forgot I’d need twice as many of the smaller yellow flames as the red, which is why there are only 3 of each in the picture!

A smaller blast created during assembly

Rather than waste the foam I experimented with a smaller blast marker cutting out from the red foam using the smaller of the two templates I’d made. I used standard PVA glue to stick the yellow smaller flame to the red foam and then repeated the process for the other side of the marker.

Incoming!

The final (sort of) stage involved me supergluing the marker to a thin wooden base that I had, which I then just painted to blend in a bit better. There we have it, very cheap, simple and quick blast markers for games.

However as you can see from the picture I took it a stage further. I added or rather smudged on some black miniature paint in that way explosions are often depicted. Nice simple effect that stops the blast marker looking too cartoonish. I also turned to the blue foam from the packet and wondered if I could make a splash marker. I don’t often play naval wargames but fellow club members do. I cut out a more splash like shape and as with the black on the blast marker I dabbed white paint on the edges of both the main shape and the smaller splash shapes, and of course I painted the base blue.

Now all I need to do is think up a way of using the green foam from the packet. Hmmm alien weapon blast effect …

Down to the Wire – Zona Alpha Battle Report

John presents us with another Zona Alpha battle report.

A Zona Alfa Solo play battle report, a continuation from The Hostage in bunker c7.
It had all been too good to be true. With half a kilometre travelled the BPM 97 coughed and spluttered it’s last and came to a grinding halt.
‘Where are we?’ Kovacs asked. ‘Strelets’ replied Leila, ‘The fence is just beyond the village’. He picked up a cluster of hotspots in the village and with the zombies in pursuit He needed to think fast.
‘Ice Queen, booby trap the doors, they’ll smell our sweat first’. Cover us whilst we check out the village.’ ‘Leila, grab the wire cutters and stock up on grenades everyone’.
Kovacs headed out first followed by Leila. They’d reached the outskirts of the village as the zombies arrived. Sure enough they triggered the Booby trap and the doors were well and truly blown off.

Four of the zombies are caught in the blast zone. With an ‘armour’ of 6 minus 2 for the grenade blast, they need 4 or less to survive. Two down!

Ice Queen takes aim at the zombies.

Ice Queen aims 3 shots at the zombies but only hits one (needing 7 or less).The Zombie is downed. She has no further actions fortunately, the zombies have activated twice this turn.

Whilst she could, Ice Queen ran around the building to Kovacs and Leila. ‘This will slow us down’ muttered Kovacs as Leila attempted to take out the zombies unsuccessfully. Kovacs lobbed a well aimed grenade in their direction and all three fell dead.

All three zombies are caught in the blast zone and all fail their armour save rolls, needing 4 or less

Picking their way through the village, it was clear that other hotspots would be triggered. ‘Better choose ourselves’ said Kovacs as he tossed a bolt at the building in front triggering the hot spot
‘Holy Cow! Four mechs’ groaned Kovacs.

Between Kovacs and Ice Queen, two mechs are destroyed.

‘Drat!’ shouted Kovacs as one of the mechs aimed at him. Luckily it missed, the second mech fired and wounded Ice Queen before it too was downed.
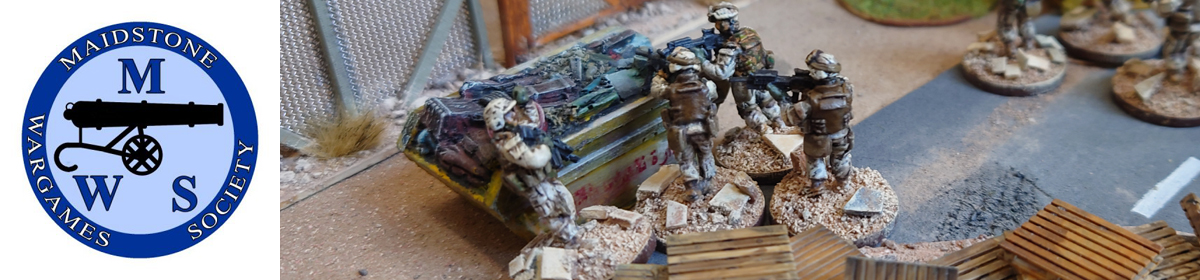
Having disposed of the Mechs and administering a med pack to Ice Queen, Kovacs weaved between the village buildings and clambered onto some farm machinery to get a clear throw for a bolt toss to trigger the hot spot near the fence. It was then that Kovacs noticed the sensors.

A good throw triggered the hot spot, revealing a huge Man eating plant

‘What the …’ ‘Ice Queen, here now!’ shouted Kovacs.

A skilful shot from the sniper rifle takes out the mutant who rolled a 10 needing a 3 or less to survive

‘Leila, run to the fence and cut a hole in the wire – don’t worry about the alarm’ ordered Kovacs. Without a fumble, the bolt cutters easily made a hole in the fence as the alarm started, waking up some Ghouls – tortured irradiated souls who had escaped from the Sanatorium.

Kovacs opens up first and between him and Ice Queen, the ghouls are eliminated

As Kovacs makes a run for the fence, the mayhem roused a group of zombies near the bath house.

Ice Queen was stranded, deserted by her comrades. With the alarms going, there was only one course of action to survive. Her Sniper rifle weighed too much, she had to ditch it to stand a chance and run for the wire before the zombies got to her. At the wire, Kovacs handed her a bottle of Electric Juice . ‘Here take this’. ‘Now run for that Sewage drain to the left’. They made it into the cold damp darkness of the sewage pipe before the first drone came over. ‘You owe me’ howled Ice Queen.
Some people say you can never get rid of the smell.


Fist-Full Of Lead: Galactic Heroes

Marcus takes us through a recent game of Galactic Heroes.

Fist-Full Of Lead: Galactic Heroes
The boys and I have played a few skirmish games of late, and Fist-Full of Lead (FFOL) is a great option for a quick set-up bit of fun. Galactic Heroes is a stand-alone product in the series for space opera style action. It is produced by Wiley Games in the US and available in the UK from Oshiro Models.

A week ago I threw together a scenario which my youngest, Sun Two, and I blundered through (because it wasn’t that well developed, as a spur of the moment thing), but I forgot to take any photos! This week I wrote up a more complete treatment and we decided to give it a go on Saturday.

With some obvious inspiration (hint for those who didn’t grow up with the obligatory Cold War fiction) I pulled out my home made skirmish board with a surface that works for anything from an arid planet to the ocean depths and broke out all the sci-fi scenery (cue aquarium plants and buildings (some home-made from coffee jar tops) and some geodesic shelters from the lovely range by Alternative Armies Ion Age).

FFOL games rely on a deck of playing cards for activation. A player can use their own ordinary deck or use the bespoke ones available. These not only have some appropriate art, but also include on the relevant prompts with benefits that accrue from activating on certain cards. (e.g. +1 to combat (Jacks), heal a wound (Queen of Hearts) or (Sixes) reload). A player is dealt cards for the number of models they control. Then one player calls out the cards in rank order. When that player calls “kings” a player with a king can activate one of their models. If two or more players have kings, activation is completed in suit order. Each activation gives two actions. The models mainly use 1d10 for shooting and close combat, but a wide choice of traits vary the characters. Crews all receive one common “crew” trait (e.g. advanced comms or camo), leaders get three traits plus leadership, a specialist two and a regular one.  The traits provide a lot of character and variation to the crew.

Planetary Research Station Zulu
The war for control of Galactic Space is the coldest war of all. The mighty, technically advanced fleets of both the Rim-Ward Confederation and the Core Union conduct an unceasing ballet of probe and counter probe, patrol and surveillance in the effort to accrue the slightest advantage should the fragile peace fail. Unfortunately, this peace is threatened as a Union stealth probe has crash landed on moon Zulu. Before it crashed it transmitted critical information to a receiver on the planet. But the only occupants of this arid dustbowl are a group of scientists. Communication has been lost and a violent sandstorm rages.

Each side has inserted a team of specialists with instructions to bring back the critical information. Each side needs to contact the remaining civilians and roll successfully to gather information (tokens). After turn five each side has an opportunity once each turn to roll under the number of tokens gathered, which will provide enough evidence to recover the crucial data cache. The side which gets off the board first secures the vital data. However, where there are secrets there are spies! It is unclear how either side came to infiltrate agents into the expedition, but needless to say they did. No-one knows the identity of the spies. When questioning civilians, on a 9+ the subject is a proves to be a spy and attacks the team. The spy is then controlled by the other side, which is dealt an extra card next turn for the additional character. If an opponent’s spy is killed, deduct 2 from their intel total.

There were also some random events in the scenario, including weather changes (the game started with a lull in the storm), buildings blowing up and the dreaded sandsharks…

Finally, I controlled the Core (entering from the left in the layout picture). Sun Two the RimFed.

Turn 1
The game started with a brief lull in the storm. Both teams approached the research station from opposite sides, failing to make any contacts during this turn.

Turn 2
The first random event produced…nothing! No-one was wounded, so despite a sandshark roll, none appeared on the board. The Core Sniper having advanced toward a civilian was, ironically, picked off from a hill to the south east by a RimFed sniper. Out of action immediately! Snarot (a snake-parrot hybrid) struck back with a shot similarly wounding RimFeds Catman.

Turn 3
The weather closed back in with visibility cut to 12” and short range up to 6”.   A RimFed trooper interrogated a mechanic (Picture 3), gaining 2 info. with a roll of 7.

The Core leader, Sharon (looks a little bit like an ‘80’s Sharon stone-every collection should have one!), approached a venerable orange robot to interrogate it, but on a roll of 9 it turns out to be a deadly spy, rolling an 8 to wound. Sharon however is “Lucky”, so forces a re-roll…9! Sharon is not so lucky after all and out of action for the game.  Core forces have already lost two figures and have no information. RimFed’s Silva Slither (metallic sheathed worm) encounters another civilian and rolls for information, only to uncover another spy. The spy shoots but misses. By co-incidence both spies roll the trait “sixth sense” from my short “spy” list. They can re-roll one shot each turn (but the Core spy overlooked this at the time)

As the turn closed, Snarot tried to finish off the orange spy with a couple of shots, but missed. The Core’s own red worm (red and silver worms have a deep-seated enmity!), Slippery, again tries to shoot the orange robot, causing severe damage (a wound) and shock. For the Core, Spartan closed with Silva and engaged in close combat alongside the Core spy in support, wounding the metallic nematode.

Turn 4
Surely things would improve now for the Core? The random event indicated two information points in a random building. It turns out they are almost immediately adjacent to RimFed’s Antman. He not only collects these but encountering a civilian in the building, also gets another token from him! Slippery tries to finish off the robot, but fails. The RimFed uses a Queen of Spades to activate the robot, shaking the shock off but failing to return to action from the wound (You can attempt to recover; stand up and function after a wound. However, you need a medic to attempt to heal/get rid of it).  Snarot again fails to finish it off.

Snarot and Slippery finally finish off downed robot

Elsewhere, the Core spy shoots RimFeds Kanga, putting him out of action. RimFeds Hawk tries to get more information out of a yellow robot to no effect. Silva overcomes his wound, and while he remains injured, manages to stand. Antman, sensing the tide of the game is flowing substantially in favour of the RimFed, moves toward their edge of the board.

Turn 5
Visibility clears again. With a staggering 9 intel., the RimFed roll a 6, meaning that they have enough information to recover the secret data package. While slippery finishes off the orange robot spy costing the RimFed two intel., it is too little too late from the Core forces. As the RimFeds forces pull back they callously leave two of their team and their brokenspy behind. Snarot and Spartan try some long range sniping at the retreating forces to no effect. Hawk, Antman and an injured Silva (who makes a sliding equivalent of a limp) make it off the board for a substantial, if brutally efficient win, even while the Core spy puts Catman out of action.

A very bad result for the Core. No intel gathered and their leader out of action. The fact they knocked out the enemy spy and two combatants is cold comfort in this cold war. And no sandsharks. Again. Very disappointing.

RimFed robot spy and Union leads down. Slippery and Snarot survey the scene.

FFOL provides a very quick, interesting, narrative game with very little effort. It took no more than 90 minutes, if that. I am thinking seriously about a future campaign in a post-apocalyptic setting using FFOL – Wasteland Warriors and a road race element. This would allow a series of micro-games in a campaign where a number could be played in a day at the club.

One day…