Following on from the post I wrote about painting the 15mm Brits in two-colour camouflage, I’ve been asked to do the same for the Germans in their three-colour ambush-style scheme.
Whereas the blutack masked scheme can be achieved with spray cans, this one does require an airbrush – you just can’t get the same level of control or accuracy with a spray can.
So here we go, a dozen (or so) steps to a three-colour camo’ scheme. Before I start, please excuse some of the photography – it was done over several days in varying weather and lighting conditions on a phone camera, so consistency in the photos wasn’t easy to achieve.
The first stage, after washing and drying the parts to remove any residue, is of course to assemble the models with superglue (I use a gel glue bought in packs of ten tiny tubes from the pound store).

Next is the primer stage. Nowadays I use a slightly more expensive primer than I used to, it’s important to get good adhesion and provide a base for the acrylic colours. I use car primer from Halfords in either grey or white – in this case grey.

I use Tamiya colours for my Germans – Buff for the basecoat, then Nato Green and Nato Brown. I thin the Tamiya colours slightly, not a lot, adding about 10% Tamiya thinner.

Then the two colours are airbrushed on – I do this freehand, without any masking. This gives a very soft edge to the camouflage areas.


After this has thoroughly dried, I drybrush the whole model in Citadel Tyrant Skull. This is one of the new Citadel ‘Dry’ paints, which have the consistency of soft putty and are great for drybrushing (although murder on your paint brushes). It’s effectively the same colour as the old Bleached Bone pot, so if you don’t like the dry paints then that makes a good alternative.

Then the skirts are brush painted Tamiya Dark Grey, which is then drybrushed in Codex Grey (because the only grey paint in the ‘Dry’ range is too light for this).


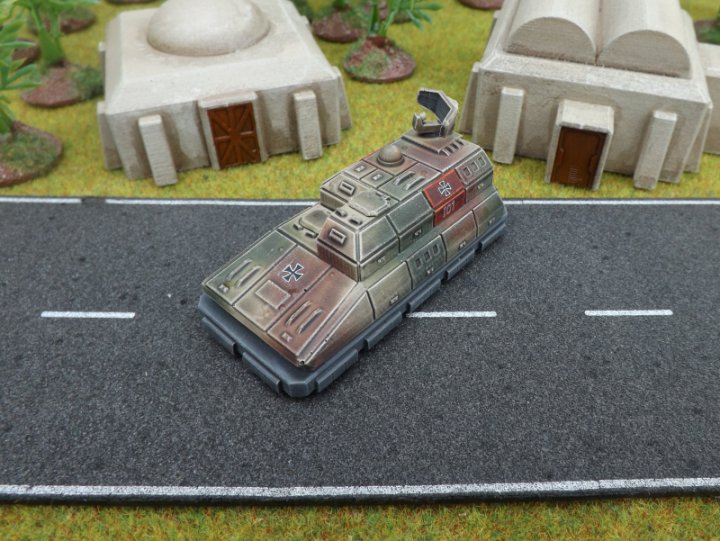
I like to add coloured panels to some of my Germans as a base for markings and tac numbers – in the case of the command vehicle, two panels either side were painted in a dark red, made from mixing Tamiya Flat Red and Red Brown.

The panel edges were highlighted in Citadel Blood Red and then (more lightly) in a very old pot of Blazing Orange.

That’s it for the main painting stages. Next is the Army Painter Strong Tone dip, which I’ve mentioned in the past. This is brushed on, making sure it gets in every crack and crevice. This is the ‘oh my god, what have I done ?’ stage, since it doesn’t look good at this point …

Give it 24 hours to dry (unless it’s a really hot day, I once left some models in the sun and they were done in 3-4 hours – and the metal bits were too hot to touch !). A tip is to put some sort of cover over them – the dip is very sticky and seems to attract dust, grass, small insects etc – and once it starts to go off, you won’t get any foreign objects out of it without marring the finish. So I put an old plastic tub over them to keep off the worst of the bits floating around.

Once it’s dry (same time next day), it’s time for decals. The AP dip is a good surface for decals, being nice and shiny, so I gave it some old-style Maltese crosses and numbers from the excellent Dom’s Decals range. The crosses are 1/300th aircraft markings, the numbers are 10mm vehicle numbers.

Make sure the decals are dry, then the last stage is to give them a quick blow over with Tamiya Flat Clear varnish (airbrushed again), which makes the whole model look completely different.


And that’s it – I hope a few of you find this useful.
You must be logged in to post a comment.