
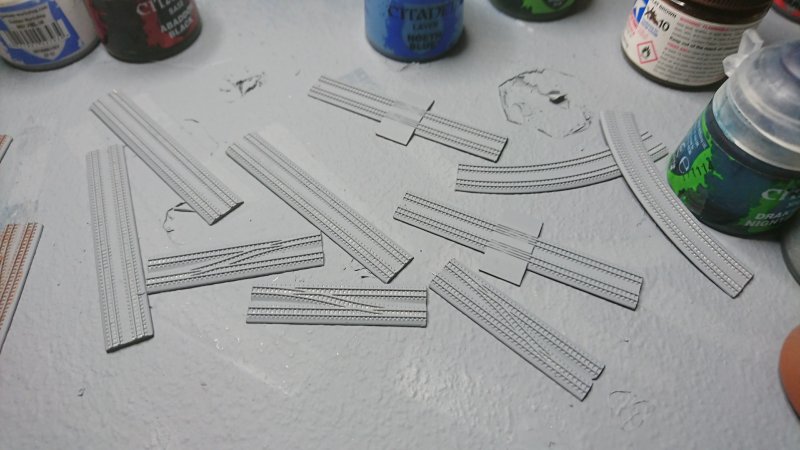
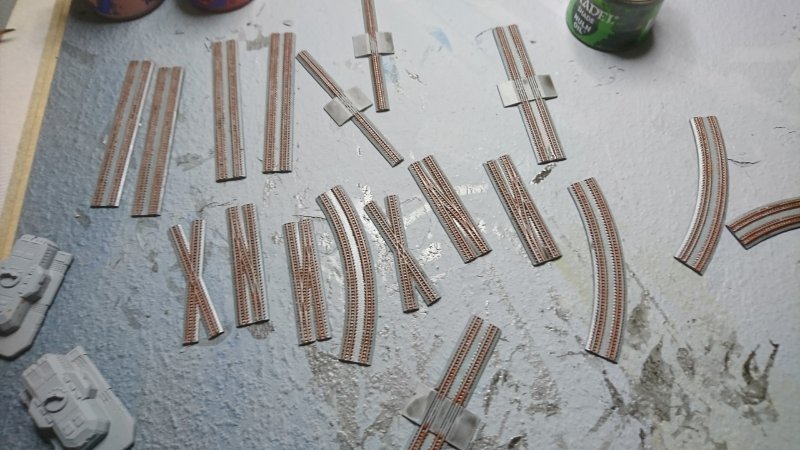
With the recent release of our new Small Scale Scenery engine sheds and track, I thought it might be a good time to quickly run through my painting method for the track. When I first got hold of prototypes of our original track to paint, I looked at all the little tiny sleepers and thought “how on earth am I going to paint those – it’ll take forever”. Well, fear not…
Step 1 – Primer
After a quick cleanup, removing any extraneous bits of sprue and running a file round the edges, I gave the track a coat of Halfords’ grey car primer. This is my favourite primer for all models – it sticks to any surface and gives a good matt base for painting over.
Step 2 – Sleepers
If you’re in North America, read ‘crosstie’ when I say sleeper, it’s the same thing. I gave the sleepers a good drybrush with GW Bestial Brown (use your favourite brown if you don’t like/use Citadel paints) – use a small brush to do this as you want to avoid too much paint getting everywhere. You will inevitably get some brown around the track but don’t worry too much, we’ll clean it up in a minute. You want a relatively heavy drybrush coat (if that isn’t a contradiction) so that the whole of the sleeper surface is painted, not just the edges. As you can see, it’s all looking a bit messy…
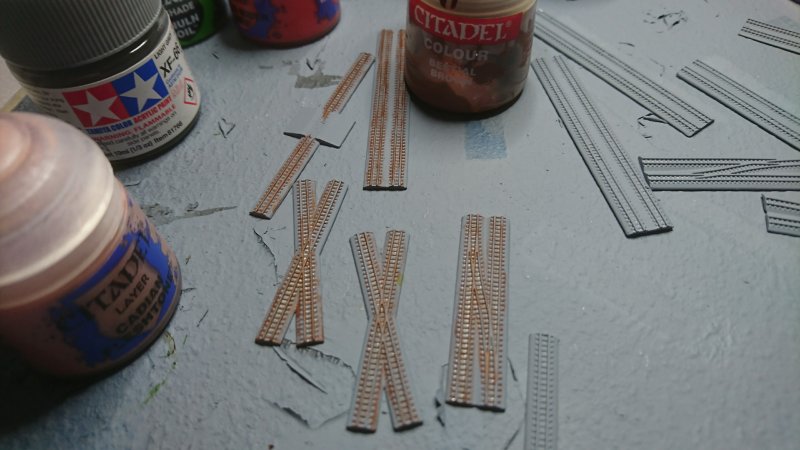
Step 3 – Cleanup
I then went round and tidied up any overspill from the drybrush with grey paint (Tamiya XF-66 Light Grey is a good match for Halfords primer). Assuming you haven’t been too liberal with the brown and got it between the sleepers, you should find it reasonably quick and easy. Don’t worry about any brown on the rails themselves – any on the top surface will be coming off later, and any on the side looks like rust, which is a major colour as far as railway track goes. You might notice that I forgot to do the tops of the road crossings in one or two places – I had to clean this up this later.
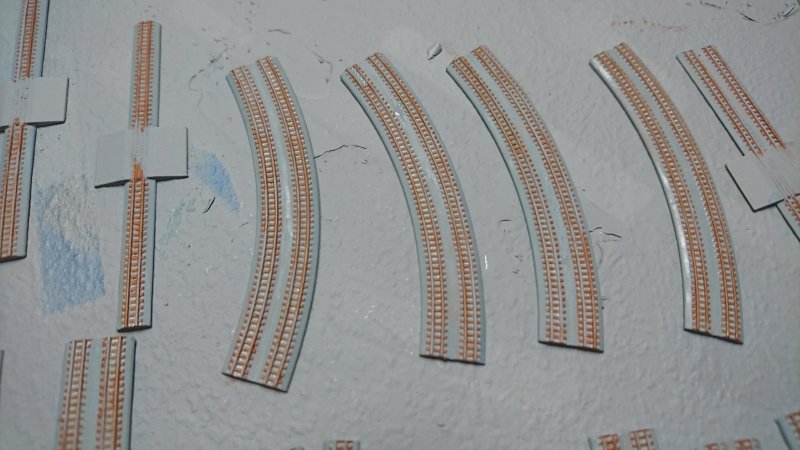
Step 4 – Wash
Everything was then give a good coat of Citadel Nuln Oil black wash (Army Painter Dark Tone or Tamiya Smoke would work just as well). This takes longer than you might think – you tend to get little bubbles between the sleepers so you might need to use a stiffer brush to work the wash into these areas.
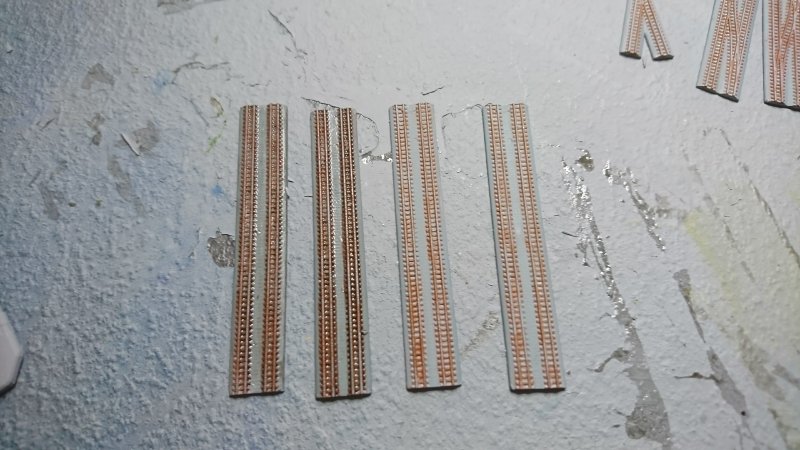
Step 5 – Rails
On our first set of tracks I used a silver paint pen and ran this over the top surface of the rails. This worked OK but I did get some overspill onto the sleepers especially around the points. You could use a small detail brush and silver paint, although I suspect it would be time-consuming. My solution this time was to make use of the natural colour of the metal. On the first piece of track I used a piece of wet-and-dry to remove the paint from the top of the rails – this took longer than I thought, and I managed to remove the paint from some of the sleepers as well. So for the next piece I simply ran a scalpel blade along the rails and scraped the paint off – perfect ! It was more accurate, quicker and cleaner. Look at those rails shine !
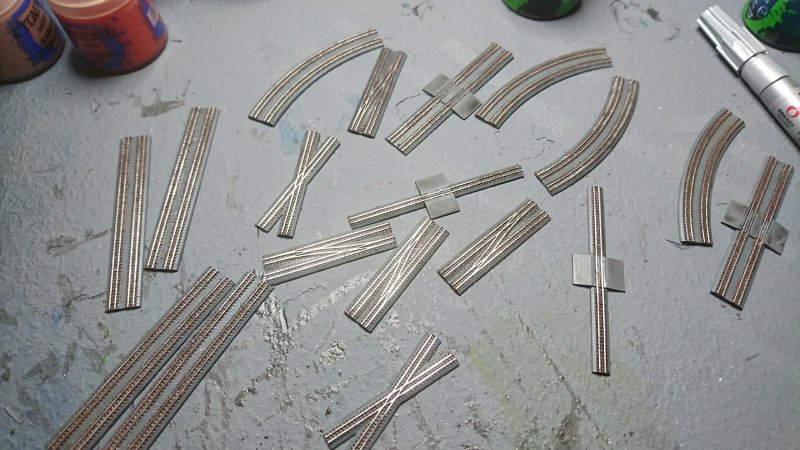
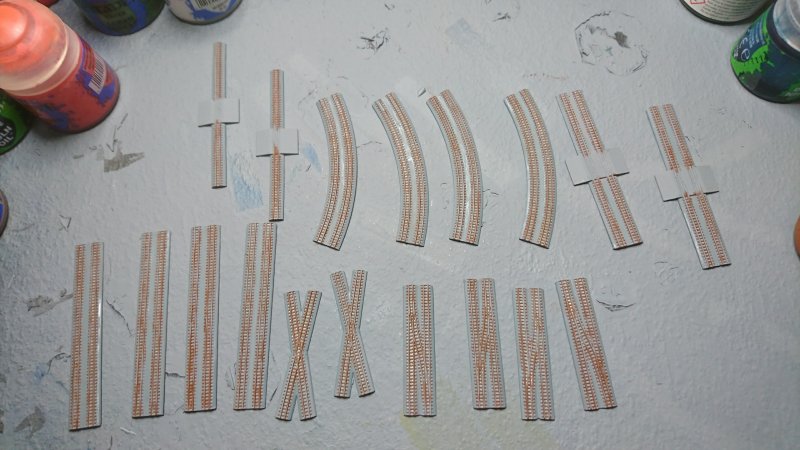
I painted almost two dozen pieces of track in an hour or so, so it’s a pretty quick method of producing reasonably good looking track.
You must be logged in to post a comment.