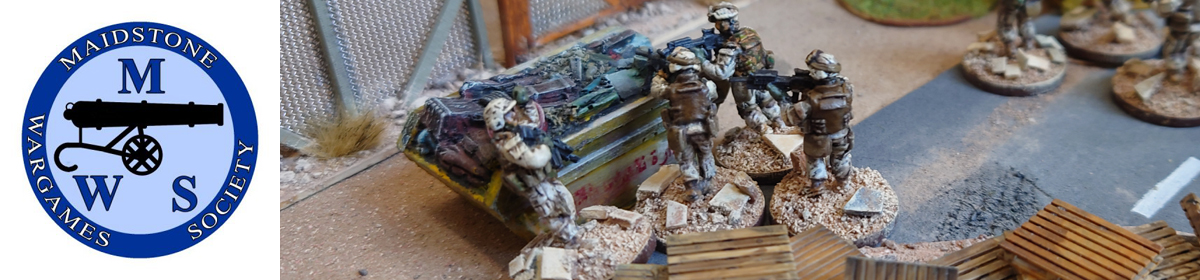

Stephen reports on a solo game of Outremer.
It had been a while since I’d had a game of Outremer, so I decided it was time for a quick bash.
Although the rules are set during the Crusades they also work as a generic set of medieval skirmish rules. So my games are set during the Barons’ War of the 1250s and 1260s.
I played the hostage scenario in the rules. Young master Perkin Adlington had been kidnapped by the dastardly knight, Sir Giles of Gretchley. No doubt taking advantage of the upheavel during the rebellion and hoping to make some money off the ransom.
Sir Richard Adlington, with his closest bondsmen, set off in pursuit to rescue the young lad. After two days in the saddle, following trails and clues, they finally found Sir Giles and his men. Dismounting, they made their way on foot through the woods to snatch Perkin and take him back home to safety…
The table was only a small one – 2’x3’. The two opposing sides had six men each.
With Sir Richard Adlington was his household knight, Sir Gieffroy de Metz plus Jarrard and Remon la Vielle (a pair of crossbowmen, and Will Fuller and Wilf the Strong, sergeants at arms.
With Sir Giles were Berwick, Ailwin Smith, Keaton Taylor, Pasquier l’Espee, and Burne Brewster.
The table was set up with woods and a couple of hills. On one side of the table was Sir Giles’ camp where Perkin was being held. Under the rules of the scenario, the hostage can not take an action all the time there is a guard within 4”. So Keaton Taylor was detailed with keeping an eye on Perkin. The two crossbowmen, Pasquier and Burne, took up sentry positions on the hills over-looking the approach. This left Sir Giles with Ailwin and Berwick to relax in camp.
Sir Richard led Jarrard and Will Fuller from one corner, and Sir Gieffroy led Remon and Wilf from the other – so they could make a two-pronged approach.

The game started. Turns take place with a pack of cards. Each character has a card in the deck, these are shuffled, and one card is drawn at a time. When a character’s card is drawn that character completes all its actions and the next card is drawn.
Sir Giles took his men through the woods, to stay in cover. And Sir Gieffroy did the same. Pasquier and Burne, armed with crossbows and away from the camp and away from the boss, sat in the bushes enjoying a bit of peace and quiet.

Jarrard skirted around the sides of the woods, hoping to sneak up on Burne He took his time, ensuring he stayed hidden for as long as possible. Then he loaded his crossbow, levelled it at his target, and let fly.
He missed.
This made Burne jump and sound the alarm. Roused, Sir Giles and Ailwin made their way over to Burne. Berwick moved toward Pasquier, in case there were others about. Perkin soon perked up as well, but Keaton kept a firm hold of his charge.

Sir Giles and Ailwin picked up pace and made their way over to Burne as fast as they could. Burne loaded his crossbow and took aim at Jarrard, to return the favour. Except this time Burne hit, and Jarrard went down with a bolt sticking out of his chest. This meant that Sir Richard and Will would have to charge in quickly or else be subject to sniping shots from Burne’s crossbow.

Over on the other side Remon had now moved up into a good position where he could see Pasquier on top of the rise behind the bushes. He let a quick shot out that hit its target but did no damage – Pasquier’s armour saved his skin. Taking good hold of his gigantic sword, Berwick stood alongside Pasquier to see what was out there.
Sir Richard and Will strode forward to push the attack against Burne. As they approached, Burne ducked down behind the bushes trying to reload as quick as he could. But as they advanced all of a sudden Sir Giles and Ailwin Smith came out of the woods in front of them. Sir Richard smiled at his luck and both he and Will charged the two abductors!

Over on the other side Wilf decided to take matters into his own hands and charged up the slope to cut down Pasquier. But Berwick stepped forward with his two-handed sword, engaged Wilf, and with a single wild swing cut down the loyal retainer!
An epic fight began between Sir Richard and Sir Giles, and Will Fuller and Ailwin Smith. Sir Richard got in an early lucky blow against Sir Giles and wounded him badly. But Ailwin was equally lucky, and got in a deadly blow against Will. Ailwin, the coward, then came to Sir Giles’ aid and the two of them attacked Sir Richard.

A similar state of affairs was taking place over on the other side. Remon began rapidly loading and shooting his crossbow at Pasquier, and Pasquier did similarly against Remon. Whilst Sir Gieffroy, an experienced knight who had seen many combats, was not so easily intimidated by Berwick mighty sword, and he advanced against Berwick meaning to kill him or chase him off!

Back with Sir Richard and things were looking dicey. With both Sir Giles and Ailwin setting about him he was taking injuries and being pushed back into the woods. Then realising that his days may soon be numbered, Sir Richard broke off and made a run for it – fleeing the field! Later, back home, he would say that he was merely making his way around to support Sir Gieffroy and Remon. We can only take this man of honour at his word.

Fate was going the other way back with Sir Gieffroy. Remon’s crossbow took down Pasquier, badly wounded, but out of the fight. Sir Gieffroy took a slight wound from Berwick, but in the end this goodly knight prevailed and down went Berwick. The way now lay open into Sir Giles’ camp and the rescue of master Perkin!
Burne Brewster had pulled back into the camp whilst Sir Giles and Ailwin chased Sir Richard. Sir Gieffroy advanced as quickly as he could, trying to lure Keaton forward to Perkin could break free and make a run for it. Remon moved up behind a bush, took careful aim, and let fly at Keaton.

A miss! But Keaton was rattled. Forward came Sir Gieffroy, and he gave Keaton the chase to yield or die. Keaton could see both Sir Giles and Ailwin making their way back, so under the eye of his lord, and hoping for some support, he gave no ground and engaged Sir Gieffroy in melee.
More fool him, because Keaton soon fell beneath the knight’s blows.

Perkin Adlington was now free and under the protection of Sir Gieffroy! All they had to do was get away. But both Sir Giles and Ailwin were not far away. They soon intercepted Sir Gieffroy and, cowardly once again, Ailwin Smith joined Sir Giles in attacking Sir Gieffroy!

For a while it looked like Sir Giles may get away with it. He was pushing the two of them back. But eventually numbers would tell. Sir Gieffroy found himself under a terrible rain of blows. It got so bad that all of a sudden…he decided to flee!
Poor master Perkin! Let’s hope the lad doesn’t grow up with abandonment syndrome.
That was the end. It had been close. They so nearly got away with Perkin. But the wicked Sir Giles and his men prevailed – Perkin Adlington would stay under his guard and doubtless Sir Richard would be expected to pay a higher ransom to make up for the losses.


You must be logged in to post a comment.