
Tony F reports on one of the two mega-games that the club put on at the August bank holiday weekend meeting.
Last weekend the club ran an extended meeting – nine hours of gaming, from 10am to 7pm. To take advantage of this there were two extra large games – a Napoleonic 15mm game set in the days just before Waterloo, and a nine-player Hammer’s Slammers clash. A report on the former will be with us soon, and here’s a brief-ish rundown of events in the latter game.
This game took place on a 15 foot long table covering a border zone between the territories of the Stewarts and the Hirosekis on the planet of Kalan (mentioned briefly in the essay Backdrop to Chaos in volume one of The Complete Hammer’s Slammers). Each of the nine players commanded a combat detachment, and each side also had an air defence detachment as a shared asset.

The Hirosekis fielded three detachments (one each of Heavy Mechanised, Planetary Warfare and Mechanised Infantry) stiffened by two Lightning Division detachments (Armoured and Infantry), with air defence provided by a Foster’s Mercenaries calliope detachment. The Stewarts’ first line of defence was provided by a detachment of Stewart Borderers – this is a unit I made up specifically for the game, comprising mostly infantry with some anti-tank guns and fixed defences. They’re very much unofficial, the detachment sheet has no points values, but feel free to use them in your own games if you wish. The defenders also had two Stewart Highland detachments and a supporting Harris Commando Armoured detachment, all in off-table barracks – these came on 1dAv turns after the first shot was fired. Air defence came from a troop of United Defence Calliopes (and boy, did they earn their fee…).
The clash would provide an interesting comparison between the Hirosekis, a Commissar force with average quality troops but commanded by officers with high leadership ratings, and the fanatic Stewart Highlanders who were rated as elite, but whose officers left much to be desired. In game terms this meant that the Hirosekis had lots of leadership points with which to order their troops around, but the troops in action couldn’t hit a barn door (from inside the barn…). On the other hand, the Stewarts were excellent quality troops but the poor leadership values of their officers meant surrendering the initiative and having very few leadership points – it took a long time to get the Highland Detachments into position once they entered the table.

The objective was a TV transitter aerial, which the Hirosekis needed in order to broadcast propaganda to the Scots. The Stewarts had been told that they needed to hold on as long as possible so that reinforcements who were currently on the way could reach the battlefield.
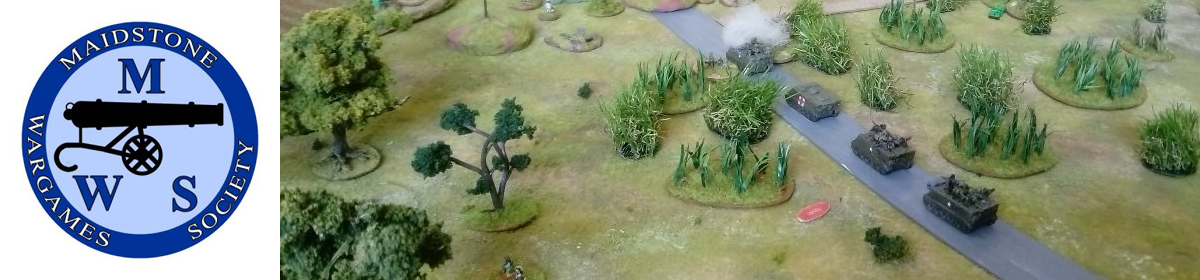
The battle raged for almost seven hours – the Hirosekis opened proceedings by advancing their heavy armour down their right flank with the Lightning Division’s heavy blowers charging down the main arterial road, accompanied by mortars and MLRS. The Borderers, a territorial unit, clung on desperately as the Japanese advanced with their anti-tank guns having little impact. Their morale rose when the first of the Highland detachments came on table, as the Hirosekis finally had someone else to shoot at !
As mentioned, it took a long time for the Highlanders to get into position because of a dire shortage of leadership points. Once their tanks and anti-tank guns managed to deploy they started to chip away at the Hiroseki and Lightning Division heavies which had begun to advance at speed (the Lightning Division blowers performing a rarely-seen Thunder Run manouevre down the main road). But the Stewarts only had four tanks between them, and once they started to be knocked out they were reliant on the towed anti-tank guns, which had to be deployed in the open to counter the Soheis. The two APC mounted heavy mortars were very handy, one of them knocking out three enemy tanks on its own.


The much-awaited reinforcements that the Scots were clinging on for finally appeared – but in the rear of the Hirosekis ! Colonel Clark, commander of Clark’s Commandos, had on his own initiative diverted his landing shuttle to an open plain behind the Hiroseki forces and sent a high-speed detachment straight into the Japanese soft underbelly. The force of light armoured cars tore into the mix of artillery, command and air defence vehicles, routing Foster’s unit almost immediately and destroying virtually all of the Hiroseki artillery. The Japanese recovered their poise quickly however, and Clark’s Commandos pretty much disappeared in hail of powerguns and lasers.
Refusing to be distracted by the clamour behind them, the remaining Hiroseki tanks made a desperate dash for the transmitter mast; one Sohei and a Shaman got there, only to be mauled by a fusilade from the remaining Stewart anti-tank guns. The Lightning Division blowers charged down the road and attempted to reach the mast that way. The leading tank was knocked out, but the following vehicle pushed it aside and the defenders had simply run out of ways to stop it.


After seven hours hard fighting, we gave the Hirosekis a minor victory for reaching the mast; more than half of their heavy tanks had gone, including that of their CO, Major Tredaiwa. The Lightning Division tanks had also taken a battering, while Foster’s Mercenaries had disappeared altogether. On the other side of the table, only one of the Stewart detachments was in any sort of shape; the other Highland detachment and the Borderers were one TU away from breaking, and the Harris Commando unit had lost most of their infantry.
We’d like to thank John Treadaway, Kevin Dallimore and Peter Merritt of the South London Warlords for coming down and helping us put the game on – John provided the Hirosekis, one of the Stewart detachments and Clark’s Commandos plus a fair chunk of the scenery. The rest of the forces and scenery were painted by me. All of the figures and vehicles are from Brigade Models apart from Clark’s Commandos, which are from Darkest Star.
Photos by Andy King, John Treadaway and me.
You must be logged in to post a comment.