First up for this week we have a wonderful Quar Tank from Phil. I always liked the look of the Quar. Too late now of course I have far too many projects on the go.
Stephen has been busy finishing up the Sci-Fi figures he’s been working on.
Here we have We have Acton Ianov (a young tech scavenger) and Tiran Jones (a smuggler and pirate)Also a couple of sci fi objective markers…And lastly is Bryn ap Iowerth, the court bard of Owain of Bangor…
And finally for this week, I’ve finished my Medieval houses. I made 13 in total, more than enough to represent a small hamlet.
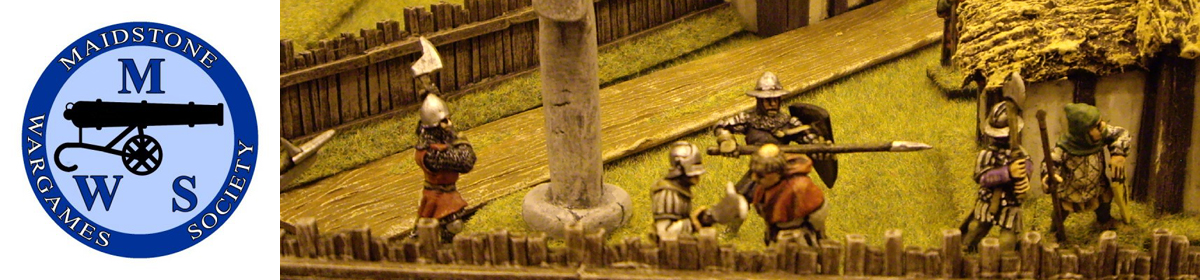
Forces move through the local town on a recruitment drive.
Keep on modelling the end of lockdown is in sight …
Marcus takes us through a recent game of Galactic Heroes.
Fist-Full Of Lead: Galactic Heroes
The boys and I have played a few skirmish games of late, and Fist-Full of Lead (FFOL) is a great option for a quick set-up bit of fun. Galactic Heroes is a stand-alone product in the series for space opera style action. It is produced by Wiley Games in the US and available in the UK from Oshiro Models.
A week ago I threw together a scenario which my youngest, Sun Two, and I blundered through (because it wasn’t that well developed, as a spur of the moment thing), but I forgot to take any photos! This week I wrote up a more complete treatment and we decided to give it a go on Saturday.
With some obvious inspiration (hint for those who didn’t grow up with the obligatory Cold War fiction) I pulled out my home made skirmish board with a surface that works for anything from an arid planet to the ocean depths and broke out all the sci-fi scenery (cue aquarium plants and buildings (some home-made from coffee jar tops) and some geodesic shelters from the lovely range by Alternative Armies Ion Age).
FFOL games rely on a deck of playing cards for activation. A player can use their own ordinary deck or use the bespoke ones available. These not only have some appropriate art, but also include on the relevant prompts with benefits that accrue from activating on certain cards. (e.g. +1 to combat (Jacks), heal a wound (Queen of Hearts) or (Sixes) reload). A player is dealt cards for the number of models they control. Then one player calls out the cards in rank order. When that player calls “kings” a player with a king can activate one of their models. If two or more players have kings, activation is completed in suit order. Each activation gives two actions. The models mainly use 1d10 for shooting and close combat, but a wide choice of traits vary the characters. Crews all receive one common “crew” trait (e.g. advanced comms or camo), leaders get three traits plus leadership, a specialist two and a regular one. The traits provide a lot of character and variation to the crew.
Planetary Research Station Zulu The war for control of Galactic Space is the coldest war of all. The mighty, technically advanced fleets of both the Rim-Ward Confederation and the Core Union conduct an unceasing ballet of probe and counter probe, patrol and surveillance in the effort to accrue the slightest advantage should the fragile peace fail. Unfortunately, this peace is threatened as a Union stealth probe has crash landed on moon Zulu. Before it crashed it transmitted critical information to a receiver on the planet. But the only occupants of this arid dustbowl are a group of scientists. Communication has been lost and a violent sandstorm rages.
Each side has inserted a team of specialists with instructions to bring back the critical information. Each side needs to contact the remaining civilians and roll successfully to gather information (tokens). After turn five each side has an opportunity once each turn to roll under the number of tokens gathered, which will provide enough evidence to recover the crucial data cache. The side which gets off the board first secures the vital data. However, where there are secrets there are spies! It is unclear how either side came to infiltrate agents into the expedition, but needless to say they did. No-one knows the identity of the spies. When questioning civilians, on a 9+ the subject is a proves to be a spy and attacks the team. The spy is then controlled by the other side, which is dealt an extra card next turn for the additional character. If an opponent’s spy is killed, deduct 2 from their intel total.
There were also some random events in the scenario, including weather changes (the game started with a lull in the storm), buildings blowing up and the dreaded sandsharks…
Finally, I controlled the Core (entering from the left in the layout picture). Sun Two the RimFed.
Turn 1 The game started with a brief lull in the storm. Both teams approached the research station from opposite sides, failing to make any contacts during this turn.
Turn 2 The first random event produced…nothing! No-one was wounded, so despite a sandshark roll, none appeared on the board. The Core Sniper having advanced toward a civilian was, ironically, picked off from a hill to the south east by a RimFed sniper. Out of action immediately! Snarot (a snake-parrot hybrid) struck back with a shot similarly wounding RimFeds Catman.
Turn 3 The weather closed back in with visibility cut to 12” and short range up to 6”. A RimFed trooper interrogated a mechanic (Picture 3), gaining 2 info. with a roll of 7.
The Core leader, Sharon (looks a little bit like an ‘80’s Sharon stone-every collection should have one!), approached a venerable orange robot to interrogate it, but on a roll of 9 it turns out to be a deadly spy, rolling an 8 to wound. Sharon however is “Lucky”, so forces a re-roll…9! Sharon is not so lucky after all and out of action for the game. Core forces have already lost two figures and have no information. RimFed’s Silva Slither (metallic sheathed worm) encounters another civilian and rolls for information, only to uncover another spy. The spy shoots but misses. By co-incidence both spies roll the trait “sixth sense” from my short “spy” list. They can re-roll one shot each turn (but the Core spy overlooked this at the time)
As the turn closed, Snarot tried to finish off the orange spy with a couple of shots, but missed. The Core’s own red worm (red and silver worms have a deep-seated enmity!), Slippery, again tries to shoot the orange robot, causing severe damage (a wound) and shock. For the Core, Spartan closed with Silva and engaged in close combat alongside the Core spy in support, wounding the metallic nematode.
Turn 4 Surely things would improve now for the Core? The random event indicated two information points in a random building. It turns out they are almost immediately adjacent to RimFed’s Antman. He not only collects these but encountering a civilian in the building, also gets another token from him! Slippery tries to finish off the robot, but fails. The RimFed uses a Queen of Spades to activate the robot, shaking the shock off but failing to return to action from the wound (You can attempt to recover; stand up and function after a wound. However, you need a medic to attempt to heal/get rid of it). Snarot again fails to finish it off.
Snarot and Slippery finally finish off downed robot
Elsewhere, the Core spy shoots RimFeds Kanga, putting him out of action. RimFeds Hawk tries to get more information out of a yellow robot to no effect. Silva overcomes his wound, and while he remains injured, manages to stand. Antman, sensing the tide of the game is flowing substantially in favour of the RimFed, moves toward their edge of the board.
Turn 5 Visibility clears again. With a staggering 9 intel., the RimFed roll a 6, meaning that they have enough information to recover the secret data package. While slippery finishes off the orange robot spy costing the RimFed two intel., it is too little too late from the Core forces. As the RimFeds forces pull back they callously leave two of their team and their brokenspy behind. Snarot and Spartan try some long range sniping at the retreating forces to no effect. Hawk, Antman and an injured Silva (who makes a sliding equivalent of a limp) make it off the board for a substantial, if brutally efficient win, even while the Core spy puts Catman out of action.
A very bad result for the Core. No intel gathered and their leader out of action. The fact they knocked out the enemy spy and two combatants is cold comfort in this cold war. And no sandsharks. Again. Very disappointing.
RimFed robot spy and Union leads down. Slippery and Snarot survey the scene.
FFOL provides a very quick, interesting, narrative game with very little effort. It took no more than 90 minutes, if that. I am thinking seriously about a future campaign in a post-apocalyptic setting using FFOL – Wasteland Warriors and a road race element. This would allow a series of micro-games in a campaign where a number could be played in a day at the club.
Welcome to another Work in Progress Wednesday. We start with some English Civil War miniatures from club member Kimber. The image above is of the Royalist Commanders, below we have a Parliamentary unit.
Parliamentary unit with artillery
Next up Stephen has been adding more characters for both Sci-fi and fantasy.
Sirrek Kim (a scavenger from Magura IV) and Devo Whipitt (a corporate hit man). And another member of the College of Mages for a Dragon Rampant army, Maxander Lindstern.
Because I ask about this last week Andy has provided evidence of the various baggage terrain pieces he did fitting into his Ox cart.
But that’s not all Andy has been working on. Here he has started painting a kit of an Eagle from Space 1999.
1970’s Aifix model kit finally gets built
And finally (again) I’ve built even more 15mm medieval buildings for my Wars of the Roses battles.
Foam medieval houses
I’m currently engaged in a discussion with club members over the colour of plaster for buildings in the medieval period.
John puts the 3D printed galleys supplied by fellow club member Colin into battle. This is a solo battle report using the Galleys and Galleons rules.
Introduction.
Rum Baba, an infamous Barbary pirate had been driven eastwards by the Christian warships but was still a thorn in the side of Venice. It was decided to despatch one of the newly built Galleass to their base at Chania in Crete to rid the Mediterranean of this menace for ever. En route, the Galleass and it’s escort were ambushed by Rum Baba and his pirate crews.
The Opposing Squadrons (details in Appendix)
The Venetian Squadron comprised the Lanterna Flagship commanded by Linguine, the new Galleass and a small Galliot to act as scout and draw the attention of the Ottomans. The Ottomans comprised Rum Baba in the Lanterna and three swift but lightly armed Galliots.
The Ambushing Ottomans lie in wait
Move 1
The Ottomans win the initiative roll and will move first each move. At the start of each move every vessel has to roll up to three D6 and roll equal or above its Q value to gain a successful action
This Galliot has a Q value of 2 so gets 3 actions, two of which it can use for movement. The double 3 denotes a change in wind direction one point anticlockwise. This does not affect the Galliots but may affect the Galleass which is propelled by sail.
The Galliots rush towards the Venetian Galliot intent on its destruction. Meanwhile, the Venetians move up cautiously and the Galleass takes in sail to maintain formation.
Position after move 1 from the Venetian side. They approach cautiously hoping to get a close range shot in before boarding actions begin.
The Ottomans move up and use their final action to open fire at long range. One point of damage is inflicted on the Venetian Galliot from this fusillade.
These two Galliots have a base combat factor of 2. The range is Medium so no firing factors are added. If the target is doubled by the modified dice roll a point of damage is inflicted and the target then has to roll on the Critical Damage table. If the attackers roll is even, it causes one point of damage with no roll on the Critical Damage table.
The Venetians move into close range and fire back
In addition to it’s broadside the Galleass is equipped with Chaser Guns which have a combat value of 1. All firing vessels get a plus 1 for close range. BOOM!The Galleass rolls a 6. This is a critical hit and the Galliot has to roll on the Critical Hit table and sustains another point of damage. It’s hit again later in the move and now has 3 damage points, one more and it will strike. Ouch!The Ottomans strike back. The Lanterna causes a point of damage to the Venetian Galliot which closes with the Ottoman Galliot and takes another point of damage so 3 points of damage each!As the melee rages, the Galleass makes good it’s escape
Two Galliots and the Ottoman Lanterna close in on the outnumbered Venetian flagship and the two Galliots who have locked in combat fight to a standstill. The Galliots have the Derring Do special rule and attack with reckless ferocity. In the first round, all base combats are reduced to zero.
Here with base combat values at zero, the Lanterna is up against. Here it loses the combat but has the Veteran NCO special rule which gives a +1 bonus when losing by one or the adjusted roll is tied. Both vessels take a point of damage as the adjusted rolls are now tied.With the Venetian Flagship on 3 damage points, the Ottoman Lanterna moves in to deliver the Coup de Grace and Linguine Strikes his colours
With the Venetian Flagship on 3 damage points, the Ottoman Lanterna moves in to deliver the Coup de Grace and Linguine Strikes his colours
With the Galleass now a dot on the horizon, Rum Baba takes Linguine’s surrender and collects his prizes. He hoped for a profitable ransom for Linguine and whilst He would sleep well tonight in the company of concubines, that Galleass worried him. His captains had been reckless, they would need to be more savvy next time.
Appendix – Data sheets for vessels involved in the conflict
This week we start off with some Sci-Fi rogues and scoundrels from Stephen. The miniatures are all converted using various bits from other sets and miniatures.
Ricard Snyder – a soldier of fortune from the colonies Jesrick Yoon – a bounty hunter with a fearsome reputation Babu Dor – a Jovian pirate from the Don-Andros system Acton Ianov – a ex-naval pilot who now makes his way as a smuggler
Next up Andy has made more progress on his Ox cart. I wonder if any of Andy’s terrain pieces will fit inside?
Travel in the olden days
Now we have some RAF and Luftwaffe forces from Marcus.
Aces High!
And finally (why do I always leave my stuff to last?) I’ve made some progress on my Tudor buildings. I’m trying several different colour schemes and seeing how grey thatched roofs look, since that is normally the colour of thatch after a short time.
Jeremey puts the Romans to shame by building a marching camp in just a few hours!
This all started because I wanted to expand my Wars of the Roses army to the point where I could field both sides. In many rulesets dealing with Medieval warfare a camp is required for each army. I only had one camp as I previously only had one army.
I therefore set about making a camp from scratch. Yes I could have ordered some tents and camp equipment miniatures but I was in one of my “Just make something” moods.
The Start of a basic palisade
I thought the easiest option would be a stockade/Palisade style camp. I already had a base and dug out the air drying clay to make the bank and interior terrain of the camp.
It was at this point things just didn’t work, the clay just would not stick to the wooden base as I was sculpting it into shape. So I took it off the base and continued on the work mat. But then I realised I needed to make an indentation for the cocktail sticks, sorry wooden palisade fence before the clay dried.
At this point I threw my toys out of the pram as I couldn’t see it working and I’d have to wait for the clay to dry. Then I had a eureka moment and turned to my old modelling friend EVA foam. I make everything out of the stuff so why not the camp.
The air drying clay is ditched in favour of foam
I cut off of a EVA foam floor mat a couple of strips to act as the defensive bank and also (just because I could) another couple of pieces to turn into a hut/shed.
Life would not be worth living without a hot glue gun
I then fired up the hot glue gun and stuck the foam to the base. Instant results and no waiting for clay to dry.
20 minutes later and the palisade is complete!
Ah I hear you cry but how did you create a gap for the palisade. All that was needed was to cut down through the top of the foam bank and then push the cocktail stick down through the cut. I simply used a little bit of superglue to stick them together. I then went across the top with my wire cutters to trim all the sticks to the same height.
Back to the hot glue gun
At this point I could have gone back to some for of putty/clay to model the inside terrain of the camp. But I was on a roll and wanted the camp finished in a day!
So I went back to the hot glue gun and used it to build up the ground against the foam banking, and I also used it to create the muddy path between the two entrances. This is easy to do, you just use the nozzle of the glue gun to melt the glue as you run back through it. I also made a little pile of logs for scenery.
A splash of brown and a bit of flock
I then turned to painting the camp. A simply covering of brown followed by a bit of dry brushing with lighter shades took care of the camp and surrounding palisade. Once the paint had dried a bit I spread PVA glue and sprinkled some flock.
The hut/shed takes form
Having to pause to let the PVA glue dry I turned to the other piece of scenery the hut/shed. To build this I stuck two pieces of foam together wit the glue gun and then cut out the entrance, I then cut the top of the block into a slanted roof shape. The roof was made by cutting a very thin layer off the foam floor tile and sticking it down on top. This formed a nice curving roof.
To create the look that it was thatched was done by drawing the craft knife gently across the top. Just enough to score it not cut it.
The finished camp
A quick paint job on the hut including painting on the wooden beams in the wall for that medieval look took moments and then I stuck it in place.
At this point for finishing flourish I added some different flock to break up the grass areas. I do have a couple of figures I might add to this, but for a model that took me about 3 hours I’m really pleased with the results.
This Wednesday we start with some adventurers for Perilous Tales painted by John. Above we have the Gentlemen and below the Ladies.
and the Ladies
Next up a rarity from Phil showing his new Quar project.
Creevin and Fidwog cavalry
Steve has added a bounty hunter to go with his recent Spaceship model.
This is the notorious bounty hunter, Boone Sadist, with his ship Scourge Reaper…
Continuing with his Dark Ages theme Andy has an Ox Cart on the workbench.
And finally for this week I decided to scratch build a new camp for my 15mm Wars of the Roses army. I’ll probably do a post about how I built this camp.
Jeremey shows off his Wars of the Roses army now that it’s complete (well almost).
On the 17th February 2020 I put up a blog post about the first Wars of the Roses units I had managed to paint up. This was the start of my very first historical army. Fellow club member Stephen was also painting up his own Wars of the Roses with the idea of fighting the various battles thoughout the year.
We managed one battle before lockdown scuppered getting down to the club.
First battle to test our Wars of the Roses armies
So I packed up the army for the following months and turned to other ptojects. But I kept drifting back to the army and found myself making terrain. Given the first Battle of St Albans was essentially a town battle I started making tudor houses.
Still a lot of work to do on these buildings. More plasterwork and thatched roofs
But Stephen started to post a few solo battles using his army and mentioned adding a few additional units, so I caved and ordered some more for my army. using the Sword and Spear army lists I went for a few of the support units. Welsh Longbows, Welsh Spearmen, General Spearmen and Mercenary Crossbows.
Welsh Longbows and Spearmen on the Painting Table
I painted these using the same method as my existing units. Stephen had painted his units in uniform colours but I wanted a much bigger variety. Although armies of this time were starting to wear their lords Livery, but I didn’t want to tie my units down to any particular faction.
I picked out a range of colours (various, browns, greens and the odd khaki shade) and painted different parts of each miniature so that no two miniatures were the same. This was potentially more time consuming but I still went through the miniatures like a production line.
Another new aspect for this army was to make the flags changable, in order to allow my army to represent any side in the conflict, or for when several lords bring forces to the battlefield.
Changable Flags for my Units
I simpy glued the flags together and left a loop to fit over the flag poles on the units.
And so finally I got to a point where I had a large enough army for a real epic battle.
The whole army with a multitude of flagsThe Left Flank of the ArmyThe Right Flank of the Army
First up this Wednesday we have some more 6mm Hammers Slammers from Mark.
The first detachment for Hammers Slammers
I’ll let mark explain a bit more about the paint scheme “My first Slammers section almost completed minus the infantry, this is a Zaporoskiye strike detachment painted in a Berlin Brigade inspired urban cameo scheme; given that I’ve used green in place of grey I guess you could say it’s semi urban. This section includes my second prototype which has a lighter brown, feel the darker works better at this scale. 5 more sections to do then I’m ready for battle.”
Next up Paul has well … Paul can explain the madness. “I have had a rush of blood to the head and replaced my 1/200th WW2 and Post War Armour Infantry, with 1/300th. Currently finishing off 8th Army and US in Tunisia, good start on the 16th Parachute/Air Landing Brigade (for post war interventions) and a Japanese WW2 Independent Brigade.
We’ve all suddenly decided to switch scales, haven’t we?
Andy has got close to finishing his Dark Ages figures, with just some shield transfers and bases to do.
The Dark Age mob is almost finished
And lastly for this week I’ve decided to paint yet more 15mm Wars of the Roses Men at Arms.
Two more units of Men at Arms and a couple of commanders
I didn’t paint these originally because I’d already done two units and the Sword and Spear army list said that was the maximum. But I’m hoping to have enough units to field both sides in a battle, and so added these to the painting table.
It’s another Wednesday and here’s what the club members have been up to.
First up Marcus has completed the spaceships he’s been working on with some lovely paint schemes. These I believe are from Ground Zero Games with the one in the main picture being from Zandris IV.
The Fleet Gathers
Next up John has painted some 3D printed ships.
3D Printed Venetian Galleys
You will rcognise these from the blog post on Monday about first experiences of 3D printing.
Tiny but well details ships from a freely available 3D print model
And lastly to go with my city ruins I’ve had a go at general rubble piles. These were made by crushing up the remaining plasterboard pieces and dropping them into a watered down PVA solution.
Rubble to go with the ruins
I then simply poured the solution out and left it to dry. Nice rubble if you can get it.


You must be logged in to post a comment.