Society member Stephen kicks of our posts for 2025 with a WW2 game of Crossfire.
During the Festive period I decided to have a non-Festive WW2 game using Crossfire rules.
It was a late-war Eastern Front game with the Russians on the attack. Each side had a company which comprised three platoons with a company HQ and machine gun. In addition, since the Russians were attacking, I gave the Russians an extra SMG platoon. I made these veterans (an NKVD unit, no doubt) and decided this platoon’s command bonus would help in both close combat as well as morale (obviously led by a commissar – usually Russian commanders only assist in close combat). Since it was a late-war game, to reflect the change in training and doctrine the Russian army went through, I also decided that Russian squads could end movement out of line of sight of platoon commanders but still had to start movement within LOS as usual (normally, Russian squads have to start and end movement in LOS). This reflects the Russian adoption of the British and American structure they went through when the Russian army went on the attack.
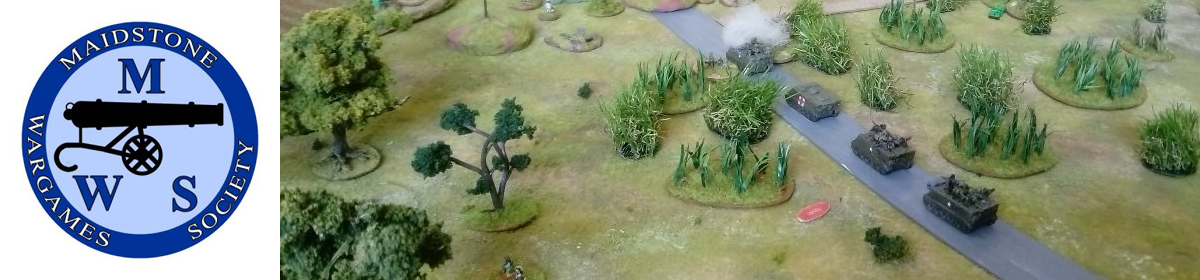
The battlefield was set up as follows:
The Germans deployed on table with all units deployed north of the east/west road. The two large barns and the railway station were big enough to accommodate three squads. The other houses and the chapel could only accommodate two squads.
The Germans put their first platoon in the easternmost barn. In the house looking south down the road was the German company command and machine gun – this would make it very risky for any Russian squad trying to cross that road. In the big barn in the middle went the second German platoon. The final German platoon deployed with one squad in the chapel and a squad in each of the wooded areas either side.
The Russians would deploy by activating from the southern edge.

Each side would gain 1 Victory Point for each enemy squad/machine gun killed. The first to 7 VP would be declared winner.
This was obviously going to be a difficult job for the Russians. The sides were more or less equal (Russians with four platoons and the Germans with three) but the Germans had the advantage of being in defence and set up in protective cover.

Right then, on with the game.
The Russians started activation by bringing on their first platoon and occupying the sunken ground on the extreme left. Second platoon came on and took position in the adjacent woods, and the third platoon came on and took cover behind the fence that ran alongside the wheat field. The plan was for the Russians to attack on one flank where they could concentrate their firepower and force the Germans to break cover or risk being rolled up. The Russians held the NKVD sub-machine gun platoon and the company HQ with HMG back – these were due to deploy on the right.

Initiative still lay with the Russians and so the platoon in the sunken ground made a group move to advance across the rail track and into the woods in front of them. At this point the Germans opened up with Reactive Fire. Using a coordinated crossfire, the German first platoon in the woods and chapel let rip – a series of Pinned results ensued but no Suppression, so the Russians maintained initiative. The Russian platoon decided to return the favour – they Pinned the German squad in the woods on the left but also failed to cause a Suppression. This meant they lost initiative and it switched to the Germans.
With all the action taking place on the western side of the battlefield the Germans decided to advance one of their platoons: those on the right, in the other barn, crossed the road and rail track and took up position in the woods. The German first platoon chose to keep up the pressure and poured more fire on the Russians in the woods. They caused a Suppression, so carried on firing, hoping for a kill on the Russians. But they failed to cause another Suppression which meant the initiative switched to the Russians.

The Russians did two things. Firstly, they brought on the NKVD platoon, which came on at the extreme right in the sunken ground there. They also decided to advance their third platoon across the wheatfield into cover behind the fence overlooking the rail track. At this point the German second platoon, in the barn opposite, engaged them with Reactive Fire. Not only that, but the machine gun also had line of sight and fire arc to the Russians in the field. This would be a lot of Reactive Fire. The machine gun was firing independently and fortunately scored a Suppression, meaning the Germans could carry on. The Germans in the barn shot as a firegroup but only caused Pinned results and so initiative went back to the Russians. But the Russian platoon had taken a lot of fire and all squads were either Pinned or Suppressed.

Both Russian platoons that had advanced found themselves with their heads down – all Pinned and Suppressed. So the Russians needed to start putting the pressure on elsewhere. They did this by bringing on the company HQ and machine gun. These took position on the edge of the fence by the farm. The German platoon in the woods on the right had line of sight and took Reactive Fire, but failed to score even a Pinned result – squads failing to score at least a Pin are marked No Fire (NF) and are unable to conduct any more Reactive Fire during that initiative. This gave the NKVD squad a chance – since they would receive no Reactive Fire they could charge forward and try to engage the German platoon in close combat! Being SMG armed and veterans would give them a bonus. So that is what they did. And it paid off very well indeed – the NKVD over-ran and eliminated the German platoon!

The Russian Company Command and machine gun moved into the first of the farm buildings. What they needed to do next, though, was try to rally some of their squads. However, failing a rally roll also means initiative is lost. As it happened the platoon in the wheatfield managed to rally all its squads, whilst the platoon in the woods on the left managed to rally one squad but failed the others. So initiative once more went over to the Germans.
The loss of the German platoon to the SMG platoon really blunted the German options. The other two platoons had little choice but to dig in and see what they could do. As such, both platoons were organised into firegroups and crossfires to make the most of what they had. The Germans in the barn once again Suppressed the Russians in the wheat field but the platoon in the woods and chapel could only cause Pins on the Russians in the wood so they lost initiative.

The Russian second platoon which, up to now, had remained ensconced in the woods behind the railway station were given the order to move up – by bringing the whole Russian company into line it would spread the German fire. As a group they moved into the railway station and took Reactive Fire from the Germans in front of them – the Germans causing Pins on each of the Russian squads!
Now, by causing a Pin a squad may continue Reactive Fire, but should they fail to cause a Pin then they may no longer do Reactive Fire during that initiative. So the Germans could carry on with their Reactive Fire, hoping to Suppress and steal initiative. But they’d seen what could happen if they get a No Fire marker and are charged. So rather than continue Reactive Fire they chose to hold back and allow the Russians to continue with their activations and maybe another opportunity to react may present itself.

The Russian company command and machine gun chose to move up to the next farm building which brought them directly opposite the German company command and machine gun. And these decided to do Reactive Fire against the Russians – causing a Suppression and taking initiative away from the Russians! So the German machine gun kept on chattering away, this time turning to the NKVD platoon in the woods in front of them – a kill! One of the NKVD squads was off. The Germans decided to make the most of their firing so the platoon in the barn resumed fire against the Russians in the wheat field – another kill!
Things were starting to improve for the Germans.
But not for much longer – they attempted more fire against the Russians in the station but failed. Initiative went back to the Russians. There then followed an extended exchange of fire between the Russian and German machine guns – one side would fire, fail and initiative would switch, and this went on for several rounds, changing initiative after just a single activation. This ended up inconclusive. Occasionally one side or the other would be Pinned or Suppressed, but then rally this off and resume firing.

Something needed to be done.
Then during one activation the Russians Suppressed the German machine gun and decided to advance the NKVD platoon into the barn on the opposite side of the road on the right. But as they moved into the open crossing the road the German squads further down opened up with Reactive Fire. Being in the open was never going to go down well and one of the NKVD squads was killed and the other Suppressed! The Germans took initiative, rallied their machine gun, which opened fire on the Russian machine gun and…eliminated it!
Victory Points were now equal – 3 each. If the Russians were going to win they would have to think of something daring. For the time being, though, it was still with the Germans who continued with their fire against the Russians in the station, but a failure to Suppress soon meant it went back to the Russians.

Close Combat is very decisive in Crossfire – a simple win means the opposing squad/s are destroyed. So the Russians looked to bring things to close combat since they had advantage of numbers on the left. The Russian platoon in the woods on the left opened up on the solitary squad beside the chapel, causing a Suppression. With that, they decided to go for it and charged across the road with guns blazing.
As soon as they broke cover the Germans in the chapel opened up with Reactive Fire. They scored a Pin against the first squad meaning they could carry on, but failing to score any more hits meant they received a No Fire marker and the other two Russian squads charged the Germans with the inevitable result – one dead German squad. With their blood up, and a No Fire marker on the Germans in the chapel, they kept up the momentum and sought to charge the squad in the chapel. However, they could only get one squad against them (remember, the chapel has a capacity of two squads and there was already a German squad in there), which meant it was an even combat and on the dice roll. Which favoured the Russians! Another German squad gone.

The remaining German squad of this platoon, in the woods to the right of the chapel, used Reactive Fire on the Russian attackers and scored a Suppression. With initiative, what could the Germans do? Truth be told, they didn’t have many options. The machine gun opened up on the Suppressed NKVD squad and killed it. Victory Points were now 5 to the Russians and 5 to the Germans – still tight. The German machine gun then turned its attention to the Russian company command but failed to score a hit.

So what could the Russians do? They decided to see if they could Suppress the Germans in the barn. They did even better than that and killed one squad. With a platoon in the railway station and another moving up through the woods and chapel, they decided to bring things to a close. The platoon in the station opened up at the German squad in the woods and caused a Suppression – this was what they wanted and made a charge against the Germans. The platoon in the station fixed bayonets and moved out. They drew Reactive Fire from the Germans in the barn and found themselves Pinned down by the roadside! So the Russian squad in the chapel, under cover of the woods, made a final charge against the Suppressed German squad.
And that was that. The German squad was killed which meant the Russians had reached their Victory Points – 7 German squads eliminated.
It had been a very close game and a very enjoyable one, and the Russians had won.

Like this:
Like Loading...


 It saw a rag-tag French outfit as the defender facing a determined German company supported by a platoon of tanks. The French were made up of a platoon of Foreign Legion and a platoon of Tirailleurs Sénégalais on one side of the river, needing to withdraw across the bridges and a Motorcycle platoon holding those bridges. The French also had some support in the form of an anti-tank gun and some engineers in a truck – the latter to demolish the bridges before the Germans could capture them intact. Along with two Bouteilles Incendiaires, two roadblocks and a couple of full Chain of Command dice for the withdrawing troops, this was the defending force. The Germans, in addition to their infantry company and tank platoon, had an Adjutant, a Pioneer team in a Kubelwagen, a SdKfz 222 armoured car, an infantry gun and a truck with four rubber boats. It wouldn’t have been an early war game without a Shabby Nazi Trick – the German players selected a fifth column sniper (Jean-Claude). We played through the patrol phase which saw some interesting jockeying for positions around the buildings on the German side of the board. With jump off points then positioned we were ready for the meat of the game.
 Repeated exchanges of fire were telling on the French forces as they tried to hold the Germans long enough for their engineers to deploy and mine the bridges.


You must be logged in to post a comment.