
Andy reports on a game of Dragon Rampant organised by Jeremey to follow our AGM, played in an MS Teams meeting. With observations and comments from Stephen and Jeremey.
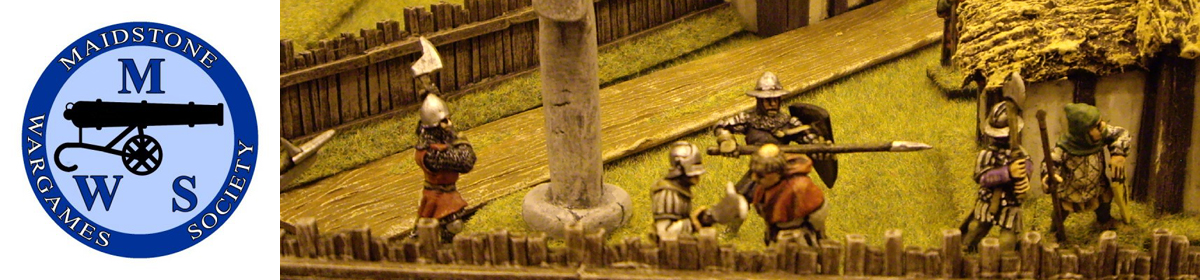
Jeremey organised the forces and set the terrain, and arranged 3 different cameras to show the battlefield. Having to provide both armies allowed him to use his Celtos undead army and his completely scratch built Rock and Wood army.

The combatants were Stephen, with Mother Nature’s Finest lead by a Rock Lord; and Andy, with the Army of Darkness commanded by a Necromancer. Both sides totalled 35 points.
Mother Nature’s Finest
-
-
- The Rock Lord: Greater Warbeasts, Cunning, Mystical Armour. (10 pts)
- Rock Trolls: Lesser Warbeasts.(4 Pts)
- Mini Ents: Lesser Warbeasts, Cunning. (6 pts)
- Light Rockmen: Light Foot (3pts)
- 2 x Heavy Rockmen: Heavy Foot, Offensive. (6 points each)
-
Army of Darkness
-
-
- The Necromancer: Elite Foot, Spellcaster (10 pts)
- Skeleton Scythes: Elite Foot, Undead/No Feelings (6 pts)
- Zombies: Ravenous Horde, Undead/No Feelings (1 pt)
- Skeleton Sickles: Light Foot, Offensive, Undead/No Feelings (5 pts)
- Skeleton Spearmen: Light Foot, Undead/No Feelings (3 pts)
- Wraiths: Bellicose Foot, Fear, Undead/No Feelings (6 pts)
- Flesh Eaters: Bellicose Foot. (4 pts)
-
We decided that Jeremey would roll unit activation and courage tests, but that the generals would roll their attack and defence dice (Jeremey – we also decided that Andy and Steven were not allowed to moan about my dice rolling!). (Andy – Oh no we didn’t!)
Once the Armies were deployed the two Generals rolled for their Traits. Stephen’s 3D6 scored 13, lucky for him, this gave a result of Boneshaker, allowing him to automatically pass one Attack order per turn. Andy (or should I say Jeremey rolling on Andy’s behalf!) only scored 5, making his Necromancer Cowardly, no Attack orders for him. Well, there’s a certain narrative logic there.
After rolling for first turn Andy ordered his unit of Flesh Eaters (on the left flank) to advance to outflank Stephen’s Heavy Rockmen, needing a 5 or more on 2D6. It was not to be, sadly Jeremey rolled low and the Flesh Eater went nowhere. End of Andy’s first turn.
On Stephen’s turn all his movement activation rolls were successful (thanks Jeremey) and he advanced on a broad front.

On Andy’s next turn he managed to advance a unit of Skeleton Sicklemen on the right flank to occupy a hill in front of Stephen’s Rock Trolls, but then failed the next activation. Back to Stephen.

Stephen’s Mini Ents (otherwise known as ‘Bonsais’) were now within movement range of Andy’s Zombies and were required to take a Wild Charge test, which they passed, so steamed in to the Zombies killing (?) 8 of the 12. The Zombies promptly failed their Courage test despite the proximity of the Necromancer, scoring less than 1, so they promptly routed of the board. Ta Jeremey.

On Andy’s next turn the Mini Ents were now within Andy’s Wraiths move distance and following a Wild Charge Test the Wraiths went in, turning two Ents into kindling and causing the Ents to also catastrophically fail their courage test. One unit down on each side.

On Stephen’s next turn his Rock Trolls were now within move distance of Andy’s Skeleton Sicklemen occupying the hill, they were obliged to take a Wild Charge test, which they passed and went in. One casualty on each side, both passed their courage tests and had taken equal losses, so the Rock Trolls bounced back leaving the Sicklemen controlling the hill. This would be replayed a couple of times, with the Rock Trolls throwing themselves at the Sicklemen and bouncing back until eventually they forced the Sicklemen back off the hill. The Rock Trolls followed up and eventually both sides had taken enough casualties for both to fail their courage tests and rout.

On the opposite flank, Stephen had advanced his Rock Lord to within Andy’s Flesh Eater’s move distance so they also had to take a Wild Charge test, which they failed and stayed rooted to the spot. Andy did manage to get his Skeleton Spearmen to form up in Shieldwall, expecting to be charged by the Rock Lord.
One of Stephen’s Heavy Rockmen (AC/DC or Van Halen?) units then charged Andy’s Skeleton Spearmen, who managed to beat them back. Andy then charged his Wraiths into the Heavy Rockmen causing a few casualties on each side, but both passed their courage tests.

Stephen then sent the Heavy Rockmen back into the Wraiths, this time both units failed their courage tests and routed from the table.

The Rock Lord finally charged into the Flesh Eaters, causing enough casualties for them to fail their Courage test and flee the field.
As the battle drew to a conclusion Andy only had his Necromancer on the table, whereas Stephen has both his Rock Lord and Light Rockmen (Heart and Bon Jovi fans).

Totalling up the losses, and comparing successful Quests, gave a Stephen a total of 10 Glory, and Andy -2 Glory as none of his Quests were achieved. A decisive victory to the forces of Nature.
The Necromancer will skulk back to his lair and set about reanimating another army.
The view from the other side of the hill (or Stephen’s viewpoint):
The final Glory totals don’t reflect how close the game was – for most of the game it looked like Andy the Necromancer would win. I often had to use my units in pairs, sending in one unit to soften the enemy up and then sending in another to finish things off. Both Andy and myself were cursed with Jeremey’s bloody woeful dice rolling for Courage tests (Jeremey – we agreed not to moan about my dice rolling) (Andy – No we didn’t). Andy was also beleaguered with poor Activation rolls at the start, which allowed me to advance on him and put him on the defensive (he seemed to spend most of his time forming Wall of Spears – probably needed to increase the armour of his skeletons).
Playing via Teams worked OK. There’s always going to be compromises – some of them could be seen as fog of war. The fact that Dragon Rampant is a simple game and we all knew the rules helped. Ultimately, it was a good opportunity to play soldiers with friends, no matter what the results were.
Jeremey – for this game I deliberately picked a ruleset we knew, went for a small battlefield and only one unit had any ranged attacks. This was all to allow the game to flow with the players only able to see the battlefield from the camera views.


 3.2% decadent souls said they have more money than sense and pay others to make it for them! 6.5% of us said that making terrain was one of the most enjoyable aspects of the hobby. Which it is. And a disappointing 9.7% admitted to being so bad at terrain making that even MW’s Wargames Widow was inspiring. Can things be that bad? (In Steve’s opinion JC).
You must be logged in to post a comment.