Andy tells the story of the Fenris mission from a different perspective.
Following the limited success of the first mission to Denides, Captain Ash de Vere set about recruiting replacements for the losses incurred, Eric Olsen, the First Mate and Sam Fleet, a pathfinder had both died during the mission.
The first order of business was to recruit a new First Mate, by a stroke of fate the best candidate Ash could find was also called Eric, Eric Bamburgh. After some reflection Ash decided the crew really ought to have the services of a medic, and fortunately the new first mate knew of a good man called Dan McIntyre who was looking for a new berth.
As the two new crewmen were settling in Patina dZuk, one of the Runners Ash had engaged for the last mission, popped in and asked Ash if he could stump up 20 credits to get her the kit needed to become a Chisler. As there was just enough credit remaining after hiring Dan, Ash agreed.
So, with the crew back up to full strength Ash set about looking for a new mission to bolster the funds. An information broker Ash knew, Germy, had heard some rumours that Fenris, site of one of the major battles in the Robot Wars, was awash with loot and knew of potential buyers for any physical loot that Ash could find. What Germy didn’t say was how many robots remained active on the surface of Fenris…
Ash and Eric tried to lay some groundwork for the mission, Ash tried his usual sources for some high impact ammunition, but none was to be found. Eric tried greasing some palms to get possible rival crews to look the other way at an opportune moment, but there were no takers.
As Ash set the shuttle down on Fenris he briefed his crew. He would lead one team with Charlie, Jen and Patina. Eric would lead a second team with Skel, Honu and Offler. Bren, who hadn’t fully recovered from the injuries sustained on Denides, and the new medic Dan would be the reserve.
As the teams approached the ruins of a town movement could be seen, several of the Fenris incident robots were moving around the town.
Robots patrolling
In addition, more than one other crew were in the town, no doubt searching for the same loot Ash was after.
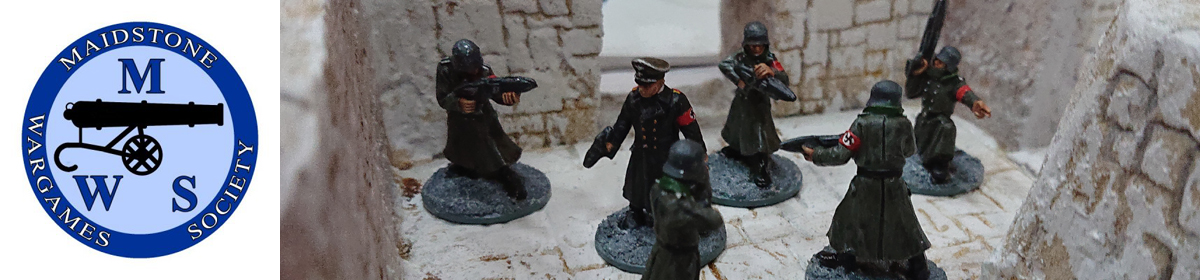
Tony’s crew
Ash led his team towards Tony’s crew, an ex-military group judging by their uniforms, activating his Energy Shield as he moved through the ruins.
Ash’s team took up positions behind some rocks while Patina got out her lock picks and set to opening a promising looking crate. Success, unlocked!
As Patina checked the contents of the crate she came under fire from Tony’s crew, presumably trying to take her out so they could steal the loot.
Ash and the rest of the team returned fire at Tony’s crew, giving the wounded Patina the chance to fall back with the loot behind some rocks to take her out of the line of fire. Ash told Patina to get back to the Troubadour with the loot as fast as she could; he and the rest of the team would cover her retreat.
A wounded Patina and her loot.
In the ensuing firefight Jen was knocked down, and as Ash and Charlie were both hit before they pulled back. As did Tony’s crew, perhaps they realised they weren’t going to be able to catch Patina.
Meanwhile, Eric’s team had moved into a different part of the ruins searching for more loot.
Eric’s team
As they advanced a clanking sound was heard behind them, one of the Fenris Robots had appeared from the ruins and opened fire, wounding Skel.
Bren and Dan came to Skel’s aid, Bren taking out the robot, and Dan treating Skel’s injuries.
Dan treats Skel with Bren on guard
Honu took up a position to guard the right flank, hunkering down amid the ruins. Good job too as another Robot moved up, firing on and wounding Honu. In returning fire Honu managed to put the Robot down.
Honu takes cover
While Honu dealt with the robot, Eric and Offler advanced through the ruins, finding another crate.
Offler and Eric find some loot
As they examined the crate they came under fire from Stephen’s crew, who seemed to be concentrating their fire on Offler. She was knocked down, and after returning fire Eric pulled back to some cover, with Bren coming up to support.
For some unknown reason the crew that had shot Offler then fell back, giving Eric the chance to go back and unlock the loot.
With Bren and Honu covering, Eric grabbed the loot and headed back toward the ship, only for yet another robot to appear! Luckily for the crew the combined fire of Bren, Honu and Eric managed to take down the robot, although Bren’s carbine jammed part way through the firefight.
With the robot down Eric’s team made good their escape, with Eric wondering why they had been robot magnets.
Eric’s team fall back with the loot (White skull denotes Bren’s jammed Carbine)
Once the Troubadour had left orbit, Dan took Jen and Offler into the sick bay to treat their wounds. Jen was remarkably uninjured after all, it must have been just a glancing blow, but Offler was in worse condition. Dan managed to patch her up, but she would not be back to full strength for a while.
Back at the Grand Market, Ash decided not to fence the loot through Germy, he hadn’t forgiven Germy for the bad intel on the robots. After some haggling, he found buyers for the Trade Goods and Alien Artefact they had recovered, netting 250 and 400 credits respectively. Ash would have to think on how to spend the hard-earned credits.
The crew gained 135 experience from the mission, enabling Eric to advance a level.
On another club outing with Stargrave Jeremey ran a game set on the legendary planet of Fenris, with Stephen providing a dramatic write up of the game …
The game was set up in the ruins of a city with the robots of Fenris on patrol throughout the region. The crews of four ships arrive to search for loot.
The Robots of Fenris patrolling through the ruins
Each crew was given a random mission brief providing additional bonuses to be had based on those missions. Stephen ended up with a mission that allowed the crew to pick a rival crew and gain extra credits for any kills against that crew.
The Seedy Dive Space Bar
“100 Credits!? You gotta be kidding me. I want 200.” Kersh Wilson banged his fist on the table for emphasis.
His opposite number leaned forward. Only now did Kersh get an idea of his features in the half-light of the smoke-filled room – the flattened nose, the red skin and ritual scarring. Kersh was dealing with a Creduxian.
“I’ll tell you what I’ll do, Kid,” said the Creduxian. “What I’ll do for you is make it 150 credits for a kill. Just 75 for a hit. Do we have a deal?”
Kersh leaned back, trying to recover his composure, remember the calm and measure he’d been taught as a young student by his masters.
“150 for a kill, huh? Yeah, OK – we got a deal.”
“Good. Good. I’ve made it easy for you. The hit’s name is Offler dZuk – she killed my kinsman. She’s a crew member on a ship called The Troubadour. The captain’s name is Ash de Vere. I’ve had one of my cronies slip Ash some information about some ruins on Fenris. Told him there was money to be made. So I’ve got ‘em off-planet for ya’, somewhere quiet, somewhere away from the eyes of the lawmen. Who knows, maybe you can make some extra loot out of it yourself…”
Kersh and his crew, as well as trying to collect loot tokens, had a special mission – extra money for taking an opposing player’s crew down to zero Health.
Fenris was an area of ruins and covered in undergrowth. Also present were some battle droids, so they’d have to take it careful. I had to choose which player I would have to try and shoot. It would have to be either Andy or Phil, as they were either side of me. I looked at where the loot tokens were and I reckoned that I was more likely to bump into Andy, so it would make sense to have him as my target since there was every chance we’d exchange gunfire anyway. Where I deployed there were two tokens that shouldn’t be too difficult to grab. I pretty much split my force in three – crew Captain Kersh Wilson (a mystic) led a couple of his crew after one token. Shoggoth (a biomorph), the first mate, led some crew after another. I had two raw recruits who I decided I’d send after the furthest away, but also with an eye on the possibility of taking a pop at Andy’s crew if the opportunity presented itself.
The Recruits sent out to scout the area
Oh yeah, I also had a pathfinder and used his extra speed to lead the way, draw any fire, see what droids were about etc.
I took the first token without too much difficulty. At that point Phil rolled a bad initiative roll (any roll of 4 or under meant a random droid would appear – Phil proved good at rolling low…) and a droid appeared near my crew. Kersh took out his lightsabre (sorry, ‘void blade’ *ahem*). The droid took a shot and Kersh deflected the shots with his blade. He then concentrated carefully and caused psionic flames to shoot from his hand and engulf the droid. Didn’t do too much. So he drew his blaster pistol and let off a couple of shots. Down went the droid.
Fire fight with a robot sentry
The two recruits – a robot called 2B-55 and a pale-skinned alien called Ronnock Crowder – advanced through the ruins. Not too far behind was Shoggoth and Yammet Lament, an ex-commando. TwoBee and Ronnock by-passed a loot token, leaving it for Shoggoth, and took position behind some ruins. Because on the opposite side of the road two of Andy’s crew could be seen trying to unlock a loot token.
Laying down some fire
Both TwoBee and Ronnock drew their pistols and started shooting. Down went one of Andy’s crew – Offler dZuk. She was only wounded, so on Andy’s activation he decided to pull her back. But TwoBee and Ronnock let rip again, and this time she wouldn’t get up – down to zero health. But was it a kill?
With three loot tokens, and having successfully completed their special mission, I decided discretion was the better part of valour and got my crew off with all their loot.
It had been a very successful first mission for Kersh and his crew.
Captain Kersh collects some loot
Or was it? The story will to Return to Fenris for a different perspective …
Stephen gives us step by step guide to painting a Sci Fi villain.
For an upcoming game of Stargrave I wanted a baddie. The Big Boss. I looked at the models I had and none of them were really suitable.
So I decided I would buy something. I knew how I wanted the model to be armed, and knew my chances of finding something exactly like that was virtually zero, so it had to be something that could be modified.
Since I intended to order some bits from Ral Partha I thought I’d have a look there.
And lo and behold, I found just the thing – a Neo Soviet Handler from their Vor range (specifically, code 40-412):
The original figure
I trimmed off the knuckle-duster thing in his left hand and in its place went a blaster pistol from the spares bag. His main armament was going to be a void blade. And when I saw this model, and what he had in his right hand, I couldn’t believe my luck. This would make the perfect handle for a lightsaber (sorry, void blade). I trimmed it down a bit, but I liked the flared ending so kept that. A hole was drilled and a piece of 1.5mm styrene rod was glued in. The model was then stuck to a 25mm plastic base and the base built up with filler. And then it was given a brown undercoat:
Modified and undercoated figure
Now, in this write-up I am just going to give generic colours rather than specific names and codes for a brand. I use from more than one range of paints and I am sure everyone else does as well.
I decided his robes, gloves, and gimp mask were going to be black. So I slapped it on, letting it get into any awkward gaps in case I couldn’t get a brush in there later so it would act as a deep shade.
Basic black basecoat
Right, this is just my own personal philosophy on black. But I never highlight black with just grey. No. Black is seldom that helpful. Look at any black clothes you may have. I bet they’re all slightly different shades – it depends on age, what the material is, what dye was used. Lots of variables. So try to keep that in mind when highlighting your blacks. The black for the robes had a bit of blue added, then white added to that for successive highlights. The gloves and mask had a blob of red added, then white added to that for successive highlights. You can see the slight difference in ‘black’ here:
Shades of black highlights
Next up, I decided to do the bits that would get a dark brown (OK, OK, GW’s Agrax Earthshade) wash – the boots, pouches, bracers, and metallic bits. These received the same base brown colour. The metals had a steel base colour. Once dried, on goes the wash.
Brown and steel parts base coated and washed.
And when that’s dried the pieces are painted up. Like black (and most colours, to be honest) it helps if you vary what you use to highlight your base colours. It’s tempting to add white to lighten it. But maybe yellow might give a different shade to the base colour, or a pale grey. This is a good thing to keep in mind, especially if you have two uses of the same colour next to each other. That said, I did use white to highlight the brown. The metal bits were touched up with the base steel colour, and then highlighted with silver. I ummed and ahhed about what colour to do the lenses on the eyepieces. Blue or green were the first choices that came to mind. But then I thought, orange. So orange it was, highlighted with a dot of yellow.
More highlights and those glowing orange lenses
Next up I decided to do his weapons. There’s a good reason for this – I just couldn’t make up my mind what colour to do his armour. Normally I would have left the weapons to last because they stick out and there’s every chance they could get knocked or rubbed as I did other bits. But I just couldn’t make up my mind. I had thought about green, but I had also decided that his blade was going to be green, and if there was too much green then I may have to re-paint the armour. With that, I decided to do the weapons first, and once that was done maybe the armour colour would be obvious. The handgun had a base colour that was a mix of steel and black to make a gun metal colour, then highlighted with the steel. A red laser sight was also dotted in. I knew from the outset I was going to do a green blade. I have a nice rich green colour, so I went with that. It’s hard to paint a 3D object like it is lit from inside, so I chose to just highlight the base and tip of the blade. I used white to highlight this time.
Pistol and lightsabre, sorry void blade, painted and highlighted
I looked at it. You know what, I thought, I reckon green would look OK. So I went with green for the armour, but a different shade of green. I gave all the armour panels a thin coating (not really a wash, but not really thick paint either) of the base green mixed with a blob of dark brown (again, you don’t have to darken colours with just black). Once dry I then painted in the panels with the base colour, which was highlighted by adding yellow to the green to create a more vibrant green, but also so it didn’t have the same tonal value as the green on the blade. The edges of the armour were based in dark yellow, and then picked out with a flat yellow.
Armour panels painted green and yellow.
And that’s the end of the painting for Doctor Moreau. Once finished, I thought the 25mm base looked a little small on what was a chunky model. So I pried the model off the base (and, inevitably, had to touch up a few knocks and chips) and glued him to a 30mm wooden base. Flocking was my standard recipe – a mix of railway ballasts first, and then some spots of static grass:
The rebased and finished figure
And that’s Doctor Moreau done, ready to be pestered and set upon by a group of ne’er do wells and freeloaders.
A brief picture album of the third meeting back, still operating under members only rules.
Four games in play today, in chronological order:
First up a FOG Ancients game by Colin & Paul, we only have one picture of this unfortunately.
FOG Ancients game in progress
Moving on to the 17th Century we had a FOG Renaissance game with Brett, Pete, John and Mark, the Scots involvement in the English Civil War.
FOG Renaissance Scottish (mostly) await the attack.FOG Renaissance Cavalry on the moveFOG Renaissance ECW Scottish in action
Moving on a couple of Centuries we move to Mexico in the 1860’s, with the French Intervention played by Alan and Mike using Zouave II rules.
Republican Mexican defencesFrench and Imperial Mexicans advance
Finally we have a couple of games of Stargrave.
The first game was run by Stephen, with Eric, Marcus, Jeremey and Andy sending their crews to investigate Dr Moreau’s House of Pain.
First Stargrave game, run by StephenDr Moreau’s bunker from Andy’s point of viewAndy’s crew fight off Audrey IIMarcus’ alien crewEric’s and Marcus’ crews approach each otherMarcus’ and Eric’s crews engageDr Moreau’s creatures take the high ground as Jeremey’s crew approach the compoundAndy’s crew try hacking the force field
We had to cut the first game short as Stephen had to leave, so we then played a second game which Jeremey had devised. As Andy’s crew had to disband after his Captain was killed in the first game he ran the second game enabling Jeremey to play.
A ship had crashed, leaving a trail of cargo and potential loot in its wake. Jeremey, Eric and Marcus’s crews came looking for loot, with indigenous interference run by Andy.
Eric’s crew, lead by Captain GreyfaxThe crashed freighter, with cargo strewn in its trail. Jeremey’s crew approaching from the top of the picture, Eric’s from the bottom.Eric’s crew approach the wreckEric and Jeremey’s crews fight over the loot (the corrugated fence representing a Holographic Wall)The indigenes
Jeremey takes us through the various times club members have used actual toys for games.
Recently Tony posted pictures of a toy Millennium Falcon he bought for his current 15mm Star Wars project. This was a Hasbro Millennium Falcon toy measuring 9.5 inches x 7 inches.
Checking the toy for size
All Tony did to this toy was to give it a wash of black acrylic paint thinned with Johnson’s floor polish followed by a heavy light grey drybrush.
Picking out the details
As you can see the end results were quite impressive for such a simple technique.
When the Stargate rules came out Stephen decided to paint up a spaceship to act as scenery. Again going for a toy Stephen bought a strange looking spaceship from something called the Starlink range.
Starlink Neptune Ship
From what I can tell you can connect this toy up to a games console for added features. Stephen converted a few bits of the original toy to turn it into a craft for his bounty hunter.
This is the notorious bounty hunter, Boone Sadist, with his ship Scourge Reaper…
I also got in on the toy action a number of years ago for my Fenris Descending game. I dug out one of my old Star Wars toys, namely this PDT-8 transport toy.
The old Mini-Rig range dating back to the early 1980’s
For this I did need to cover over the compartments you put the action figures in and went for a complete paint job, but that was still just a simple primer of grey, dry brushed silver and a black ink wash applied.
The shuttle craft from Fenris Descending
Again the level of detail on the original toy made it a good choice to use for wargaming. You can often pick up such toys for a bargain price on Ebay or in the toy store clearance bin. A purpose built wargaming spaceship of the same size (although likely better detailed) would be quite expensive.
I can see my self doing this again if I spot the right toy.
Inspired by the imminent arrival of Osprey’s new Stargrave rulebook, Marcus suggested that we have a shuttle scratchbuilding contest (this was several months ago, the book is of course out now). Although the rules are aimed at 28mm figures, this very loose ‘contest’ was for 15mm models.
A while ago I saw a 15mm scale spaceship made from a Nerf rifle on Facebook – it was probably the size of a corvette or small frigate. While I had no desire to make anything that big, the idea still seemed sound for a much smaller vessel made from a pistol or similar. So I picked up an X-Shot branded gun from a supermarket for a fiver … which then sat untouched in its box for over a year. The shuttle building competition seemed like the ideal time to dig it out and make something of it.
I started by dismantling it (it was held together by screws) and removing the trigger, grip and the spring mechanism that propelled the rubber projectiles. This left me with just three pieces – the triple barrel and the two body halves, which I superglued back together. The screw holes were filled with green stuff which I tried to hide as best I could by sculpting in detail to match the surrounding area. The plan was to turn the pistol round so that the gun barrels became the engines and the cockpit would somehow be grafted onto the trigger end. This was all a very vague concept, since I had no idea of the details and what I was going to use to make it all (this make-it-up-as-I-went-along theme ran through the whole build…).
I had to tidy up a couple of bits – I took a razor saw to what would be the nose and removed a protruding bit of plastic, which I covered with a hatch from a Games Workshop vehicle. The hole where the grip came out was boxed in with plasticard with a view to becoming a well for the nose landing gear.
After hunting through my spares box for a suitable aircraft cockpit I came up blank, so in the end I built a simple frame around a curved protrusion which should look like a cockpit when painted up.
Engines were my next issue. Try as I might, in my extensive pile of half-built kits I could not find three identical engines to cover the three muzzles of the original gun. I did find two Mirage-III engines which I used for the lower two. For the upper, central engine I found a rather odd finned one which came from a Japanese spaceship kit. I rationalised the different designs by designating the lower two as the sublight drives, while the upper one is the ship’s FTL or Jump drive.
The final major subassembly that I had to work out was the landing gear – it would have to be robust enough to hold the weight of the ship and stand up to the rigours of gameplay. I’d originally planned to scratchbuild something with skids or feet along the lines of the Millennium Falcon, but during my various delves through my kit pile I came across the landing gear of a 1/48th Rafale which looked like it would work. Having wheels rather than skids also made sense as it would make the shuttle easier to manoeuvre in the tight confines of a carrier bay or hangar. The nose wheel fitted perfectly into the well I’d made earlier – I just superglued it solidly to the back of the well. I drilled holes in the fuselage sides to secure the two larger rear wheel struts and added some extra supports to make them even more secure.
The forward hull had a circular recess on each side – on the left I put the main hatch, originally from a GW Rhino. I gave it some hinges and a grab rail from various kits, and an entry keypad which is the only 3D printed piece on the ship. On the right is the ship’s main armament – when the shuttle was originally built this would have been a second hatch, but now it’s in private service the captain has added a twin heavy cannon mounting, which came from a GW dreadnought. I’ve never played Warhammer 40k, but once upon a time I worked on a video game project for Games Workshop and ended up with number of WH40K sprues in my bits box, which have finally proved to be very handy.
Then I was into full-scale greeblie mode, covering much of the surface of the vessel with all manner of bits and pieces – there are aircraft weapon pylons, bits of superstructure from 1/1200th battleships, a metal radome, some windows and shutters from model railway buildings, helicopter rocket pods and many other unidentifiable bits. There’s also a small defensive gun turret under the main hatch. The engine body got lots of pipes and valves made from plastic rod and strip, and a couple of lengths of old bass guitar strings.
Eventually I called a halt and declared the build finished, and moved onto painting. The overall colour scheme reversed the original colours of the plastic gun, with the main body in white and the nose in orange, and the engines bare metal. I sprayed it overall with Halfords’ white car primer and then washed it with light grey acrylic paint thinned with Johnson’s floor polish (I had planned to use Citadel Apothecary White contrast paint but I’d run out and had to improvise…). This was then heavily drybrushed with pure white with some edge highlights thrown in. The nose was painted with Gryph Hound Orange (another contrast paint) and drybrushed up, and then the engines painted with Citadel Leadbelcher before washing black and drybrushing silver. Contrast paints can be a bit patchy on large flat areas, which just what I was after – this is meant to be an well used, battered vessel that has seen plenty of use.
I painted the gun housing in dark blue-grey, along with the numbers etched into the sides of the fuselage, the cockpit glass in a variety of blues to give a graduated shade and the undercarriage in silver. I then picked out lots of details in different spot colours – a red and white striped probe, yellow emergency gas tanks, grey sensors, a green radome and orange and blue dorsal fins. I even had a go at a rainbow-like heat distortion effect on the engine using washes.
Finally I raided my collection of decals to finish things off – a mixed selection of aircraft markings and GW Tau symbols.
So that’s it – the Empyrean Drifter takes to the spacelanes. Of course it needs a crew, which I’m currently pulling together from various sources. And I’ve now started to think that they need a base to operate the Drifter from, which is a whole new rabbit hole…
During a recent discussion over Stagrave and making scenery Marcus mentioned a cheap set of terrain available from Mantic Games for the game Dreadball. Further browsing of the Mantic Games site showed a box set called Dreadball Xtreme for £9.99.
Club member Jeremey took the plunge and bought a set for evaluation:
This all started when I saw the Dreadball set of Free Agents that I thought would be good for converting into a Stargrave crew. The Free Agents set was £9.99 but I discovered the Dreadball Xtreme set for £9.99 included the Free Agents set, it also contained some terrain in the form of crates, perfect terrain for any Sci-fi games; so I thought I might as well pick up a set.
I had to pay postage so the whole thing cost me £16.99, and this is what I got.
Contents of the complete set
I will say straight away this is not a review of the actual game. I had no interest in playing it. I bought the set for use in other games.
This is what you get in the set. First up were the 9 Free Agent miniatures that first led me to the set. The miniatures in the game are all hard plastic. The quality varied, some had sharp details others were very soft. Also the painted miniature pictures on the Mantic Games site gave me the impression that some of the miniatures were larger. For example the Treeman looked tall but is the same height as the other humanoid miniatures. Mould lines were quite pronounced on some of the miniatures, those needed to be cut off, filing on this type of plastic just roughs up the surface of the miniature.
The Free Agents
Next came the female team for the game. The miniatures are quite slight and of all the miniatures these were the softest and worst mould lines.
First team in the set, Female players
This was a shame because I wanted a number of female characters in my Stargrave crew. You get two copies of five different miniatures in this set, although two are wounded. But these could be good for rescue scenarios in games.
Here is a close up showing the size of the mould lines on the female miniatures.
Some figures are very slight compared to other sci-fi miniatures
The second team are convicts and these had better castings. You get more variety with this team (they are convicts apparently), they are nice post apocalyptic looking. there are three miniatures where you get two copies. One pose being wounded as with the female team. There are two other miniatures and then the larger ogre/thug miniatures that come with different arms and heads so they don’t have to look the same.
Second team from the set
The Dreadball Xtreme set comes with two figures to represent team sponsors. The suited miniature would be good as a boss to be protected or assassinated in games, with the other one potentially being a gang leader.
The team Sponsors
Now we come to the terrain which is one of the reasons I wanted to get the set. These are quite good with four power unit pieces, six square crates, four lighting units and 16 hexagonal crates. These were all nice clean castings with few mould lines.
The terrain set
I should also mention the other bits from the box that I might find a use for. The rules, counters and cards for the game don’t hold much use for me. But the game mat from the set is about 24″ x 24″ and a hefty piece of rubber (mousemat?) style fabric. You could probably use it as a door mat it feels so tough. But I’m probably going to cut it up as the design will work for landing pads, storage areas or to represent the interior of a starship. There were also 24 plastic hex bases in two colours. These could be good for various terrain projects of bases for other miniatures.
So was it all worth it? I must say I was hoping for more from this set, the casting is a bit poor on some of the miniatures and the detail very soft. I will have to see how these look once I apply the spray undercoat. That often highlights the detail a bit better. But for my £16.99 I got enough miniatures to create a fairly good crew of 8 or so miniatures, some creatures and characters for scenarios, 30 terrain objects and a mat that will make several pieces for games/terrain, all that considered it was probably worth it. But I do wonder why the Dreadball Xtreme set is £9.99 when the contents if bought separately on the Mantic Games site would be over £60 just for the miniatures. Are the individual team sets at £25 each better cast? Who knows the reason behind it. But I’m happy enough with the amount of material I got from this set.
Marcus gives us the next instalment of his Sci FI adaption of What a Tanker!
I have continued to develop my WA(G)T ideas since the first outing and this is the third time on the table. Well actually on the floor again, but I did at least get to use the table for game 2.
I have introduced some changes, and there are more ideas to come. Firstly, I went back to the original Lardy allocation for the dice orders. On reflection I didn’t feel much was gained by that change.
Secondly, this time I added in a command group each. I tried this in the first game but adjusted how they worked this time. For simplicity I gave both command groups four dice. The idea behind these is that they can (apart from making nice objectives for the enemy maybe…) use their dice to cancel enemy orders or supplement their own units die rolls. I played it that the command units needed to roll at least one 6 to use as a comms/data link. At first it was too easy to disrupt enemy shooting by allowing any dice rolled by a command unit to cancel an enemy order dice. This time I went for the following options:
Cancel one enemy move dice or substitute a friendly unit dice
Cancel or add an acquisition dice
Add/Improve aim
Add a shoot dice
Add a defensive dice
Comms/data link
I also added in missiles in both games. However, in the first game they didn’t work satisfactorily. In the second, well, you’ll see.
I added in a wider selection of cards than in the original WAT game, to add some sci-fi flavour. Some were successful, although those relating to missiles need to be revised.
Finally, influenced by PSC’s “Red Alert” which I have written about previously, the biggest change in this iteration was the number of vehicles on the table (sorry, floor!) with a shift to multiple element units. Essentially these employed the same stats as used previously with a hit just removing one vehicle.
There were a few new or adjusted vehicles. The “attack boats” were a Callisto class boat, as seen in the previous game, but with a change to a missile launcher in place of the forward twin gun. It is a modular design (the turrets on the models are magnetised). The two smaller boats notionally have vertical launch cells under the bow cover. These still acted like one unit, although in retrospect I think I should have upped the defence value and/or the hits that could be taken, especially on the larger Ganymede.
Additional units:
Core Dice
Max Attack
Defence
Movement
Attack Boats
6
Ganymede 8 missiles; Leda & Ersa 4 each
8
6
Pz 35 “Hornisse”
5
15
9
9
Command Units
4
0
8
7
The British started with 2 groups of 4 Chieftains, one of 4 Ferret’s and the naval group of Ganymede, Leda and Ersa plus the command group, see the header picture.
The NAU had 3 groups of 4 Wespe, 1 group of 4 Hornisse and the command group.
The Hornisse models are envisaged as earlier models which have not been completely replaced by a later version, but are ideal for service in a riverine/swamp environment (maybe they should be better than grav vehicles over this kind of terrain. I always envisaged grav vehicles having more “mushy” responsiveness over wide stretches of water)
Ersa and Leda are also from GZG. The Hornisse is from the Osario from the Scotia range. As an objective I thought about both making this the command groups or taking the previous route; the British was to get the Callisto off the far river edge with the NAU needing to prevent this. In the end I went for just targeting the naval group and playing out a few turns.
Activation worked as previously, but I forgot about the “exploding 6’s” for hits. It seemed likely to be a more destructive game anyway…
Here is an “drone” shot of the initial set up:
With shots from the British perspective:
And the NAU positions:
Turn 1:
The NAU took the initiative moving the green Pz 37 unit up, seen at the bottom of the drone recce photo, and the corresponding yellow unit to the top. The yellow unit benefited from a stealth card requiring an additional 2 acquisition dice. The British Ferrets activating next were unable to move, but prepped for future activation with the idea that they would designate targets for the missiles on the naval units if possible. The Ganymede group also moved up and were able to acquire and aim at the NAU yellow group having rolled three 6’s.
The cautious positioning continued since the British had no data link and the GBR yellow group were therefore unable to acquire the stealthed NAU yellows. No firing took place this turn.
Turn 2:
The NAU again gained the initiative (on exactly the same number of dice as the GBR), continuing a theme from the last game.
NAU command had rolled two 6 (one of which could be used as data link) and two “shoot” dice last turn. The dice rolled for the last turn continue to be available until a unit activates in the subsequent turn and rolls a new “hand” of dice.
The NAU orange “Hornisse” hover tanks moved forward in the centre, but were unable to find a target in line of sight. However, NAU blue had no such difficulty. Moving to acquire the naval group they launched a 15 dice attack. Despite the GBR side using a card for a D6 firer systems down, resulting in a reduction of only 1 attack dice to 14. A roll of 6655 didn’t seem too threatening, until the 8 defence dice yielded no blocks! A further desperate defensive systems card for the GBR took out one of the critical hits, but under the new rules either critical (6) or a double hit (55) would destroy a target. While the card saved the Ganymede the Ersa and Leda were destroyed.
In response the GBR yellow Chieftain unit moved out of cover and launch a retaliatory attack on the more exposed NAU yellow unit. With 13 attack dice -1 for range attenuation, the Brits roll 666655. Despite playing an “All power to shields” card, the NAU rolls only a 65 against the incoming fire, seeing three of the four vehicles in the unit destroyed. The remaining vehicle rolled a test and stayed in the fight (D6 higher than the number of vehicles destroyed)
GBR orange Ferrets attack the “Hornisse” unit, having rolled 6543 (using the wild 6 as a 2 to acquire), but hits of 665 were all blocked . The Ganymede went into stealth mode with a card.
Both command units now activated successively and maintained comms/data links.
The turn concluded with a GBR Green Cheiftain attack on the exposed NAU yellow over the river with a 6555 on 13 dice. With only a defence of 4 the unit still blocked with 65 resulting in one tank destroyed.
Turn 3:
This proved to be the final round of a vicious confrontation.
The NAU maintained the initiative and their yellow unit used an extra command unit acquisition dice to make 3 allowing them to target the Ganymede in stealth mode. 15 dice resulted in a 66666. A defensive systems card d4 roll resulted in two of these being cancelled. The Ganymede’s defence dice only took out one of the remaining hits, resulting in a mighty explosion as the last two critical hits crashed home. BOOM!
The NAU red Hornisse unit rolls 65511. However, despite being unable to acquire or aim, using a “snapshot” card, they are able to make a reduced level attack. A ten dice attack results in an unlikely 66655. The green unit with all power switched to attack is unable to stop any of these critical hits, although a damage control card cancels the non-criticals.
NAU command rolls a 5321. Without a data link it cannot use any of these dice to support its units. NAU Green rolls 633322 continuing the paralysis on the NAU left flank as without a shoot order, they cannot get into the fight.
The GBR command group still has data link and the GBR yellow unit uses a command unit 2 to acquire NAU yellow. With a 13566 and the 2, the GBR unit can make two attacks using the wild 66 as 44 shoot orders. A 66655 followed by 65555 leaves the NAU unit doomed, having only two for defence against each attack.
That effectively ended the action for the round and the game, with both sides more or less suffering equal damage and choosing to retire.
As alluded to earlier, the missile rules didn’t get tested and the cards need further development given the rule changes. Overall though, I like the changes; having the extra vehicles on the board “Red Alert” style and the command unit rules, although these could evolve further. While the game was excessively destructive I think that was a function of the lack of defensive allocation and a need to restructure the cards to reflect rule developments. The cards are a key thing to work on going forward.
However, missiles still need work. I am thinking of rolling one dice (probably a D6 but maybe others depending on missile characteristics) per missile and in the spirit of using the same dice in a different way, rolling the defence dice to block the specific number rolled (i.e. a defensive 6 would take out any attacking rolls of 6, a 2 would take out any attack rolls of 2 etc.)
I hope to develop the command group idea and use multiple groups (2/3 perhaps depending on the size of game).
I have an idea that I might do an Antarctic game going forward. I have a suitable shower curtain that I used as a mat for a club show game. However, I have no suitable vehicles or other terrain. In the interim I may break out my island terrain (a couple of pictures of which can be seen here) for the next game and hopefully some future blogs might cover painting vehicles (probably striping and re-painting old vehicles) in snow camo and creating some terrain.
John gives a the low down on the Kontraband expansion for Zona Alfa, and a prize winning battle report on one of the scenarios from the book.
John tells us “There’s a competition on the F/B page for battle reports. I sent a copy of the article to the rules author and I’ve won a copy of the rule book signed by the author and illustrator.”
Zona Alfa was published by Osprey in early 2020. It’s a skirmish game set in the Chernobyl exclusion zone where teams battle for salvage and hope to survive. I’d hoped to play it at the club, then along came the pandemic. The author supports the game well via the Stalker 7 website and solo or Coop rules were soon developed, where the player games against the zone itself rather than a physical opponent. I’ve posted 3 battle reports here and you can check out Guerrilla Miniature Games U Tube channel where a full 7 game campaign is played out. These rules are highly recommended.
Kontraband is an 80 page expansion to the Zona Alfa ruleset (which you will need to play Kontraband), available through Amazon as hardcopy or Wargames Vault as a pdf. It develops the ideas above to take the game in a different direction, recommending a play area of 3’ x 3’ and a crew of 4 veterans. It is set deep in the Exclusion Zone at high threat level so it’s worth playing through a few standard Zona Alfa games before diving in. Here’s what’s in the book.
Crew Members.
Crew members can either be Stalkers – good at combat or Scientists – good at technical tasks, a further option is to include a dog companion for which there are detailed rules and additional rules for Hazmat suits. Each crew member can have different equipment or skills so it’s worth spending the time to make them complementary.
Zone Setting.
The play area is populated with a recommended nine searchable locations (points of interest). The crew have to live off the land so these need to be searched for food, drink, ammo etc. to sustain the crew for the next game. There are 20 points of interest cards from which the 9 are randomly selected, shuffled and placed as an Incident Deck, the top card being revealed when a point of interest is searched. These cards are nearly all bad news and may spawn a zone hostile within close combat distance, dangerous plants or booby traps. There is a greater emphasis on melee combat than in Zona Alfa.
The objective of the game is to search Anomalies to retrieve artifacts (the recommended goal for a campaign being 12 artifacts). It is recommended that the play area for a game has 3 Anomalies to search. The rules for anomalies are fleshed out and there are options for different area effects if the anomaly search goes wrong – four ways to die. Models can be caught in a gravity force field, electrocuted, blasted or teleported away from the anomaly.
There is no game turn limit, the risk of staying in a dangerous area is handled by zone events. Starting on the second move, and becoming more likely with each subsequent move, there is a risk of a zone event, for example: an energy wave, vermin stampede, security patrol, angry mutant or anomaly movement to ruin your day.
New Stuff
This covers a better way of dealing with wounds than the original rule book, there are new weapons and accessories with better options for melee combat. Zone hostiles can be made more dangerous and the concept of fatigue and obsessions are introduced. In Zona Alfa, progression is covered from Rookie through to Veteran. In Kontraband, crew members can add sixth sense, extra toughness, and an additional skill after a number of survived missions.
Missions and Expeditions.
There are 6 separate mission ideas for pick- up games or to link together to form an expedition and a sample expedition of 5 missions in the rulebook. So whilst waiting for some new figures, I decided to try out the reconnaissance mission.
Here is the table layout with 9 POI (blank dice) and 3 anomalies (Spheres), the crew will enter at the bottom RH corner. Their mission is to search the 4 POI at the corners as a minimum, destroying all Zone Hostiles and retrieving samples from any of the corner POI which contain a hazard. I selected a crew with 3 Stalkers and 1 Scientist.
Turn 1.
For the first turn the crew will check out the POI closest to their entry point, the abandoned farm equipment. Each crew member can have three actions per turn and it’s worth using one action “alert” to provide overwatch for the Searcher. The top card from the Incident deck is revealed.
Here the vermin swarm is spawned by using a D10. The dice roll number is the distance in inches/2 from the POI and the facing gives the direction. The Leader (Nimzo), with the steady hands skill and a red dot sight has one action before the swarm can charge into the nearest model and attack it. They are destroyed.
Had the incident card been a bandit ambush, it’s likely that one or more crew members would have been out of action on turn one, unless crew members are on alert to take pre-emptive action.
The Searcher (Ali) has the scrounger skill so can search the POI twice, He secures rations, water and ammo which the crew will need for the next mission – in the game you have to think about the future as well as the present.
Turn 2
At each turn after turn 1 a D10 is rolled. The die roll is added to the turn number and if the result is greater than 10, a zone event occurs the subsequent turn. No zone event for turn 3.
The crew head up the board and Sukova (a Scientist) is best equipped to search the anomaly, which she does.
Here, a skill roll of 8 would normally fail but Sukova is equipped with a Detector which gives her a +2 bonus and she recovers an artefact, which would count towards a campaign goal.
Turn 3
A zone event, an anomaly shift will take place at the start of turn 4. The crew move up to the top RH corner of the board to search the POI, next turn. This will not affect the crew as they will be out of range.
Turn 4
No zone event is rolled. Spassky (Bounty Hunter) checks the POI – not the best option. The card reveals a zone hazard ‘Spores and Spitters’. He survives one attack and retrieves a sample from the POI.
Turn 5
The zone event roll results in an Alpha Predator entering the board at the start of turn 6.
The crew move towards the POI at the top left hand corner of the board but reserve an alert action to use against the Predator when it enters the board. Where possible, they move into cover, this will give protection against the attacking Predator which has Ranged and Melee combat abilities
Turn 6
An area emission effect will arrive at the start of turn 7
The predator enters, this is a dangerous opponent with high armour value. Ruined buildings prevent a direct attack route and it is forced wide and after 3 movement actions it has none left to attack the crew. It’s the crew’s turn and Ali fires the grenade launcher and scores one wound. The Leader gives him an extra action to get into cover. Spassky with Steady hands and a Red Dot sight on his battle rifle fires at the predator. It takes 3 firing actions but the predator is downed. Spassky is stuck in the open.
Turn 7
The Zone event roll results in another Alpha predator arriving. Things are not good for Spassky. He takes the full force of the Zone emission, he’s pinned and wounded and it takes all his actions to recover. Nimzo gives him an action to go on alert. The rest of the team move round to deal with the Predator when it enters.
Turn 8
The zone event roll brings up another zone emission at the start of the next turn.
The Predator enters, Ali fires a grenade which causes one wound, whilst Nimzo causes another. Spassky lobs a smoke grenade at the Predator which has to take a will check. It rolls a 10. This is an automatic pin and the will failure adds another. It will take 2 actions to remove the pinned counter but the Predator will still be able to attack Spassky once when it emerges from the smoke.
It’s a straight roll off, Spassky has the knife man skill and is armed with a Trench knife. Both adversaries roll a hit. Spassky could use his roll to parry the attack from the Predator but he’s a Bounty Hunter. Both take a wound and the Predator is destroyed.
Ali makes it to the thicket which holds the POI they must search for. Sukova manages to search a second anomaly and grab an artefact before ducking into cover. Nimzo orders Spassky to seek cover under farm machinery. Nimzo joins him there to apply a med kit.
Turn 9
The zone event for the next turn is another Alfa Predator
This turn, the effect of the zone emission is negated because all crew members are in cover. Nimzo and Spassky go on alert whilst Sukova searches a POI, which reveals a mutant.
The mutant spawns 4 inches away from the POI and is downed by Spassky. Sukova retrieves some ‘hotload’ ammo for the crew.
Meanwhile Ali’s search triggers a Zone Hazard – cobwebs.
Ali avoids the effect of the Zone Hazard, collecting a sample and retrieves a Lithium battery, Med Kit and heavy weapons reload. He will need this for the grenade launcher next mission.
Nimzo gives Ali an extra action so he can go on alert and get in position to attack the Predator the next turn
Turn 10
The zone event for move 11 is another zone emission.
The Predator enters but the crew are ready. Ali fires a grenade causing one wound and Spassky finishes it off with two shoot actions, the extra damage from his AS Val battle rifle proving crucial. In their move, the crew race towards the final POI that needs to be searched to complete the mission. They duck into cover to avoid the effect of the emission. Ali moves slower as he is slowed down by the heavy weapon.
Turn 11
The zone event for move 12 is the arrival of a Spetsnaz zone patrol
The zone emission has no effect and the crew continue towards the final POI. Spassky searches the POI – Marsh gas, if he fails the will check, he will fire at the nearest crew member! He passes and collects a sample having an action to clear the board. The rest of the crew follow, Ali needs to take a swig of Electric Juice to give him the extra action before the Zone Patrol enters.
The incident packed game had taken just over 90 minutes, a bit longer to make commentary notes and photos. I really enjoyed the game which adds extra detail to the Zona Alfa ruleset. I’ve played this scenario 4 times now, each game was different and challenging. I’d recommend this game to all players- whether you are a regular player or a sceptic who felt the original game wasn’t for them.
Reflections
Zona Alfa and Kontraband are well supported by the author who has answered any queries or clarification promptly. The Facebook page is an excellent and supportive source for the game, no bitchy point scorers on this site which is refreshing compared to other wargaming Facebook pages I subscribe to.
With the announcement of the release of Stargrave last year one of our members suggested that as a lockdown project those interested might like to kitbash or scratchbuild a shuttle or spaceship and paint up a 15mm crew for the game, with a target date of early 2021 when we hoped we might be able to resume meetings. The due date was of course extended.
A long time ago in a galaxy far, far away…
Actually, no, it was in the 1970’s in Rochester, I bought and made up an Airfix Space 1999 Eagle Transporter. Said model has followed me around various student lodgings, digs, flats and finally my current home.
So, I had a search in the loft and found the Eagle. It’s not had very much use, but at one point I completely repainted it into a non-cannon scheme.
Eagle as found
I noticed that the thruster units were missing, I have a vague recollection that I removed them for the last repaint, and put them in a ziplock bag somewhere. Exactly where I don’t recall, hopefully they will turn up at some point.
Having found the model I decided I didn’t want to do a full strip and repaint, but I wasn’t that keen on the colour scheme I had used for the doors on the cargo pod or cockpit.
I decided to just touch up the grey and repaint the cargo pod and cockpit panels. I started off by giving the doors and the cockpit panels a couple of coats of Foundation White. Once dry I then repainted the doors and panels with Fluorescent Orange, with some black lining. The instrument panels at the top of the doors were painted Gunmetal Grey.
I also decided that the main engine nozzles need a touch-up, matt black inside and Gunmetal Grey outside. I also repainted the black panels on the cockpit section. I suspect my decision to use a grey and orange scheme may have been influenced by old Royal Navy SAR helicopters.
I had a rummage through my spare transfer box and found quite a few sheets from some Hasegawa 1:72nd scalexe UH-1D Helicopters I’d built for Vietnam games. This gave me a load of duplicate registration numbers, plus some Japanese Kanji characters. I gloss varnished the areas I to which I was going to place the transfers, added some 5-digit numbers to the front and sides, and larger two-digit numbers to the sides and top surfaces. I also added a Kanji block to the sides of the cargo pod, these actually read Rikujōjieitai or “Japan Ground Self Defence Force”. The reasons for adding some Kanji characters will become clearer later.
Eagle repainted
While I was working on the Eagle and posting WIP pictures on the MWS groups.io discussion page a debate arose about whether I should give the Eagle some weapons. There were arguments in favour and against, some of which were quite passionate.
I decided to try and have the best of both worlds, and make the guns detachable. Looking at the Eagle the spinal lattice work had gaps of approximately one inch. I thought I could make some inserts to fit this lattice to hold the guns.
I started by cutting some 25mm square sections of 5mm foamboard, then trimming about 2 mm off each edge of one of the cardboard faces and the underlying foam. This needs to be done carefully so as not to cut through the second face. This results in a roughly 21mm square “plug” with a 25mm square upper face. I made two of these.
Left to right: 25mm square foamboard, markings for the edge cuts, the roughly 21mm square plug with 25mm upper face.
I painted the guns Gunmetal grey and the body of the pack as close a match to the Eagle’s grey as I could mix. I then gave the guns a liberal coat of Army Painter Dark Tone wash.
Eagle Guns (L to R) Chin gun from a Kirin walker, Triple Powergun, Remote Weapon Mount
These gun packs just push fit into the spinal lattice, the foam is flexible enough to deform as they fit into place and expand again to hold them solid. The separate twin turret just fits into a recess in the cockpit section.
Eagle guns mounted
Now onto the crew.
A while ago I was tempted by a couple of GZG figure packs that bore an uncanny resemblance to the cast of a certain 2000’s Sci Fi TV show and film. Shiny. So, these would become the crew of the Eagle.
I mounted these on some 16mm diameter washers, built up the bases with Polyfilla and undercoated them with grey primer.
I found a few pictures of the cast on the web and used those as inspiration for the colour scheme, or as close as I could get with the mostly Valljeo paints I had available. The bases were then finished off with basetex and the figures varnished.
Three of the cast had duplicate figures, either different clothing and / or weapons, so I painted the second version in slightly different colours so that they could be used as different characters if required.
Left to right: two versions each of the Captain, Enforcer and First Mate.
The other six members of the crew only had a single casting each:
Left to right: Telepathic teenage ninja girl and her brother the Doctor; Pilot (husband of the First Mate), Engineer, Shepherd (sort of a priest) and Courtesan.
Oh, and the use of the Kanji script on the Eagle? In the TV show the characters speak a mixture of American English and Mandarin (the latter usually mild profanities) and the latter also appears in company names and logos, the Kanji decals were the closest I had to Mandarin.
I originally thought that the Airfix kit was 1:72nd scale, but if so, the crew would have to be contortionists to fit in the cockpit.
Off to Google. There’s quite a few websites dedicated to Space: 1999. I found one website that states that the Eagle is 76 feet (23.16m) long which, given the model length of 300mm nose to engine nozzles, would make the kit approximately 1:77th scale; another compares the Airfix kit to the different Eagle models used in the TV series, which were not necessarily consistent with each other.
This suggests that the Airfix model is likely to be closer to 1:96th scale. I could probably start some arguments if I started making pronouncements that 15mm = 1:100 scale (personally I reckon it’s closer to 1:120), but the bottom line is I think that the Eagle looks OK next to 15mm figures, and the crew could get into the cockpit without scraping their heads on the ceiling.
Unarmed Eagle and crew
Wherever you have protagonists you need antagonists. As far as I could see GZG didn’t do any of the TV show’s “baddies”, the Alliance, so I went elsewhere.
Brigade models do some Uniformed Starship Crew and some Tank Crew in helmets. I got a pack of each. Unfortunately, the bases on these were too small to glue directly to the washers, so I had to cut some suitably sized cardboard fillers to bridge the gap. These figures got a generic mid grey uniform with some red and silver highlights here and there. Depending on your viewpoint these are the heroes of justice, or the lackeys of the oppressive state.
Alliance Officers: The Commander (2nd left) and her Lieutenants.Alliance Grunts
These chaps don’t have a ship of their own, but I do have a vehicle, a Brigade Javelot scout car, for them.
Grunts and car
It might be a bit tight for all 8 of them in there, so I might need to get them more transport!


You must be logged in to post a comment.