A short round up of games played at our last meeting.
The usual FOG suspects staged a 6mm game, Mid Republican Roman vs Later Selucid.
Mark ran a 28mm Judge Dredd game, with virulent scenery, you may need your sunglasses.
Close up of the tower block
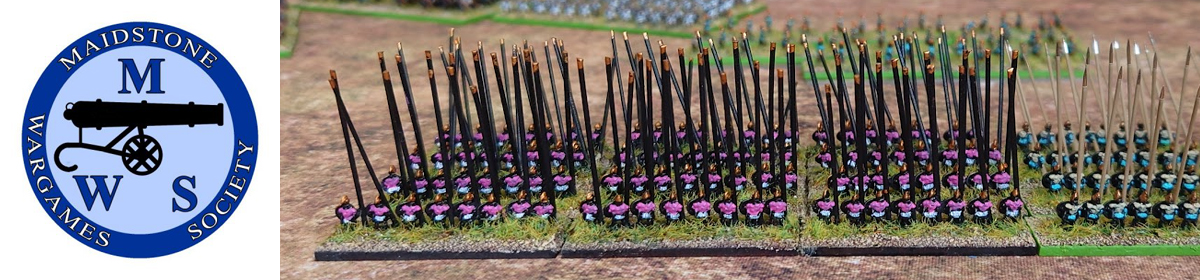
Jeremey and Stephen continued their refight of the War of the Roses, this time recreating Towton.
Each were “assisted” by two sub commanders this time, on the Lancastrian side with Stephen were Andy and Tony G, with Tony F and Peter joining the Yorkist commander, Jeremey.
Andy & Tony F both switched sides since the last campaign game (not unusual in the War of the Roses). There will be a full report on this game written up by the victorious commander.
Armies deployed, Yorkist on the left, Lancastrian on the rightYorkist CentreMore YorkistsStephen’s victorious Border Horse.A truly dismal roll by the Lancastrian’s French crossbowmen, three 1sLancastrian centre, what’s left of it.The Lancastrian dead. Units with red dice were Andy’s, blue dice were Tony G’s and black dice were Stephen’s
A fresh look at Border Reivers by society member John.
Above – The Dead Pool – Curst Eckie comes a cropper
Introduction
As many of you know this subject is dear to my heart since reading “Steel Bonnets” by George MacDonald Fraser, the Flashman novelist – a cracking read. It stimulated me to wargame this period when I first joined the club and the game featured as a club game shortly after. Here’s a brief historical introduction for those who are unfamiliar with the period.
The Border Reiver is a unique figure in British history. Starting in the late Middle Ages incursions from both sides of the England/ Scotland border and the method of inheritance where the land was shared between all the sons led to a situation where it was difficult to maintain a living in the area. Livestock breeding became the mainstay of life and through it, cattle rustling and the attendant protection racket (Blackmail) became widespread. It should be noted that these activities were not exclusively English/ Scottish affairs and there was much inter marriage across the border making policing more difficult. These activities reached a peak in the 16th century and were brought to an abrupt end when James I and VI came to the English throne.
I had been unhappy with all the rulesets I’d tried as I didn’t think they captured the small-scale skirmishes I was keen to game. Spurred on by finding I have probable genetic links to two Reiver families through my Mother’s Ulster roots, I decided to write my own rules. Reiving reached a peak in the mid to late sixteenth century and it is this period that is the subject of these rules.
Design Goals
Before starting out, I set some design goals
Scale – These rules are not about large private armies but focus on the family units where the head of the house could be served a dish of spurs when the larder was empty and there were mouths to feed. I thought about 20 figures in total on a 3ft playing surface which fitted my collection of old 28mm figures and accurate scratch built fortified farm houses known as Bastles.
Table set up, the quiet before the storm at Gatehouse North Bastle
Style – I felt strongly that the games had to be scenario led. It wasn’t about eliminating the Opponent’s force but achieving the scenario objective. In fact, in the Reiver world eliminating the Opponent’s force could lead to a noose or provoke a feud (scenarios and rules for feuds are included). To this end I have outlines for nearly twenty different scenarios and there is scope to link scenarios for a club day. I hope at some stage to add a campaign system.
Mechanics
Characters – I gave individual Reivers a status Elite, Veteran, Borderer and Farmer/Levy. According to status, reivers would have a number of skills. For each mission a Leader would pick a gang with skills specific for that mission. Combat skills are included so a player has to choose between a mixture of combat skills and mission specific skills before starting. Leaders get a Leader skill automatically; they can issue orders to other members of the gang and rally them. Leaders can allocate one of their skill points to be Inspired. They have a larger command radius and rally models more easily. I am also working on a series of traits to flesh out the characters further. In a small-scale skirmish, this character development seems important.
Activation – I did not believe an I go/you go approach was the right so went for a card driven method with an End of Turn card. Reivers were known by nicknames so individually named cards was just right and I decided the End of Turn card should be denoted by a weather condition – Torrential downpour for day actions and Full Moon for night actions. This would mean that some characters do not get to activate. Other cards would cover changes in weather (affecting visibility movement and ranged combat), a key feature of Reiver actions was stealth and forces would mainly start on hidden markers reflecting their sneaky activities.
Hidden countersA selection of cards.
Sleet shows the adverse effects when drawn. Scumfished (smoking out a building’s occupants) has a turn counter until the effect is triggered
Forces of law and order, weather and End of Turn cardsCharacter cards
Actions – an activated model has up to three actions, this will be reduced depending on weather, wounds or if carrying out a specific action. Some actions require a success roll on two D6, if the model has the relevant skill, it rolls an extra D6 and takes the best two results.
Combat – I reasoned that close combat between two opponents with similar capabilities and well armoured would favour the defender and their armour. Those models with close combat skills get to roll additional dice and pick the best roll. For ranged combat, models get to roll additional dice and select the best roll too, following the same principle. Those models which are severely wounded reroll to see if the model is killed. The method ensures that models stick around for longer, so the game does not come to a premature conclusion.
Morale – This is tested at two levels, each model receives a morale marker each time something bad happens such as failing a skill check when climbing a ladder and hence falling off, when a model stumbles during movement or after combat and when wounded. It’s the Leader’s role to get the figures to “snap to it” . If the morale markers are not removed, the individual model has to check and may quit the field. If the model is involved in close combat, these morale markers negatively affect the modified dice roll and the model is more likely to receive a severe wound.
I have put in a force morale check as well. A point can be reached where the number of casualties or the amount of bad luck suffered causes the whole gang to retreat or quit the field.
Encounters at Night – it’s more than just the reduced visibility, I’ve added getting lost as a risk for those models which move out of command radius and a risk of attacking models on the same side by use of a “Scotch Mist” card.
More cards – Red Mist puts models in Feud mode
Forces of Law and Order – These are represented by two leaders, an area Lawman and his Deputy. They command a group of Garrison Levy who can only act under command and a Houndsman with dangerous dogs.
Play Testing
I’d like to thank Tony G, Tim, Bob, Jon and Alex for their helping in trying out the rules. So far the games appear to have gone well though there is quite a bit to do still and Alex gave some good ideas to help streamline game play and some suggestions to use for the campaign section as these are developed. Thanks to Tony G for helping with the garrison activation (yes, you were right about ranged combat so I have toned this down) There is still a lot to do so I’ll be carrying out more play testing so if you fancy trying something very different, please let me know.
Below are a selection of photos from play testing so far.
Dastardly Halls make off with the cattle.Fire to the Door! A pre requisite of Scumfishing- smoking inhabitants out of a BastleStowlugs apprehendedBull is ironically gored
Stephen and Andy report on a comparison of two Medieval rulesets.
We decided to try fighting the same scenario with two sets of Medieval Wargames rules, Lion Rampant 2nd edition and Baron’s War 2nd edition. We would keep the armies as similar as possible in the two games, subject to the requirements of the respective rules.
We based our scenario on the Baron’s War scenario 10 Hidden Treasures and Lion Rampant Scenario 12 The Taxman Cometh.
In Hidden Treasures the players take turns to place six objectives on the table, if a player has a unit in contact with an objective at the start of the turn, they roll a D6, on a 6 that objective is revealed to be the treasure and the other objectives are removed. Who ever controls the treasure at the end of the fifth turn wins the game.
For the Lion Rampant version, we kept the same number of objectives and score to reveal the treasure, but in keeping with the Lion Rampant Glory system we decided that if the player controlling the treasure took the treasure off table he would receive 5 Glory, but only 3 Glory if the treasure was under his control but still on table at the end of the game, plus or minus Glory from Boasts.
We set the terrain up with a small village in the centre of the table, with a couple of fenced fields nearby, with some hills and woods on the flanks. We would keep the same terrain for both games.
1 x Elite cavalry with leader (with Commanding trait) @ 6 points
1 x Flemish Heavy Infantry @ 4 points
2 x Skirmishers with bows @ 4 points
1 x Genoese Crossbows with pavises @ 6 points
1 x German mercenaries (Warriors) @ 4 points
Stephen won the die roll to determine Attacker / Defender and took on the nominal Attacker roll, the deployment mechanism we used was that the defender deployed any 1- or 2-point units, followed by the attacker doing the same, then repeating the sequence for 3- or 4-point units and finally units costing 5 or more units. The end of the game would be determined b either one player getting the treasure off table, or once there were five or fewer units on the table a die roll at the start of each turn of less than the number of units left on table.
Turn 1. Stephen got off to a good start, advancing all his units except his Elite cavalry, I responded by advancing my Heavy Cavalry to contact one of the objectives but ground to a halt when my Heavy Infantry refused to move.
Turn 2. Stephen continued his advance on the objectives, with one of his Skirmisher units on his left flank contacting one of the objectives. I rolled for the objective my Heavy Cavalry had contacted last turn, with no success, so decided to move my Heavy Cavalry on towards Stephen’s Skirmishers and their objective. I then moved my Heavy Foot towards the first objective, and my other units towards other objectives.
Turn 3. Stephen’s Skirmishers rolled for the objective they had contacted and it came up a 6 the treasure had been found! At this point all the other objectives were removed. Stephen immediately pulled his Skirmishers back and started to move his other units towards his left flank. My Heavy Cavalry were just about close enough to Stephen’s skirmishers with the treasure that I could try to charge them, hoping they would fail their probable Evade reaction. Unfortunately for me Stephen succeeded in evading, his archery taking out one of my riders, and his evade move took him just too far away for me to contact him, my Cavalry then failed their courage test and fell back. To add insult to injury, my next activation to shoot with my Skirmishers at his Elite Cavalry failed, ending my turn.
Turn 4. Stephen continued to pull his treasure carrying Skirmishers back towards his table edge, while he brought his Elite Cavalry across to cover them, and advanced his Heavy Foot through the central village towards my Light Foot. This time I managed to activate all my units, rallying my Heavy Cavalry, putting my Light Foot into Wall of Spears anticipating an attack by Stephen’s Heavy Foot, advancing my Crossbows down the side of the village hoping to be able to shoot at his Elite Cavalry in a later turn, and moving my Elite Cavalry towards my right flank.
Andy’s Elite Cavalry halted by a flimsy fence.
Turn 5, Stephen continued to pull back his Skirmishers with the treasure, with his Elite Cavalry getting closer to support them, as were Stephen’s Crossbows. I advanced my Heavy Cavalry towards his Skirmishers, and my Elite Cavalry through one of the fields, but my Crossbows failed in their shooting attempt.
Turn 6 was short, Stephen’s Crossbows and my Heavy Cavalry both failing their activation attempts.
Turn 7 saw Stephen issue a challenge to my Leader, a duel must be fought! Had I refused the challenge all my units would have had to take a courage test due to my Leader’s cowardice. Honour would not allow that, so forth my Leader went. The Duel consisted of three dice each, scoring hits on a 5 or 6, if one Leader scores more hits than the other the loser dies! The duel was anticlimactic, one hit each resulting in a draw, both leaders returned to their units, their honour upheld. Stephen’s German Mercenaries charge my Skirmishers on my left, the Skirmishers evaded, causing a casualty on the Germans, and ending up too far away to be contacted. The Germans passed their courage test, but on my subsequent turn my Skirmishers shot again, causing two more casualties and a courage test which the Germans promptly failed catastrophically, causing them to rout from the field. My Heavy Cavalry charged Stephen’s Crossbows, I won the ensuing melee and the Crossbows failed their courage test becoming battered.
Turn 8 saw Stephen’s Crossbowmen fail their Rally test, but he then went on the offensive, his Heavy Infantry charged my Light Infantry, beating my lighter troops, who then failed their courage test becoming battered
Andy’s Light Foot fall back battered (red marker) from Stephen’s Heavy Foot
Stephen’s Knights then charged my Heavy Cavalry with the fight again going in Stephen’s favour and my Cavalry failing their courage tests and also becoming battered.
Andy’s Heavy Cavalry battered and down to a single figure as Stephen’s Knights look on and Andy’s Heavy Foot advance slowly through a ploughed field.
On my turn both my Heavy Cavalry and Light Infantry failed their Rally tests, the Heavy Cavalry so badly that they fled the field.
Turn 9, Stephen rallied his crossbowmen and got the Treasure bearers off table, ending the game.
So, on to the accounting, Stephen received 5 Glory for getting the treasure off the field of battle, he also succeeded in all three boasts he made:
“They shall tremble before me”, 2 of my units battered at the same time, worth 2 Glory.
“I shall drive them back into the sea”, make one unit retreat off table, worth 1 Glory.
“I shall challenge their leader to a duel”, self-explanatory, worth 1 Glory.
On the other hands, I made two boasts, both of which I failed to achieve, so scoring -1 Glory each:
“They shall tremble before me”, see above.
“I shall destroy more units than I lose”, worth 2 Glory.
Final scores: Stephen 9 Glory, Andy -2 Glory. A decisive victory to Stephen.
Apologies for the lack of photos of this game, I got too tied up in fighting the battle to take pictures.
Baron’s War
Stephen takes over with the account of the Baron’s War game.
We put our retinues together to mirror the Lion Rampant equivalents, but under the army composition rules of Barons’ War – so not identical, but as good as.
Stephen’s Retinue:
Unit: 1 x Veteran Lord Commander (mounted), 5 x Regular Knights (mounted)
Unit: 1 x Veteran Serjeant Commander, 5 x Regular Serjeants
Unit: 1 x Veteran Serjeant Commander, 5 x Regular Serjeants
Unit: 6 x Veteran Bowmen
Unit: 10 x Green Crossbows
Andy’s Retinue:
Unit: 1 x Veteran Lord Commander (mounted), 3 x Regular Knights (mounted)
Unit: 1 x Veteran Serjeant Commander, 5 x Regular Spearmen
Unit: 4 x Regular Mounted Sergeants
Unit: 6 x Regular Crossbowmen
Unit: 5 x Green Spearmen
Unit: 5 x Green Spearmen
Unit: 6 x Green Bowmen
So, same scenario – find the hidden treasure and get off with it.
The main point of these games was to compare the rules. For Barons’ War a unit has one activation, but that can be improved to two, or maybe three, if you have a commander attached to the unit (and a commander can also give extra orders to other units). And in Baron’s War players alternate activation of units. This means there is a fundamental tactical difference between the rules – in Lion Rampant you are thinking about what you are going to do now. That’s also the case in Barons’ War (BW for short), but in BW you are also thinking about what your opponent is going to do in the same round, so you have to think about which unit is best to activate, whether to hold activations back for later (in BW your can do a reaction to your opponent’s action), and how the round will develop so you can exploit it. It’s a bit like Saga in that respect – knowing when to unleash everything and when to hold something back for later.
Off to war we go
Anyway, let’s get on with the game.
We rolled for deployment, as per BW rules. Andy was the ‘red’ side and could deploy in the middle, which he did and meant he was already in control of a couple of objective markers.
Andy’s skirmishers about to search an objective while his Crossbowmen look for targetsAndy’s light foot gather round two more objectives, while his Cavalry trot off
I had the flanks to deploy on, not quite in control of any objectives, but no more than a move away.
Venison tonight lads!
Turn one, and Andy searched the objectives, but no hidden treasure was found. My veteran archers on a small rise took aim and let fly at a group of mounted serjeants – two went down to the deadly fire and first blood went to me.
Ready, aim…
Andy then passed a couple of activations, so I took advantage of this to move units up to take control of a pair of objectives. My crossbowmen (only inexperienced green troops – in BW at least 10% of your army has to be made up of green troops) let rip at Andy’s archers hiding beside a pig-pen. Two were taken down, he failed his morale check and they were broken. However, Andy then returned the gesture, fired back with his crossbows, and three of my troops went down and were also broken. Oh well, eh?
On the second turn my spearmen on the left searched the objective marker and lo and behold, what do they find – treasure! Yup, more church vestments. Funnily enough, the treasure in the Lion Rampant game was found in more or less the exact same spot!
The chase was now on. On Turn three I started to move my spearmen toward the table edge. And this is where the tactical nature of BW may have a slight edge over Lion Rampant, because at the start of the turn both sides roll for initiative to see who goes first. But also (and like Lion Rampant) you have to do compulsory morale checks before moving on to ‘new’ activations. Which means you can’t necessarily guarantee you will move those troops you need to move before your opponent. This builds in tension, tactics, and what makes for an exciting game. In turn three I also did what I think may have been a rash move – my knights charged Andy’s spearmen. Knights do though, eh? That’s why they’re knights. OK, so I demolished and shocked his infantry, but I’d also put myself in charge range of his knights and I had no reactions left.
The knights square up
Andy did what he ought to do – his knights charged mine. It did not go how I would have liked. It took a couple of rounds, but my knights eventually succumbed.
Such an ignoble ending
This also left the game in balance. Because at the end of turn five (the duration of the scenario) I had achieved the scenario objective – find the hidden treasure and get away with it. However, Andy had also achieved the general game-end criteria – kill your opponent’s commander (and none of your other commanders pass a morale check to take control). So, who won? We’ll have to leave that one to the chroniclers.
Let’s rumble!
Final thoughts. For me, it is hard to choose between the two because they are so different. Lion Rampant is a quick pick-up game that anyone can jump into and get the hang of in just a turn or two. There is a lot of merit in that. BW requires a little bit of pre-planning (working out and putting together a suitable retinue), but it’s also a more tactical game which means it will take longer for a newcomer to pick up and appreciate the subtleties. No, not more complex, but more subtle. Of course, that’s not to say there are no tactics to Lion Rampant (there are!) but Lion Rampant does lack the depth of BW. Personally, I couldn’t choose between the two. Lucky me that I don’t have to. There is a place for both depending on what you are after for a game – sometimes I want that simplicity and quick ‘pick-up’ nature, sometimes I want a more challenging and thoughtful game. Lucky me that I have both on my bookshelf and can choose depending on my whim. If you are interested in medieval wargames then I’d suggest you have them both as well, because I can’t pick one over the other.
Back to Andy for his thoughts on the two rulesets.
I should open by saying I have played Lion Rampant, and other rulesets in the same family, for many years and am very familiar with them, whereas I have only played Baron’s War once or twice before. This may have an impact on my assessment of the two sets of rules. Both sets of rules have a small-ish number of unit types to start with, and both allow you to upgrade / configure units but Baron’s War has more variety in the options you can apply, and a couple of limitations on force composition, a minimum of 10% of your points must be spent on Green troops, and no more than 50% of your force can be used for units with attached commanders. Lion Rampant has fewer, simpler, upgrade options, and no mandatory requirements for force composition.
I would say that Lion Rampant is the easier game to pick up, but Baron’s War can probably give you more variety in force composition. It’s a “horses for courses” kind of situation, and there is room in my gaming calendar for both rulesets.
We had a very good turn out at the last meeting, 5 games in progress with over 20 members present.
First up, John and Alex were play testing John’s Border Reivers game.
All quiet at the Bastle house, for now.Action at the ford.
Mark ran another Dungeons and Dragons session, taking his adventurers to sea and then deep into the dungeon depths.
The dungeon master looks on as the adventurers ponder their next action.Action at the QuaysideDungeon delvingWho let the dogs out?
Paul ran a 6mm FoG Ancients game, Late Bulgarians vs Ottomans.
Light cavalry on the right somewhat outnumberedThe centre of the battle seems a bit emptyClash of cavalry
Stephen and Jeremey continued their refight of the War of the Roses, using Sword and Spear rules, this time recreating the Second Battle of St Albans. There will be a write up of this game shortly.
The Yorkist camp, artillery and cavalry await the approaching Lancastrian vanguard.The artillery has fallen to Lancastrian archery, but the first Yorkist reinforcements are now approaching the campA Lancastrian pike block about to dispose of some Yorkist archers, but Yorkist Men at Arms are waiting behind the archers.Towards the end of the battle, the Yorkists have pushed the Lancastrians back from the campOn the Yorkist left flank there are few Lancastrians left.
Finally, Mark H ran a War of the Spanish Succession game, using his own fast play rules.
Cavalry advanceMore CavalryThe armies line upCavalry wings clashThe infantry engage
It’s been a while since we posted any pictures of society meetings, but here are some from our latest meeting, which had a good turn out with five games in progress and around 20 members present.
First up we have a 2mm Ancients game using Strength and Honour rules, Republican Romans vs Germans.
Marcomanni & Suebi Warbands clash with the AuxiliaSame clash, different angleClose up of the Suebi WarbandLine of battle
Our second game was a clash between a 100 Year’s War English army and some Ottoman Turks, this time in 6mm using Field of Glory rules
Archers flanking Men at ArmsClose up of ArchersArchers holding the hillCavalry charge the Men at ArmsMen at arms punch a hole through the line of Archers
Slightly later historically we turn to the War of the Roses, and a game based on the Battle of Wakefield, this time in 15mm using Sword and Spear rules.
Battle of Wakefield, starting positions. Jeremey feeling somewhat surrounded.
In the background you can see Stephen’s representation of Sandal Castle, you can see an article on its construction here.
Close up of the Yorkist right flank.Lancastrian Left Flanking forceYorkist Archers, the small dice show the remaining strengthUneven archery duel, all units started at strength 3.
Our fourth game, chronologically, takes us to the East End of London, where things go bump in the night. A Victorian Gothic Horror game using “A Fist Full of Lead” rules in 28mm.
Just another day in the East EndA bit of a barneyHello, hello, hello, what’s going on here aaarghhIt’s not even safe indoorsA Hansom CabPolice raid a house of ill reputeThey’s big n hairy & I be afraid of ’em
And finally, we go to Vietnam, with a 1:600 scale Air game using Thud Ridge rules. Only a couple of photos of this game unfortunately.
SAM-2 site protecting a vital bridge as a Skyhawk attacks.Close up of the Skyhawk, pursued by MiG-15s
Stephen reports on a solo game using Song of Blades and Heroes
Apologies from the editorial team, we messed up the publishing schedule.
It is the year 1266. The Baron’s War, led by Simon de Montfort, is at an end – de Montfort and his supporters were beaten decisively at Evesham the previous year.
Since then, not all has been lost. Many of those still devoted to the cause, though dispersed and leaderless, still resist King Henry’s rule.
We find ourselves somewhere in the hills overlooking the Wye valley, early autumn, 1266. A young and idealistic knight, Sir Hugh Bolton, a loyal follower of de Montfort’s, has been lying low on the Welsh border, as have so many of the rebels.
Sir Hugh has received word that another rebel knight, Sir William le Bleu, is also in the area.
Together, they have decided to meet at an isolated traveller’s inn – Woodfell Hall – high above the Wye valley. As night falls, the two knights and their accomplices make their way to their secret rendezvous.
However, what Sir Hugh does not know is that Sir William is not all he seems. His real name is Sir Peter of the Wash, and he is a loyal retainer of Prince Edward! Sir Peter has been sent on a mission by the prince to seek out rebels hiding in the marches and either arrest them or, better still, kill them!
With Sir Hugh is a knight companion, Sir Aymer, plus four experienced men at arms and another four archers – all veterans of Evesham. Sir William/Peter is also not alone. Prince Edward has sent with him two other knights, Sir Fulkes and Sir Gilbert, plus a troop of five spearmen led by a man at arms, and three crossbow-armed sergeants.
Sir Peter’s Men Arrive On The Scene
The first couple of turns were quite quick, with each side only managing to activate one or two models. Sir Peter gave an order to the crossbows to advance up the road, but then the spearmen (presumably tripping over something in the dark) failed. Similarly, Sir Hugh attempted to get his retinue to head down the road toward Woodfell Hall, but only the archers made it.
Sir Hugh With Archers Up Front
It was a slow initial advance.
Things changed for Sir Peter though – he made a group activation of the crossbows again, and they rolled three successes, meaning they could take three actions. They double-timed down the road, coming up to Woodfell Hall, and seeing Sir Hugh and his men further down the road, raised their crossbows and let fly!
The Spearmen Start To Move
This obviously took Sir Hugh by surprise. But fortunately for him (well, those who had been targeted) the shots had no effect. Two can play at that game, thought Sir Hugh, and he ordered his archers to return the gesture. But since the archers, like the crossbows, had been shooting at long range the effect was the same – no hits.
A Volley Of Arrows
The pace soon picked up.
One of the crossbowmen climbed up the side of the inn to take position on a veranda where he could snipe.
Mmm…Wonder If I Can Climb Up That
Meanwhile Sir Peter tried to give more group orders to the spearmen to bring them up in support – his encouragements worked this time.
Sir Hugh’s men also started pouring into the battle. The archers came up to the road junction, formed a line, and let loose. This was a much better tactic – one of Sir Peter’s crossbowmen was struck, and not only struck, but hit with a gruesome shot! Down he went with blood shooting all over the place from the arrow that had severed his jugular. This caused a morale check amongst Sir Peter’s men. The knights held firm, but the tardy spearmen all fell back a little, not wishing to be the next ones to suffer such a terrible fate.
Lying In A Pool Of Blood With An Arrow In The Neck
The remaining crossbowmen showed they could do just as well. Raising their weapons, they took aim at two of Sir Hugh’s men at arms. Both bolts hit home – one of the men at arms fell down dead, and the other was knocked down with a bolt sticking out of his thigh.
One Knocked Down (face down) One Killed (face up)
Sir Hugh got the rest of his men going, urging them to advance through the scrub and bushes that ran alongside the road. The archers drew their arrows again and had another go.
And the same thing happened!
Down went the crossbowman hiding on the veranda, another gruesome kill! This left the remaining crossbowman feeling nervous and, with his morale faltering, he made a run for the rear before an arrow found him and left him a messy, bloody, heap like his friends.
Blood Drips Into The Water Trough
All this missile fire was well enough, but both sides were keen to get stuck in with sword and shield and sort this out the honourable way. Sir Hugh and one of his men at arms had been using Woodfell Hall for cover as they advanced, and the others had moved through the bushes, which meant they had the drop on Sir Peter, whose retinue had stalled under the effectiveness of the longbows.
By the horse troughs outside the inn is where the two sides finally came to blows.
The Melee Starts
The archers tried to stand back and get in a shot where they could, but in the darkness it would be reckless to shoot into the melee. Sir Peter barked out his orders to the spearmen to urge them forward into the melee, and his knight companions also came into the fight.
It was turning into quite a mess. Sir Hugh’s force was split into three – Sir Hugh with one of the men at arms coming down the road, Sir Aymer with another man at arms coming through the bushes, and the archers waiting to take a shot at any target that presented itself.
More Knocked Down Than Killed
Meanwhile Sir Peter’s troops were more consolidated, though this had been more by accident than design. But what this meant was that one of Sir Peter’s men knocked down one of Sir Hugh’s men whilst another was able to come up and finish them off as they rolled around on the ground.
More Killed Than Knocked Down
Then the telling blow happened. Sir Hugh and Sir Peter faced off against each other, and in only a brief exchange Sir Hugh was knocked to the ground and then Sir Fulkes came up and struck Sir Hugh the killing blow!
The fight continued for another couple of rounds, but it was obvious the rebels had been beaten. Realising their cause was lost the remaining rebels made a break and ran.
Sir Peter and his retinue had come out the winners. They had earned their blood money.
Oops, a bit of a scheduling snafu today, but, better late than never, Stephen describes his latest project:
Like a lot of projects, this one started off small and just grew.
Originally, all I wanted was half a dozen elves for games like Song of Blades and Heroes. I looked around at the different options and I saw that buying half dozen metal miniatures was more or less the same cost as buying a box of 30 placcy Oathmark elves, and the extra numbers may give me a few options.
So inevitably this grew and I made them into a Dragon Rampant force.
Because you do, eh?
I like my fantasy to have that ‘alternate history’ vibe to it. You know, what if the ancient Greek heroes really had existed, what if elves and dwarves had existed.
That just sits better with me.
And given that my historical interests lie in the early medieval period (13th century is where my real interest lies) then I thought to myself, ‘let’s imagine the elves as if they were present in 11th century Britain’.
So that’s the aesthetic I’ve gone for, rather than Tolkien or (horror of horrors) the GW look.
The host of Dean
In the Hexham Chronicle, under the year 1138, it is recorded, ‘…after payment then did the aelfson unwrap their bows and they stood with the king’s men and brought upon the Scots a deadly rain of arrows’. This early reference to elves suggests it was they who brought to the English armies the battle tactic of a large body of formed archers that was to prove so popular in later centuries. However, the earliest reference to elves can be found in the Anglo-Saxon Chronicle. In the year 855 we find this cryptic reference: ‘And so did Milean, lord of the elves, bring to the king a white horse for his journey to Rome, as was the custom of old for the elves to pay honour to their lord.’ What this suggests is that elves had been known in the country for a long time. A later ASC reference says, ‘King Henry was reminded that Epping had been held by the elves since time immemorial and so the king rendered unto the elves that which he owed’. We also know that in 1322 the elves were no longer present in Britain since Chaucer, writing in 1381 says, ‘he was named Robyn of the Hode / and of Epping aelf he was sired / and with Thomas of Lancaster / he fled with kin and off they all rode.’ – interesting that he has Robin Hood as an elf!
We know that in Britain there were two main elven settlements – one in the forest of Dean, and another in Epping. Both of these were royal forests so it is unknown exactly what the relationship between the elven communities and the crown was. Undoubtedly the elves would have sworn fealty to the English crown as sovereign, and it is known they generally supported the English throne on matters (the exception being in 1171 when the elven court were signatories to a papal letter for Henry II’s involvement with the Thomas Beckett affair).
The elves that I have collected represent those from the Enclave of Dean (as the elves referred to the forest). This can be seen by their preference for red trimmings – those from Epping preferring blue. It’s not known if this was a fixed coloration (because there are many exceptions) or if it was just a general trend.
The Lord and Lady of Dean
The Lady and Lord of Dean
These two form the main leaders of the elven force.
The Lady is a single-model hero and I have her as Light Foot with the short-range missiles upgrade (to represent magical flurries of thorns and brambles) and also the full spellcaster upgrade. She is a Ral Partha model.
The Lord is also a single-model hero and I have marked him up as Elite Foot with the missiles upgrade.
Forest Guardians
Forest Guardians
These are the minor nobles – well-equipped and armoured. I have John Lambert to thank for these because he kindly donated some chainmail clad torsos from one of the Gripping Beast sets, which I then kept themed using the spare heads and arms from the Oathmark box. The shields came from the spares box and I went with 11th century Byzantine shield designs because that way they would both be period specific but also different.
They are Heavy Foot – with no other upgrades. I was desperate to avoid the elves as ‘super humans’ because it’s not a trope I like, so I resisted giving them the offensive upgrade.
The Company of the Glade and The Company of the Gloom
The Company of the GladeThe Company of the Gloom
These are two archer units made from the Oathmark box. This is pretty much as they come. I decided not to put them in a uniform, because I don’t like that look. So they got random colours but I worked from a limited palette to help tie them together.
In deciding what these are I was again in a dilemma. They’re elves, so they must be expert archers, right? Well, yes, I suppose so. But I decided the elven reputation for archery would come from their preference for large numbers of archers rather than being a horde of Robin Hoods. So I have them as Light Missiles, and bravely fought off the temptation to give them the sharpshooter upgrade. However, that remains an option if I need to up the points cost.
Oak, Ash and Thorn
Oak, Ash and Thorn; the Treekin
These represent the elves’ main allies – the forest itself. I have called these Treekin and they represent the spirit of the forest. The phrase ‘oak, ash, and thorn’ is a description that was given to ancient woodlands, so it seems right. These are also from Ral Partha.
I have these as a reduced model unit of Elite Foot. I decided against Lesser Warbeasts because I felt that troop type was too brittle and didn’t reflect the nature of the troops. I almost nearly made them a Greater Warbeast unit, but the Elite Foot stats seemed right.
Lightfoot and Kin
Lightfoot and Kin
Forgive me, a moment’s whimsy. There’s not much to say here. They are faeries, pixies, sprites – call them what you will. Again, sourced from Ral Partha.
What they are is a unit of Scouts with the invisibility upgrade.
So that’s my new elven force.
The problem is that there’s still room in the box for more. And we all know what that means…
For our recent Stargrave jaunt to the planet of Aqua Sulis, the five players were required to bring a boat. It could be anything that floated in, on or above the water, there were no design rules. Here we run over the various tubs, buckets and hulks that were served up.
Eric
Eric went for a laser-cut survey shuttle from Blotz that could obviously float on the surface of the sea. He should have done a little better with the security features, since it turned out to be very easy to break down the back door, shoot the pilot and steal the boat.
Andy
A few months ago, Stephen said he would run a Stargrave scenario based on a Waterworld location, and asked us to build some form of maritime transport.
I did a web search for 28mm boats, and amongst the hits was a Special Operations Craft-Riverine (SOC-R) from AnyScaleModels.
The main hull is around 7” long and 2.25” wide. Plenty of room for my crew I thought.
I needed to make it look a bit more Sci Fi than modern, so I asked Tony at Brigade if he had some suitable engine nacelles I could scrounge, he came up with some from their 15mm Perseus VTOL. I also had a few other bits and pieces from Brigade in the bits box: some Sensor turrets and some Heavy Laser guns from their Mercenary range.
Both the boat and engine nacelles had a few air bubbles that needed to be filled, I used some Humbrol Model filler for this. After drying and sanding down, the boat components and nacelles were washed in soapy water and allowed to dry.
The wings attached to the nacelles were quite thin, 2-3mm at most, this required that I drill and pin the short wings to the boat hull, as a glue only joint wouldn’t be sufficient.
I decided to mount the engine nacelles roughly amidships, in line with the pilot’s seat and control panel. I drilled a hole for the sensor turret in the front deck. On reflection I might have offset the pilot’s seat to one side rather than have it central.
Once the superglue had dried, I primed the boat with Halford’s grey primer, and then gave the boat a coat of Warpaint Soviet Green.
Once the Soviet Green had dried, I painted the sensor lens, engine intakes and exhaust matt black, I painted some of the boat’s hatches Gunmetal Grey.
I then painted the detail on the control panel, matt Black dials and Crystal Blue screens. The pilot’s seat was painted Khaki Grey. The final touch was silver on the wing leading edge lights and red and green navigation lights, touching up any errors with Russian Uniform WWII, which I found to be almost an exact match for the Warpaint Soviet Green spray paint
Once the model was dry, I gave it washes, Military shader on the green areas, Dark Tone on the metal hatches and engine nacelle grills and Strong Tone Wash on the seat.
I then had a hunt through my transfer box and found some very old decals from a couple of Airfix kits; some registration numbers from a Swedish Boeing Vertol CH-46 Sea Knight and name plates “Apollo” from a Churchill Tank kit. I also found a couple of DANGER decals from another helicopter kit.
I painted a layer of gloss varnish over the areas to which I intended to apply the transfers, which, considering their age, went on easily without breaking up.
Once the decals had dried, I gave the boat a couple of coats of matt varnish, and here she is, the Apollo, ready to venture forth in Waterworld.
Phil
When Stephen suggested the Waterworld game I thought that I would pass just because it involved building a boat and I really wasn’t sure I could be bothered. Then with a couple of weeks to go he asked me I was up for the game and I agreed.
Bum, now I needed to come up with a boat.
Fortunately this proved to be a fairly simple affair. Hidden away in a corner of my cellar were a few Games Workshop kits that I had been bought as presents many years ago. Combining bits from a couple of these gave a simple boat / skimmer that could fit my entire ship’s company.
The main part of the hull came from a 40K Tau Tidewall floaty thing. The exact model doesn’t seem to be available anymore but a couple of similar ones are still on the GW website. The dome at the back game from an Age of Sigmar Grundstock Gunhauler – another floaty thing. By chance the dome piece fitted precisely on a flat part at the back of the Tau model. Nice and easy.
Painting was also straight forward. A spray of GW Zandri dust and some complementary reds and browns from Wargames Foundry. And of course the obligatory GW washes to finish. It only took a day to make which was better than I expected.
Tim
Tim was the only one to go fully scratchbuilt, with a cross between a canal barge and a WW2 landing craft made from foam card. The cogs and wheels were ‘liberated’ from his wife’s craft supplies (we wonder if she knew ?). Looks like a bit of a pig to steer, but it was a cunning move to make it this long since the prow of Tim’s boat started 6″ further into the table than anyone else !
Tony
Finally, Tony went down the Don Johnson/Miami Vice route with a full-on speedboat. It started out as an accessory for a 6″ action figure – origin unknown. It was purchased from a bootfair for 50p, so who’s complaining ? I ripped out the existing cockpit, fitted a new plasticard floor, jump seats, engine and other bits and pieces from my spares box and gave it a quick respray complete with go-faster stripes. Only it didn’t go any faster since it spent most of the game being boarded by giant frogs or dragged down by a sea kraken.
For our next instalment in this series Tony starts with a couple of submissions:
Our title image is a scene from the film “The Lord of the Rings: The Return of the King”, the Charge of the Rohirrim, with Théoden at the fore during the Battle of the Pelennor Fields. Figures from Tony’s extensive collection.
Returning to history, Tony says: “I thought I’d have a go at recreating some WW2 historical photos for this. I dug out my copy of “Blitzkreig in the West” from After The Battle publishing, which specialises in showing contemporary photos and then retaking the scene as it was in the 70s (when the book was published…)”.
We can’t reproduce the photos from the book for copyright reasons, but here are Tony’s reconstructions.
On May 10th, 2nd Panzer Division was moving through the Ardennes – the original photo shows a PzIII passing a Protze truck. I used a Pz.III and a Horch field car – I didn’t have a Protze with crew figures, the Horch just looked better. In hindsight it needed a backdrop of some sort to hide the garden fence.
Horch field car and Pz.III
In the early hours of May 15th 1940, the French 26eme BCC (heavy tank battalion) encountered units of the 7th Panzer Division near Flavion in Belgium. After heavy fighting the Char B1s were stopped by German artillery. I found a fully painted B1 in my collection that was still awaiting its tracks, so I thought it would make an ideal stand-in for the disabled vehicle on the road.
Char B1s of the French 26eme BCC (heavy tank battalion)
Moving from WW2 to the Hundred Years War, Stephen gives us the Battle of Crécy
The battle of Crecy, 1346
And finally for this submission, a couple of scenes from the Original Top Gun film (1986!) provided by Marcus.
Scene from the original Top Gun, F14 and “Mig-28”, Watch the Birdie!Scene from the original Top Gun, F14 vs 2 “Mig-28s”
A short photo round up of the society’s last meeting.
Our opening salvo (above) is from Alan’s 15mm War of Spanish Succession game using Maurice rules.
French Infantry hold the townAllied Infantry advanceKings of the hillMore Allied infantryCavalry clash
Now on to World War Two, John ran an introductory game of Chain of Command, Germans vs US.
German Infantry take coverUS Infantry advanceShermans!Germans take position upstairs
Our next game(s) are naval actions using the Galleys and Galleons rules, run by the other John and Colin.
The first of these games was set in the Mediterranean sea, and uses 3D printed ships.
Mediterranean GalleysClose up of one of the shipsThe fleets close.More galleys
Their second game was set in the South China Seas, using John’s scratch built ships.
Chinese treasure fleet intercepted by pirate rowing boatsTreasure fleet ambushed
And finally, off to Middle Earth with Tony & Andy playing a couple of Dragon Rampant games, both set in the Shire.
In the first game Tony’s Hobbit militia, with some help from Aragorn and some Dúnedain Rangers defended Hobbiton from Andy’s Goblins and Warg Riders.
Nice, quiet HobbitonWarg riders approaching HobbittonA somewhat battered AragornAragorn flees after an encounter with some Goblin Light Foot
Tony successfully defended Hobbiton in the first game.
In the second game Tony turned to the dark side (sorry for mixing film tropes) and fielded Saruman and his Orcs, while Andy fielded a Dwarf contingent. Somehow we only got one picture of the victorious Dwarves.
Dwarves take back Hobbiton
Honours were even on the day, one game each (although the “Good” side won both games)


You must be logged in to post a comment.