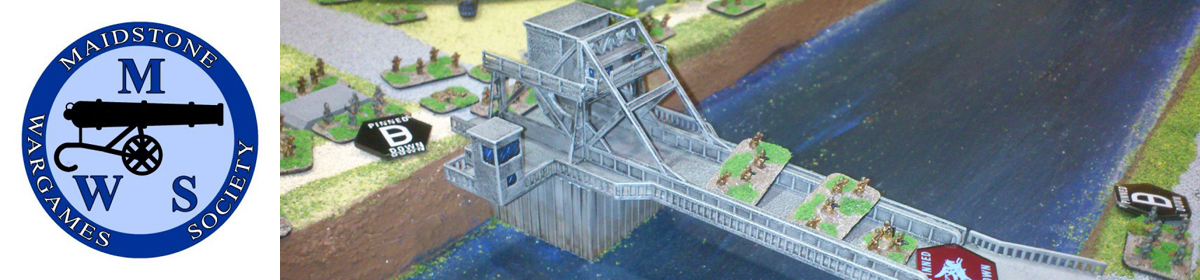
Welcome to another work in progress Wednesday. We start this week with Stephen and a right bunch of scum and villainy, getting ready for a future game of Stargrave, and a were wolf that we are hoping won’t be making an appearance in the same game.
Next up we have Felix who has been painting orcs from his Isengard battlehost.
Following on from that and Tony F has been preparing for a forthcoming 6mm Hammers Slammers. He has been working on some roads.
And some power pylons.
And lastly for this week Marcus has continued painting up his planes, adding some tiny decals to them.
Welcome to another work in progress Wednesday. I think the rest of the membership are still recovering from attending the Salute wargames show on the 12th April. This week we only have a few bits of progress and all of them from Member Marcus.
Above we have more progress on his divers, complete with loot boxes.
Next up Marcus has been busy on his ever growing collection of aircraft from a number of eras. Members have been trying to identify all the aircraft on Marcus’ painting table.
And finally from Marcus for this week we have two female protagonists soon to be spy’s in some James Bond themed game.
That’s it for this week, hopefully the rest of the membership will have recovered (myself included) and making more progress on their projects for next week.
Stephen takes us through a recent game of Charlie Don’t Surf.
Throughout 2024 I put together a collection of 15mm Vietnam stuff. The Vietnam War was one of the first historical wargaming periods I ever gamed, back in the early 90s. This was, of course, because of the spate of Vietnam War films of the late 80s and early 90s and because the music of the period was so good. All of which I loved.
However, like things do, it fell by the wayside and I sold it all on. But last year I joined in a game of Pete S’s ‘Charlie Don’t Surf’ and Pete M’s Vietnam game, both of which I really enjoyed. This re-kindled my interest in gaming Vietnam and so I started collecting models and miniatures.
I also enjoyed ‘Charlie Don’t Surf’ so I decided that would be the rules I would use.
So, having put a game in the club diary for May, I decided I would run a solo game so I could refine my knowledge of the rules. I decided on a simple meeting encounter.
It is late 1967. Military intelligence is bringing in lots of reports of large communist troop manoeuvres in the south. Something is clearly going to be happening in the run-up to the Tet holidays. Two US infantry platoons have been detailed to perform a blocking action to prevent troop movement of local VC elements in the locality of the village of Boc An. This village is known to have communist sympathies and, as such, the provincial authorities are keen not to alienate the locals any further. Therefore, this area is not a free fire zone and any use of indirect fire will require authorisation.
On the opposite side are two platoons of Main Force VC infantry. They are armed with AK47s and so will count as assault rifle squads. Their objective is to exit the table on the opposite side they enter from. The VC are operating on blinds (with two dummies). Since this is a solo game I decided that I would dice to see which blinds are dummies and which are real when the need comes.
The table was set up with the VC blinds on one edge and the US platoons deployed within 6” of the opposite. The US forces had two Big Men (God, I HATE that term!) as platoon commanders, one Big Man is company command with a medic. Company mortars are available but will require authorisation. I set the US platoons up in standard formation – one squad on point with the other two squads behind. All US squads would count as machine gun squads (the M60s having been distributed amongst squads rather than as a separate weapons squad).
The US forces would have a slow advance because they were soon having to wade through the rice paddies. I had them avoid the village just in case anything happened that would antagonise the villagers. The plan was to spread out once they’d passed the village to stop any VC slipping through the net. Similarly, the VC also had a slow advance through the jungle – still operating on blinds, so still unsure which units were real and which were dummies. The two central dummies advanced up the hill with the two flanking dummies moving around the flanks to create a dilemma for the US forces.
The US 1st Platoon rolled badly for movement through the paddies so the squads started bunching up. Meanwhile, 2nd Platoon did quite well and so managed to move up to put them in a position should one of the flanking VC units turn out to be real. Mind you, 2nd Platoon would also have a patch of elephant grass to wade through as well, so making a bit of time through the paddies was a bonus. As for the VC, two of the blinds had reached the summit of the hill with the other two making slightly slower progress on the flanks. It would soon be at the point where the US platoons could start making spot rolls as the VC were now on the edge of the jungle.
The US company command as well as 1st Platoon all failed in their spot rolls and so when it came to the VC activation they had a choice – stay where they were and remain hidden or, with the US platoons in the open, take advantage of that and open fire. I went with the latter – it was going to happen sooner or later and so it made sense to let rip while they had the advantage. I rolled for the two VC blinds on the hill to see if they were the real units. And, you know what, they were! So troops were put on the table. This meant the game would turn into a straight fight rather than a hunt and pursue.
So the VC let rip with their AKs. US 1st Platoon were caught in the open. They’d crossed the paddies and were in the area of scrub between the road and the hill. The lead squad took a pasting and accumulated several Shock and became Suppressed. I was surprised at how lethal the game could be, but then the fire was at a unit in the open at close range. It wasn’t looking good for the US platoons. When the US activated they managed to give back a little of what they’d received, but the VC were in the jungle, so whilst it was at close range it was still a poor shot. Nonetheless the lead VC squads took two kills as well as being Pinned and Suppressed. Ouch!
The firefight now brewed up. The US 1st Platoon commander found himself in a dilemma – whether to get his squad returning fire before the VC went again or to rally some of the Shock to make them more effective. There was only one choice; with all the Shock they’d taken their fire would be ineffective, so he had to take the gamble and rallied some of the Shock on his troops. Meanwhile, the company commander recognised the potentially lethal situation he found himself in and called for the company mortars to strike the hilltop, but he would have to wait until authorisation came through. The VC fire came in once more and this time it was deadlier – two US killed! However, the Critical Wound card came up, meaning one of the killed was a serious injury. The Medic called in a casevac chopper and proceeded to tend to the wounded man and try to get him to a suitable LZ for evacuation.
Two things then happened. The US 2nd Platoon spotted and engaged the second VC platoon. The VC took one killed and a few Shock. Seeing the kind of fire-power the US could give out, the VC second platoon pulled back to the downslope of the hill, the intention being to disappear back into the jungle and find another way off the board. Also, authorisation for the mortars came through nice and quickly (clearly, higher command saw the urgency of the need), which meant the mortars might be coming in soon. 1st squad of the US 1st Platoon pulled back after the mauling it had received so the other two squads of 1st Platoon could engage the enemy.
Then it happened. In came the mortars. Only the shot hadn’t been as accurate as hoped. The barrage actually missed the VC and hit the side of the hill, which meant the barrage also fell on part of the village! The villagers well and truly copped it – not only Pins, Suppressions, and Shock, but four civilian fatalities! Not good. Not good at all. This caused the company command a dilemma – should he call off the mortars or would he be able to correct fire in time. If he called off the mortars then this may result in more delays as authorisation would be needed to resume firing, but if he couldn’t correct fire then the village would take another leathering. Such is the fate of war. Well, such is the random turn of cards. He kept the fire up and just hoped that he could correct the mortars in time.
And lucky him, because that’s just what he managed to do. Yup, his card came up before the mortar card came up. It’s as cold and simple as that. But he managed to correct fire and put it straight on top of the VC 1st Platoon. The effect was devastating.
The VC 2nd Platoon had pulled back, returned to a blind and, when the Di Di Mau card came up managed to bring on a dummy blind so it was hard to say which was the actual platoon and which was a fake. The two dummies split up and went back to the original plan of moving around the flanks. Meanwhile, the VC 1st Platoon moved to get away from the mortars, but the US company command just walked the mortar barrage with them to keep up the pressure. It was now starting to look unlikely for a VC victory. The US casevac also came in allowing the medic to pass on his charge and off it went with the US wounded.
It felt like things were coming to a conclusion. The US 2nd Platoon cleared the elephant grass and made a spotting roll for the VC blind that was moving around that flank. A successful roll, so now to see if it was the actual unit or a fake. It was real! This meant the US would have the VC trapped and their whereabouts known. The VC were not idle though. Whilst their 1st platoon was now stuck under falling mortars, their 2nd platoon opened up on the US 2nd platoon, causing a fatality as well as Suppressing them. It was far from over.
That said, the numbers were starting to tell. The VC 1st Platoon was really piling up the Shock and they were about to break. And with the rest of the US 2nd Platoon coming up to engage the VC 2nd Platoon and the ever-present threat of falling mortars, it was obvious what was going to happen. The result? The US had won a military victory, but with the casualties sustained and, more importantly, the mortar strike on the village, the VC had won a political victory.
Welcome to another Wednesday post, we start this week with a 3D printed orc horde that is part of the open day game Phil is putting on. This is just the first of many apparently.
Next up David P has been working on some German and Soviet WW2 troops.
Sticking with the time period and Marcus has been painting up some Beaufighters and P40’s.
Moving on a few years and Mark J has been painting up some Cold War Soviet Gaz 66 trucks and a BRDM 2.
And now jumping into the future or a long time ago given that Stephen has started working on a sci-fi bar appearing in a Stargrave game at some point. This will be a scratch built project, the tables being 50mm miniature bases.
And that’s it for this week, we will see you next Wednesday.
A slight change to our normal Wednesday progress post this week. Members are busy preparing to take our newest show game to the big wargames show Salute on the 12th April.
Bradley (l) faces off against Atari-1.
This year we are putting on a rendition of the classic arcade game Battlezone. If you’re going to be at the show do come along and try your luck against three other opponents! You won’t need a stash of 10p pieces just some good dice rolls.
You can hear more about the game courtesy of OnTableTop’s coverage of our game at the Cavalier show in February.
Atari-1 has Brigade in its sights.
This is our entry in the Salute line up: Maidstone Wargames Society – Battlezone – Futuristic Tank Warfare in 1980 – STAND: GK11
Stephen reports on the beginning of a new Lion Rampant Campaign. Andy’s apologies for taking so long to get this onto the blog.
After the debacle of our Crusades campaign I demanded satisfaction from Andy and we agreed to another campaign based around the Norman Conquest.
My Normans rarely see the light of day so this was a chance for me to get them out and gain a bit of glory. Andy took the English.
In the same vein as the Crusades campaign we upped the points values a bit – two 24 point forces, two 30 point, and the final game would be a 48 point bloodbath. Each army gets an extra free point that can only be spent on Leader skills (though more points can be taken from the army total to buy more expensive Leader skills). As before, army lists have to be drawn up ahead of the campaign and assigned to each battle before they are rolled for.
So to kick off we rolled to see who would be Red (Andy) and who would be Blue (me).
And then we rolled for the first encounter of the campaign – we rolled The Village and then rolled again to see which specific scenario – The Taxman Cometh!
So it begins.
For this first game I had a 24 point, fully-mounted, force. I purchased the Strongbow Leader skill. My force consisted of 2 Elite Cavalry (the knights), 2 Heavy Cavalry, and 1 Heavy Cavalry with crossbows.
Andy’s Anglo-Danish force had 30 points, comprising 2 x Elite Foot (1 containing his leader), 2 x Heavy Infantry, 1 x Light Infantry and 3 x Skirmishers. Andy’s leader purchased the Commanding Skill.
Club member Mark placed six tax counters face down on the terrain – these all had a (hidden) value and each side would gain Glory equal to the total value of counters they could get off the table. In addition to this players gain Glory for making Boasts. My Boasts were ‘I shall strike the first blow’, ‘They shall tremble before me’, and ‘I shall burn their homes’. Andy went with ‘They shall tremble before me’ and ‘I shall destroy more than I lose’.
One of the counters had been put in a church and, since I had a mounted only force, we had to make a decision on mounted troops being able to enter a building. The rules say nothing on this. So we rolled randomly and decided that mounted troops could not enter buildings. Although this went against me it made absolute sense and was the right decision. However, this left me with a dilemma – it meant that I would be unable to secure one of the tokens. This shaped my choice of Boasts. I decided that since I would be unable to get it I would try to deny it to Andy by burning down the church! I think you’ll find that such actions are all part of the job description and duties of being a Norman tyrant. (Andy: Sacrilege!)
The first couple of turns of the game were a general advance on both sides. We both did well on Activation rolls and as I recall we both managed to activate all units for the first two turns.
Norman knights out for a ride
Andy had put his skirmishers on his flanks, where two of the tax counters were hidden in the woods, and he managed to secure both. He also made a general advance in the centre with his light infantry, heavy infantry, and dane-axe wielding elite huscarls.
Anglo Danes take the hill
I steered one of my units of heavy cavalry to the woods on my right flank to get the tax counter there, and my mounted crossbows to snatch the tax counter hidden in the woods in the centre.
Shall we shoot or shall we burn something
Those had been the easy ones. The struggle was going to be for the two central tokens – one in the church and the other in some ruins.
View from the Anglo Danish side
Surprisingly, Andy’s unit on his right took their token and fled the table (you only count tokens you get off table). I thought they might stick around for a bit longer to hold the flank. Then he advanced a unit of skirmishers into the ruins to claim a third token.
View across the battlefield
That was annoying, but I saw it coming. I knew it would be difficult to budge them – we classified the ruins as rough going with cover. This made it all the more essential that he didn’t get the token in the church. With that in mind I activated my archers to loose their bolts at the English light infantry who were approaching the church doors. I scored a couple of casualties and this forced him back. With my mind on the Boasts I’d made, I then stuck the spurs into the Leader’s unit and charged the English heavy infantry.
Norman Lord leads the charge
We caused casualties on each other but we both passed our Courage checks and bounced off each other.
On your marks, get set, go!
I then took my chance with the church. A unit of heavy cavalry had moved up and now I made a roll to see if I could burn it. With only 6 men in the unit this meant I needed a 9+. I rolled and scored…11!
Up went the church. This meant it now counted as impassable terrain making it impossible for anyone to get the last tax token. That’ll teach those English rebels, I laughed haughtily.
Normans set fire to the church
Meanwhile, out on my right flank, I could see Andy was trying to find a way of harassing me with his unit of skirmishers. Problem was that in the woods they were safe but out of range. To get in range they had to leave the woods and this would put them at risk of a cavalry charge.
Then something unexpected happened.
On Andy’s activation he charged his heavy infantry into my Leader’s unit. I rolled to counter-charge but failed!
Anglo Dane Elite Infantry charge the Norman Leader
Oh well, I thought – those knights are well armoured and might take a casualty but not the end of the world. And, yes, they did take a casualty. But I rolled a double 1 which meant it was the leader that coped it!
Down he went.
The Normans were now leaderless.
However, one thing was in my favour. The two tax counters I had were high value ones, and I’d also managed to fulfil all my Boasts. So, despite the loss of my Leader, I figured I was still in a strong position.
Problem now, though, was that my mounted crossbows, who had a token, were in a difficult position with both the English heavy infantry and elite infantry getting within charge distance. If I lost them, and their token, then the fortunes of war would be reversed, and I could see in Andy’s eyes that he knew that too.
So the race was now on – get off the table with what I had.
Being mounted had an advantage because I was faster than him. Andy started pulling back his skirmishers with the tokens to secure them, whilst trying to put the pressure on me.
It got a bit hairy when I failed an activation roll to move the crossbows, but Andy was just out of charge range and the following turn they were off and that was the end of the game.
I had secured 5 points of tax tokens and gained another 5 Glory for my Boasts plus an extra 0.5 Glory for facing a larger enemy. This gave me 10.5 Glory.
Andy also scored 5 points of tax tokens, but failed to achieve either of his boasts, so lost a point for each, giving a total of 3 Glory
The first game went to the Normans with a convincing 10.5 to 3 win.
The winner gets to choose the next game and I chose The Road. We rolled for the specific scenario and came up with Meet The Neighbours.
In this game players start in opposite corners and gain Glory for units they get off the opposite corner (plus Boasts).
In this game I had 30 points and my (new) Leader had also taken Strongbow. My force consisted of 2 Elite cavalry, 1 Heavy cavalry, 1 Heavy infantry, 1 foot crossbows with pavises, and 2 skirmishers. My Boasts were ‘Their arrows shall be lost like tears in the rain’, and ‘I shall avenge them’ (I chose his Leader’s unit – after I had lost my Leader I couldn’t let him get away with all the goading that would be coming and had to even things up!).
Andy had a smaller force this time, only 24 points, a single unit of Elite Infantry containing the Leader, 2 units of Heavy Infantry and one of Light Infantry, the force being completed by 3 units of Skirmishers. Andy’s leader purchased the Commanding Skill again.
Boldly he chose ‘Half the Enemy shall fall to my Swords’ and ‘I shall destroy more than I lose’. At least he’d start with an extra 0.5 Glory for facing a larger enemy.
Going into the second game I was cautious. Andy is a very good player and could easily turn fortunes around. So I decided that I would avoid combat where possible (the exception being to nip off the English Leader). My plan was to advance as quickly as I could with the infantry and use the cavalry to protect flanks and threaten any English units if they tried to attack.
That was the plan.
So the game started. The problem we both had is that we couldn’t get all our units in the deployment area, meaning those units off table could only come on with a successful Move activation. Andy went first and made a general, broad, advance. He managed to activate all his units and even bring on the excess unit.
Off to war they go
Things didn’t go quite so smoothly for myself. I started with my Leader’s unit off-table. The first unit I tried to activate failed and without a Leader to prompt a second attempt that was it! The English advanced again.
Back to me. Well, a bit better – I managed to move one unit, which created a gap for me to bring on the Leader. Which I failed. He had another try. Failed again! That breakfast croissant or pain au chocolat was obviously keeping him busy.
Andy advanced again. He swung two units of skirmishers south, toward an area of woodland which meant that if I wanted to advance that way I’d have to endure some bow fire.
By this time Andy was halfway across the table. I’d moved some units but still had others in the deployment zone. It was obvious my plan of getting across the table was going to fail. Andy would be off sooner than me and would win the game with a good score. I had to change my tactics. The only way I could win is if I prevented Andy getting off the table and the only way I could do that was by eliminating his entire army! I went on the attack!
Norman firing line
It was more by luck than design. By the time our two forces came face to face I hadn’t advanced too far but the position I found myself in was an advantageous one. To one side of the road was a hill and to the other was an area of rocky ground. I decided I would put the crossbows on the hill, the skirmishers in the rocky ground, and use the heavy cavalry and spearmen to plug the gap with the knights behind to act as a mobile reserve where they could either exploit a gap in the enemy or charge to the defence if the enemy broke through. It was a strong position which I can’t take any credit for.
The key to this would prove to be the rocky ground. I think Andy recognised that and I could see him manoeuvring units that way to launch an attack. Lines were drawn. Now the battle started.
Anglo Danish thanes and huscarls make a steady advance
My skirmishers in the rocks opened fire (thanks to the Leader’s Strongbow skill) on Andy’s light infantry, causing a couple of casualties. Meanwhile he started moving the heavy infantry around the side of the rocks and his Leader’s unit came forward. The English skirmishers opened up with some desultory bowfire – thankfully the rocky ground provided good cover.
Norman archers in the stones
Seeking an opportunity I thought I’d try my luck. With his Leader within charge range of the Norman heavy cavalry, and an eye on my Boasts, I thought I’d give it a go. In went the cavalry. I caused one casualty against the English (failed the Lucky Hit to bag the Leader) but Andy had given me a fair wallop – I took three casualties. Not only were the Norman cavalry Battered but they were at half strength as well. Oh well, I thought, I’ll use them as an expendable unit and see what more damage they can do to the English Leader (a perfectly acceptable attitude for an invading Norman tyrant).
On Andy’s turn he did something that surprised me – he charged his light infantry into the rocks to take on my skirmishers! Well, I suppose I don’t blame him. If he left them there then it would cause a lot of problems. He had to do something. In response to the charge I decided to Evade. That took me out of the rocks but it caused casualties on the charging English which meant they had to retreat. Meanwhile, to the south, the English skirmishers in the woods and the Norman crossbows on the hills just stared at each other. I moved a unit of Norman knights behind the hill but in position so they could charge if the skirmishers dared come out the woods.
Norman corssbows supported by Norman knights
The fight around the rocks continued. The English heavy infantry moved forward. This could be a potential problem. I had two choices. Ideally, I wanted to shoot with both my skirmishers to loosen them up, and then charge with the Norman Leader’s knights. The skirmishers would shoot on a 7+ and the knights charge on a 5+. If I failed with either of the skirmishers then activation would switch to the English and I’d miss out, so maybe I could just charge with the knights? The Norman Leader had the Strongbow skill, but I’d used that to order the crossbows to shoot at the English Leader’s unit (another casualty on them, but still not the Leader).
Anglo Danes march pass the POND OF DEATH
I decided to put my faith in the dice. I rolled for the first skirmisher unit. Success! They fired. Then I rolled for the second unit of skirmishers. Another success! OK, so the English heavy infantry had taken a few casualties. Now was the time. In went the knights, led by the Norman Leader – let’s just hope it wouldn’t be a repeat of the previous game.
In they go
No, it wouldn’t be. The English infantry took more casualties and failed their Courage test. They fell back, Battered, and below half strength. They’d taken enough casualties that it would be hard to recover.
Feeling cock-a-hoop with my charges I sent the Norman heavy cavalry in against the English Leader again. Another casualty on the English meant they were now at half strength, but in return they eliminated the last of the heavy cavalry. I didn’t care. They’d done their job. It was now starting to look good for the Normans and I could see another victory coming.
Andy realised he had to go for it. The skirmishers to the south moved out of the woods and shot at the crossbows. They caused a single casualty but I fluffed the Courage roll and they had to retreat behind the hill. My skirmishers moved back into the rocks and continued firing at the English light infantry causing more casualties and Andy obligingly rolled a double 1 for their Courage. Off they went. It was now looking very good.
We were moving into the end game. My thoughts turned to Glory points. If I entirely eliminated the English army that would be game end but since I hadn’t got any units off I would only receive Glory for the Boasts I’d made and none for the game objective. It was going to be hard to do anything about that.
Andy points an accusing finger at the Norman spears
Andy still had a unit of heavy infantry in the centre. They lined up against the Norman heavy infantry and went in. It was pretty much a draw, with a casualty on either side. In the meantime my skirmishers kept opening fire on the English Leader, but bad dice rolls meant I just couldn’t cause any casualties. I then sent in a unit of knights against the English skirmishers and completely eliminated them. In response Andy moved the other unit back into the woods where they would be safe. The Norman heavy infantry charged the English heavy infantry and, again, a couple of casualties on either side but the Normans failed their Courage test (and would ultimately fail to rally and rout off table).
Then came the final act. The Norman Leader ordered the crossbows to open up at the English heavy infantry. At close range the bolts thudded in and off they went. The skirmishers drew their bows, took aim at the English Leader and…down he went at last! All the English had left was a unit of skirmishers hiding in the woods.
Ironically, I didn’t want to destroy them. What I wanted to do first was get some of my troops off-table. Andy knew this, so it was in his interests for the skirmishers to either be eliminated or get off themselves to bring the game to an end before I gained too many Glory points. What I also wanted to do was weaken the skirmishers to reduce their effectiveness but without actually killing them. A burst of fire from the crossbows did the trick, reducing them to half strength. Both sides made a rush for the table edge. The English, though, were closer and were soon off, bringing the game to an end. I hadn’t got any of the Normans off.
Final Glory scores were just 3 for the Normans (for successful Boasts). The English had got a half strength unit off, earning 1 Glory, and had the extra 0.5 Glory for having the smaller force. But they had failed both Boasts meaning -2 Glory giving a final total of -0.5 Glory.
A second Norman win! Glory tallies at this point are 13.5 for the Normans, and 2.5 for the English. We still have three games to go. Andy is a good and capable player, so whilst I’m happy with this lead I am not complacent.
It’s another Wednesday and we start with more Legions Imperialis from Mark J. Above we have some more Alpha Legion units. Mark is due to put the game on in a couple of weeks so we’ll have a chance to see what the whole army looks like.
Next up we have some divers from Marcus to add to his underwater obsession. These have much more of a Jules Verne vibe about them than most of the other divers we have seen from Marcus.
And Marcus has also started some loot tokens for games like Stargrave.
And last for a short and sweet offering this week, I’ve managed to paint up some more 3mm sci-fi buildings from Brigade Models. I’ll soon have a small city for the battlefield.
And that’s it for this week, we’ll see you again next time.
Although we were only going to play the Battle of Stoke Field as a tie breaker if the main campaign ended in a draw. We thought for completeness we should play the battle. The Lancastrians were definitely playing for the last scrap of honour they could muster with this battle having already lost the campaign.
Reading about the battle we decided for Stoke Field, the Yorkists should have at least half their army made up of mercenary and militia units to represent bringing together a rebel army. While for the Lancastrians, half of their army would start on the players baseline to simulate the King’s forces arriving late to the battle. Although not a big battle historically we decided to go big with 1000 points per side, with each side divided up into two commands. Stephen and Andy took up command of the Lancastrians (well Tudor) forces, while Tony G joined me to share the Yorkist (well Rebel) army.
I arrayed my forces in typical fashion with the archers in the front and infantry behind. When we play these high points games I normally have to bring everything I have painted, so I also brought my mercenary pike block and a fair bit of cavalry in the form of Mounted knights and currours. I put the pike block on the right and all of the cavalry on the left to try and outflank the enemy.
Tony G went for a similar deployment, Tony was facing Stephen as the Tudor King who had to deploy right at the far edge of the battlefield. I was facing Andy who had deployed as far forward as permitted.
Very much like the historical battle this meant that within the fist activation of units Andy and I were already in bow range before the King had even got moving. The initial exchange of arrows saw the Yorkists inflict more damage, but didn’t come away unscathed.
Some favourable activation dice also allow the Yorkist currours to quickly advance on the flank and threaten the Lancastrian archers. I’ve used this tactic in a number of battles. The cavalry cannot be ignored so I often find they end up drawing units away from the front line. Andy moved some archers to contest the cavalry, but I decided to be bold and charged my cavalry in.
The charge worked and first blood went to the Yorkists. This was to be the start of a trend on the Yorkist left. With four cavalry units the Lancastrians were in for a hard time having brought no cavalry of their own.
Meanwhile on the Lancastrian left Stephen had started to move his forces forward, but the dice were not being kind and so the advance was somewhat piecemeal.
Back on the Yorkist left and emboldened by the initial cavalry success I decided to continue the charges. These were not as successful, Andy’s archers managed to hold off one attack and he had brought forward his billmen units to halt a further charge.
The deployment for the game ended up turning it into a battle of two distinct halves. The Yorkists forces on their left had manage to almost wipe out the Lancastrian archers and had engaged in several rounds of melee combat with the cavalry charges, while on the Yorkist right not a single dice had been rolled in anger.
I had suggested to Tony as my fellow commander to just wait for Stephen’s forces to advance and not worry about moving forward to engage. With the unique activation system in Sword and Spear armies can often find themselves breaking up during an advance if the dice are not being kind.
On the Yorkist left the cavalry charges continued the Currours continued to be locked in combat but the first of the mounted knights pushed through a unit of billmen and charged off in pursuit of the fleeing Lancastrians.
Seeing the Lancastrian casualties mount up I suggested to Tony to ditch the idea of setting up a defence and to take the fight to Stephens forces. Losing no time Tony got his archers into range and started the customary exchange of arrows.
Tony like me had moved his cavalry into a position of harassment on the right. Stephen had attempted to get his crossbows to within firing range but the restrictions on Crossbows not being able to move and fire hampered his efforts. But Tony decided to follow my example and charge in his currours. Unfortunately the Yorkist fortunes had turned and the cavalry were halted.
Tony soon sent in his other unit of currours but it wasn’t enough and the Lancastrian crossbows had prevailed. But the rest of the Yorkist forces on the right were starting make an impression, adding to the growing Lancastrian loses.
Not wanting to wait for the archery duel to play out Tony charged in some billmen, but they could not dislodge the enemy archers. To counter Stephen charged in his highlanders but they were checked in turn by Tony’s infantry.
After what seemed an age Stephen finally managed to move his three large units of pikes in to melee, this was certainly not to little, but it was too late. The Lancastrian forces had already passed their first morale check, which saw a number of units suffer a loss of strength. They failed to destroy the archers giving me time to move my own pike block into the melee.
The Lancastrian cavalry woes continued over on their right flank. The Yorkist knights had managed to defeat several billman units and were running rampant behind the Lancastrian front line.
Tony continued his assault and managed to defeat the last of the Kings archers pushing them over their break point and handing victory to the Yorkist cause. As the last of the turn was played out the Lancastrians suffered yet more units destroyed despite committing more of their forces in an attempt to even the score.
Stephen’s pike blocks had managed to destroy a the unit of archers with a second unit reducing the Yorkist pike block to half strength.
The Lancastrian Highlanders fought hard with a bonus dice in the melee to try and push aside some of Tony’s billmen, but it ended in stalemate.
In the centre of the field I’d made the mistake of putting a bonus dice on my crossbows (crossbows can’t use bonus dice for shooting attacks), and neither did they have a valid target, so with nothing to lose I charged them into the flank of the pike block. It was far closer than it should have been and the crossbows took the pike block to just two remaining strength points, losing only one themselves.
And thus ended the turn and the battle. This was a really interesting fight with mine and Andy’s forces engaged in the fight from turn two, on one side of the battlefield, while on the other side Stephen and Tony’s forces did not even exchange missile fire until around turn five. By that time the Lancastrians had almost reached their first army morale point. Things could still have been turned around but being so far behind in casualties gave the Yorkists forces a morale boost and the confidence to throw caution to the wind and step up the attacks.
The Lancastrians retreated from this final battle adding to what had been a disastrous campaign, but historically the Lancastrians lost more of the major battles during the war they just managed to win the important ones, sadly that wasn’t to be this time round.
Yorkist Loses
3 Units of Currours (12 points)
1 Unit of Billmen (4 points)
3 Units of Militia Archers (9 points) Total loses 25 points (Army break point 57)
Lancastrian Loses
1 Unit of Crossbows (3 points)
5 Units of Billmen (20 points)
10 Units of Longbows (30 points)
3 Units of Dismounted Men at Arms (12 points) Total loses 65 points (Army break point 55)
Welcome to another Work in Progress Wednesday, we’re starting with lots of rocks this week. I bought a bag of 3D printed bits from Beowulf Miniatures at the Cavalier Wargames show, and really didn’t know what I would use them for. In the bag was a large oval hex covered base. So I surrounded it with black foam rocks.
I also made some more rock outcrops, just need to add some dry brushing to these. I also finished painting some more 3mm sci-fi buildings.
Moving on and Tony F has been busy creating some road junctions, hedges and trees for his 6mm forces.
Sticking with Sci-fi and Mark J has been painting up some raised platforms for his forthcoming Legions Imperialis game.
And last but by no means least Stephen has put together and old model of a UH1 helicopter as a crash site for a Vietnam game.


You must be logged in to post a comment.