Our 2024 Open Day is just over a month away and there has been lots of progress on this years games. The Open Day is on the 22th June this year. We’re open to the public from 11am – 4pm on the day.
This is a great day to come and see the society in action and maybe throw some dice at one of the various games we will have on the day.
This year we have a good selection of games, which might just be the incentive you need to either get back into the hobby or to find a new home for your own armies and games.
We will have a game of Barons War complete with scratchbuilt castle.
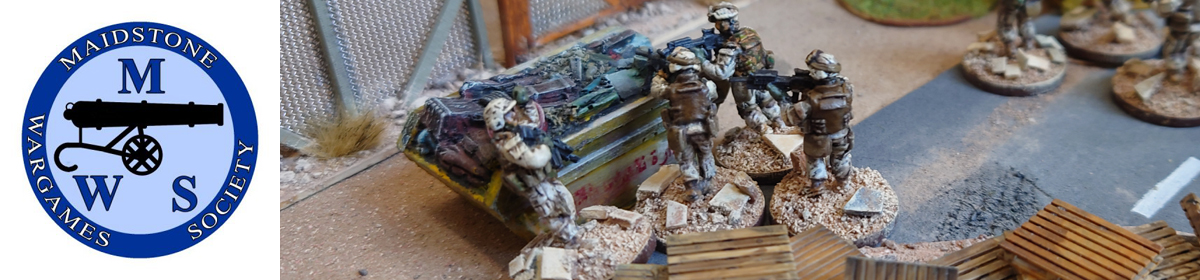
There will be a game of Project Z for some post-apocalypse fun!
The Elephants will be on the rampage in a battle between Romans and Carthaginians
The Soviet/Afghan war will also be covered this year
Along with a big World War 2 battle somewhere in Europe
And last but not least the magical treefolk will be fighting their ancient enemy the rock warriors in an entirely scratchbuilt fantasy game.
Details of where the club meets and location of the Open Day can be found on our About the Society page.
In the year AD1058 there was a Norse invasion of England. The Anglo Saxon Chronicle doesn’t have much to say about it, just ‘In this year came a pirate host from Norway; it is tedious to tell how it all happened.’
And that’s it.
So Eric and myself decided to refight this tedious invasion using Saga.
I created a matrix of games from The Book of Battles, the game moves on to the next fight depending on who wins each encounter. If you also fancy giving this a go then below is a copy of the matrix. You can work out what to do – who is attacking and defending should be apparent from the previous game and what works best to create a story.
Game Matrix
Eric had Vikings led by Sigvald Ironhand, and I had Anglo-Danes (the English) led by Edward Oswaldsson. We used Warlord Experience from The Book of Battles to have games with a bit of depth and also to help create a narrative flow.
Sigvald and his raiders
First game was Feasting & Pillaging. Three objectives were laid out (loot from the nearby church) with the Vikings trying to steal as much as they could and the English trying to take it away from them. We went with 6 points each. The English had three points of hearthguard, two points of warriors, and one of levy. The Vikings had two points of hearthguard, two of warriors, and two of levy.
Edward and his hearthguard
The English hearthguard massed on their right flank, with the levy and the warriors on the left intending to use some woods as cover. This was because the Vikings had put their bow-armed levy in the middle meaning that a lot of missile fire would meet anyone there. I think Sigvald was being a bit cautious to start with since his raiders didn’t make the most of their moves – coming forward only slowly. Meanwhile, Edward knew that speed was of the essence and so started double-timing his troops, huffing and puffing as they went, to try and secure the church valuables.
Vikings skulk behind the stones
The Vikings advanced through an area of standing stones (clearly this site had been of religious significance for centuries), which also slowed their advance. This allowed the English hearthguard to capture one of the objectives. However, in the centre the English warriors realised that if they were to stop the Vikings then they would have to expose themselves to some bowfire if they were to secure one of the objectives. So they made a dash for it! The bowfire came but no casualties were taken. The Vikings hadn’t been idle though. Their warriors came forward and they managed to capture the last of the objectives.
Vikings with the vestments
The English levy, hiding in the woods, were within striking distance of the Viking thieves. But they had a dilemma – they could stay where they were and loose their slings or they could rush out of the woods and charge the Vikings. If they were going to stop the Vikings then a flurry of sling bullets was unlikely to take them all out – clearly they were going to have to get stuck in!
Anglo-Dane levy make a charge
They made a valiant attempt. The Vikings took casualties but they also gave them out. The English levy lost this exchange and were pushed back. This gave the Vikings the chance to make off with the treasure. On the left Sigvald had moved his Vikings through the stones and saw Edward ordering his hearthguard to make off with the loot. Another unit of English hearthguard had moved to shield the laden hearthguard and took a round of bowfire on the chin. Ouch! Down went three hearthguard.
Go on lads, I’m right behind you
And that was it – game over. The English had managed to get two of the objectives off the table, whilst the Vikings were in control of just one. Victory points came out at 36 to the English and 32 to the Vikings. Edward gained 3 experience points and took the level 1 Exploration ability. Sigvald gained 2 experience points which wasn’t enough to gain any abilities.
So checking the game matrix we see that, with an Anglo-Dane win, we move on to the Ambush scenario. The Vikings, having only partial success with their raid on the church of St Hildaburga, are now trying to flee the scene. The English are going to see if they can cut them off, finish the job, and take back what’s been stolen (which includes some slaves!)
Viking slave traders
We had 4 points each in this game. The English took two points of hearthguard, one of warriors, and one of levy. The Vikings had one point of hearthguard, two points of warriors, and one point of levy. In this scenario all units start off-table and you have to choose when and where to bring them on. There are three units of baggage moving across the table and the aim is to capture the baggage.
The English went first and brought on about half their units. They came on roughly in the middle, the thought being that by the time they got to the road so would the baggage. Sigvald’s Vikings did similar. I then made my first mistake – I brought the rest of my units (mainly hearthguard) on at the far edge of the table. My thoughts were they could block the baggage if anything made its way through. Turned out this wouldn’t happen – both the Vikings and English would intercept the baggage in the middle, this meant I had put one of my units out of the game because they were too far away.
Viking hirdmen advancing
Eric had learnt something from the previous game – sometimes it pays to double move a unit and take the fatigue. Especially in the games we’d played so far, where speed and movement were important. So that’s what he did and soon took control of one of the baggage items. In the middle my levies stepped on to the road to block another of the baggage items. This is where I made another mistake. Because I decided to pull them back (still don’t know why) rather than leave them where they were so they could start peppering the Vikings with their slings. Thus taking another of my units out of the game!
Then something bad happened that was out of my control – I rolled my Saga dice and the result meant I would be unable to activate my warriors (sorry, can’t remember what symbol I needed). I had one of the helmets so went for the Activation Pool, rolled them, and…they all came up the same as well! This meant that I could not move the warriors who I intended to charge the Vikings carrying the baggage. I did move up the hearthguard and Edward though.
And on Eric’s turn he did what any man of honour would do – sent in Sigvald so we had a warlord versus warlord scrap!
Trial by combat
This did not go well. Sigvald had 12 combat dice and Edward was on 10. That’s even enough and with the warlord’s ability to turn hits into fatigue I expected us both to come out of this alive but with a few cuts.
But no.
Edward got two hits on Sigvald. But Sigvald got ten hits on Edward, of which eight went through!
That’s a dead warlord.
At the end of the game it was 21 Victory Points to the English and 34 to the Vikings. A convincing win. Edward gained 2 experience points and Sigvald gained 3 and took the level 1 Tenacity ability.
Seems quiet enough for the time being
So we move on to our last game – Guard The Loot.
The Vikings, having escaped the English ambush, are now nearly home and dry. All they need to do is get their plunder aboard the boats and off they go.
The rules of this scenario mean that each player places 3 objective markers. At the end of the game you get Victory Points based on how many you control – those placed by your opponent are worth more than ones placed by yourself.
We had 5 points each. The English (now led by Edward’s son, Gyrth Edwardson) had three points of hearthguard, one of warriors, and one of levy. The Vikings had two points of hearthguard, two of warriors, and one of levy.
I made a slight mistake in my deployment. There were six objectives on the table but I only had five units. This meant it would be impossible for me to control all six objectives, but if I’m honest, I reckon that would be hard to achieve anyway. So not that bad.
We’d set up with a river running across the table with a bridge in the middle. This was slightly on my side. Normally you roll for how passable the river is at the beginning of the game but we decided we’d roll for it when a unit reaches the river. We decided we’d roll separately for the river either side of the bridge.
Vikings secure control of the booze
Both the Vikings and English soon gained control of two objectives each. The Viking warriors found some crates in the woods and Sigvald and his hearthguard found some more near a hill. The English levies took control of some cargo beside the river but rather than cross to another piece of loot just the other side of the river they chose to stay where they were so they could shoot at any Vikings that tried to claim it. Edward and his hearthguard soon took control of some barrels. The fight was going to be for the remaining loot. I had placed one of the loot tokens on the bridge which, being on my side of the table, meant I should be able to grab it. However, due to the scores I knew I had to push it and gain as much loot as possible and, ideally, the ones Eric had placed (worth more Victory Points) if I was to win the day.
So what do we do now
I pushed a unit of hearthguard and warriors toward the bridge. The intention was that the hearthguard would cross over where they could make a grab for one of the other pieces of loot and the warriors would come up to control the loot on the bridge. With Edward controlling one piece of loot I decided the other unit of hearthguard would cross the river to ultimately attack the Vikings with the loot in the woods. I let Eric roll for the river. Impassable! Yup, a steep, slippery, bank and deep, fast-flowing, rapids made it impassable. So I made the decision to double-time them to the bridge where I could launch an attack on the Viking side of the river. Meanwhile Eric moved a unit of hearthguard to control the loot by the river. The English levies opened up with their slings but…nothing!
Here we go! Here we go!
Now things hotted up! The first unit of English hearthguard crossed the bridge and made for the Vikings in the woods. Eric did the brave thing and backed up. And the Viking levies opened up with their bows. I used the Shieldwall ability to raise armour to 6 and thought that would be enough to stop the arrows. But no – three casualties caused! I then moved the warriors on the bridge along the banks of the river (and behind a hill to protect them from any arrows) so I could contest control of the loot there. This meant Eric only had control of two loot tokens whilst I had control of three, and the possibility of taking control of a fourth. Would that be enough to win the day?
Give us back our barrels
On the last turn Eric decided to go for it. Realising the difficult position he was in it was clearly an all or nothing situation. He counter-attacked on the bridge, meaning the English lost control of the loot token there, and then he brought up a unit of hearthguard to charge the warriors who were threatening control of the loot by the river. In this fight it went the Viking way – no Viking losses but two dead English warriors. This meant the warriors had to withdraw and therefore the Vikings would regain control of that loot token.
And that was the end of the game. The Vikings had just managed to snatch victory from the jaws of defeat – they had three loot tokens worth 9 Victory Points and the English had control of just two loot tokens worth 6 Victory Points. A close one.
But final Victory points for the day came to 63 for the English and 75 for the Vikings. A narrow Viking win. They had got away with some loot but not as much as they could have.
Battle number ten in our campaign took us to the all important battle of Barnet. One of the main features of the battle (apart from the treacherous Earl of Warwick) was the fog that plagued both sides on the day. To represent this we rolled a 1D3 at the start with the result indicating the affect of the fog. The result was that all ranged weapons for the battle were reduced by 2 DU. This meant the longbows went from 5 DU to 3DU making any archery exchange very close indeed. We normally have a couple of guest commanders for our battles but this time it was just myself commanding the Yorkists and Stephen with his Lancastrians. But we stuck to the armies being divided up into two commands each.
Battle of Barnet
Both sides deployed in fairly typical fashion but the make up of the armies was quite different this time. For the Yorkists my main force was quite strong with men at arms, bills, longbows, mercenary pikemen and mounted men at arms. I had 16 units under this command. The remaining 8 units of the second command were mainly militia units of bills, longbows and some currours. I intentionally kept this command weak as a feint with the hope that the Lancastrians would still commit enough of their stronger units against it.
On the Lancastrian side Stephen did not bring any cavalry which surprised me, but did bring some guns and units of Irish Kerns. He brought a good mix of militia and retinue units, and a unit of Gallowglass (dismounted men at arms for game purposes). Stephen had brought twice as many command units as I had which would prove to be a problem for me and divided his commands evenly with 13 units in each.
Deployment was typical but I left some space in the middle to bring up some infantry should I need it later in the battle. Probably by accident but very similar to the last battle we had both placed our strongest flanks facing the enemies weakest.
With the fog causing problems both sides advanced their archers in the centre for a quick exchange of arrows. Despite using many bonus dice this didn’t really achieve much.
Along with my two generals I had brought a captain who would have the sole responsibility of commanding the mounted men at arms on the Yorkist right flank. I knew I wanted to get the cavalry moving and threatening the Lancastrian left flank as soon as I could, hoping the enemy could not ignore them.
In the centre and the Lancastrians suddenly changed everything with some superb archery, making a unit of Yorkist longbows the first casualties of the day. This led me to spur on my infantry in the centre to make good use of the road and fill the gap.
Out on the Yorkist left flank I needed to goad the Lancastrians into believing my weaker units were a threat and so I boldly moved up the Currours to attempt a similar manoeuvre to my men at arms over on the right. Knowing the threat the cavalry posed Stephen surprised me by using a few bonus dice to have his Kerns charge in, thus depriving my cavalry of their impact bonus. Even worse was to come when the Kerns managed to survive a melee against both units of Currours!
Seeing the disaster over on the left flank I resolved to make up for it with my mounted men at arms. The Lancastrians had moved up some archers, so I had to get the charge in. But again the Lancastrians held firm and the cavalry became bogged down.
To try and maintain pressure on the Lancastrian right I decided to move up my militia longbows but the exchange of arrows proved ineffective. This was then met with an advance from the Lancastrian longbows.
Back to the centre my bold move to fill the gap paid off with the billmen routing some of the troublesome archers. But the Lancastrians had brought up their men at arms ready to join the fight.
With the Yorkist left flank plan having failed and the same happening on the right, I decided to bring in extra support and managed to overwhelm the archers and again threaten the Lancastrian right.
In the centre the last of the Lancastrian archers had been destroyed but this left the billmen facing the elite of the Lancastrian army alone. Acting just as bold the Lancastrian men at arms soon got the better of the Yorkist billmen.
The centre was now becoming the main focus of the battle with both armies bolstering their ranks.
It was at this point the disaster on the Yorkist left had reached a turning point with the Irish Kerns managing to rout some of the currours.
This was added to with the Yorkist militia longbows being nearly destroyed. I had hoped my smaller left flank would have occupied the Lancastrians for longer. The units had played their role and held up the left flank of the Lancastrians, but with casualties being fairly even on both sides at this point I had to rethink my strategy.
Focusing back to the Yorkist right I was lucky enough to get some good activation rolls and went on the offensive with my surviving longbow units.
The centre then became a bloody ground, the Lancastrian men at arms faired poorly and were defeated by the Yorkist billmen, but the Lancastrian Gallowglasses made up for it with a valiant defence, even after I managed to support the bills with some spearmen. I also decided it was now or never to get my mercenary pikemen into the fight.
With further success on the Yorkist right the mounted men at arms charged through the Lancastrian guns and onto some waiting billmen. The Yorkist archers also managed to destroy the last of the opposing archers pushing the Lancastrians to their first morale check.
Spurred on by the Lancastrians dropping morale I pushed more billmen forward, although the loss of the second unit of currours and militia longbows on the Yorkist left flank put my army close to the first morale check.
But the battle continued and the Lancastrian Gallowglasses still held firm making for a nervous time. But in the Yorkist favour was that the Lancastrian right flank was too far away to get involved in the battle in the centre.
The following turn was the last with yet another disappointing show from the Lancastrian men at arms who were dispatched but the pikemen for no loss to themselves. And the Gallowglasses finally fell pushing the Lancastrians to their breaking point.
And so the Battle of Barnet ended with a Yorkist victory, to make the day worse the Lancastrians also lost the Earl of Essex and the Duke of Exeter.
Time to reassemble the armies and march to Tewkesbury.
Yorkist Loses 2 Units of Currours (8 points)
4 Units of Longbows (12 points)
2 Units of Militia Longbows (6 points)
1 Unit of Billmen (4 points) Total loses 30 points (Army break point 47)
Lancastrian Loses
2 Units of Dismounted Men at Arms (8 points)
3 Units of Billmen (12 points)
4 Units of Longbows (12 points)
2 Units of Militia Longbows (6 points)
1 Unit Gallowglass (4 points)
1 Unit Guns (2 points)
1 Unit Irish Kerns (3 points) Total loses 47 points (Army break point 45)
The Maidstone Wargames Society is pleased to announce our show game for 2024.
The Luftwaffe approach the south coast of Britain and their first set of targets, the radar stations.
We present the Summer of 77, a world war two Battle of Britain participation game. Why 1977? I hear you cry. Our show game is based on a simple game that appeared in the 1977 summer edition of Warlord magazine and is the brainchild of society member Phil who has turned it into a full scale 3D landscape.
Fully detailed landscape of the English countryside, towns and villages. Not to mention those all important airfields and radar stations!
The game has already made a successful appearance at this years Cavalier show in Tonbridge and will make its next appearance at Salute 51 on the 13th April, we are table GJ05 on the show plan. If you’re at the show come and try your hand at thwarting the Luftwaffe. You can also find out all about the game including how it was constructed on our show game page Summer of 77.
Spitfires prepare to scramble to meet the incoming German fighters and bombers.
Andy rounds up a busy weekend for the Society. Photos by Andy unless stated otherwise, header photo by Stephen.
Last weekend saw both a Society meeting and our annual trip to the Cavalier Wargames show run by Tunbridge Wells Wargames Society.
Only three games at the meeting on Saturday, perhaps due to some members only being able to get out on one of the days.
First up, David ran a Napoleonic Corps game using General d’Armee rules and figures from his collection. This was a popular game with half a dozen members partaking.
Eric ran a Judge Dredd RPG, only a couple of photos of this one I’m afraid.
Judge Dredd RPGJudge Dredd Bar room Brawl
Finally on Saturday Andy and Stephen finished off their Lion Rampant Five Battles campaign, joined this time by Treasurer Mark and new member Charlotte.
Game one.
This was a Convoy mission, the Christians had to escort three “baggage” markers diagonally across the table, a cart, some monks and some civilians. The Muslim forces had to stop them.
Much reduced cavalry face off (Charlotte)Andy’s convoy and escorts (Charlotte)Egyptian Light Cavalry (Charlotte)
Game 2. This was to be our “Big Battle”, with two commands on each side. Here the objective was simply to defeat the opposition.
Andy’s warbandAndy’s Warband (Charlotte)Charlotte’s and Stephen’s warbandsStephen’s view point (Stephen)
We will post a write up of the final games in the campaign in the near future.
CAVALIER
On Sunday half a dozen or so members travelled to Tonbridge for Cavalier.
The Society’s game for this year was masterminded and built by Phil, and was a 3D representation of a map game published in the 1977 Warlord Comic Summer Special portraying a Luftwaffe raid on Southern England during the Battle of Britain.
Phil’s board, 560 individually marked squares!Airfields and ammunition dumps are three of the targets for the LuftwaffeA close up of the townA copy of the original game can just be seen at the bottom of the photo
Andy reports on the first part of a short campaign.
Stephen and I started the year with the Five Battles Campaign from Lion Rampant Version 2. We decided to set the campaign as part of the Crusades, and allow the use of the additional rules and forces from Lion Rampant: The Crusader States.
Stephen would take the Muslim forces and I would take the Christian forces.
The campaign comprises of five battles, the participants prepare 5 Warbands and they allocate each of these Warbands to one of the battles. In the book these are of 20, 24, 24, 24 and 30 points, we decided that we would go large, and would use Warbands of 24, 24, 30, 30 and 48 points.
We gave leaders the free skill to allow a single reroll for a failed Move Shoot or Attack order, and allowed an extra point to each of the warbands (2 to the 48-point warband) to be used solely on additional leader skills (up to 2 skills per leader), so the warbands would effectively be 25, 25, 31, 31 and 50 points. Any points spent on leader skills in excess of the one or two extra points would be taken from the point value of the Warband.
The 48+2-point warband would be used in the last game, and would be split into 2 contingents, players choice if this warband contains contingents of equal or unequal points values.
Throughout the campaign Stephen would be the Red player, and I would be the Blue player.
For each battle the roll of a D6 would determine which scenario would be used, with the basic Bloodbath scenario being a 1 in 6 chance for each battle.
The five battles in the campaign, and the possible scenarios and attackers are:
Battle
Die Roll 1-3
Die Roll 4-5
Die Roll 6
Scenario
Attacker
Scenario
Attacker
Scenario
The River Valley
6: A Gentle Stroll (p146)
Blue (Andy)
16: Bloodfeud (p166)
Red (Stephen)
1: Bloodbath (p137)
Roll D6. Highest is Attacker
The Hills
3: Defending the Indefensible (p140)
Red (Stephen)
7: Hold on Tight (p148)
Blue (Andy)
The Road
13: The Convoy (p160)
Blue (Andy)
14: Meeting the Neighbours (p163)
Red (Stephen)
The Meadows
11: The Messenger (p154)
Red (Stephen)
4: The Fugitive (p142)
Blue (Andy)
The Village
8: Sausages with Mustard (p149)
Red (Stephen)
12: The Taxman Cometh (p156)
Blue (Andy)
To determine the first battle of the campaign we rolled a d10, subsequently the winner of a battle would choose which battle came next.
Battle 1.
The d10 result was 2, leading us to fight the battle in the River Valley, for this battle one long edge, the south edge, is a deep, impassable river, and we placed a stream, counting as bad going, just over halfway across the table, just to the east of the middle of the table.
The subsequent d6 roll resulted in scenario 6, A Gentle Stroll (p146). This made me the attacker and Stephen the defender. I had chosen a 31-point warband for this scenario, Stephen had a 25-point warband.
Andy (Frankish Settlers (Pullani)) Total 31 points
1 x Knights (Elite Cavalry, Drilled), Leader Braveheart (In challenges only hit on a 6) @ 8 points
2 x Sergeants (Heavy Cavalry) @ 4 points each
1 x Foot Sergeants (Heavy Infantry) @ 4 points
1 x Foot Yeomen (Light Infantry) @ 3 points
1 x Crossbowmen @ 4 points
2 x Skirmishers @ 2 points each
I should have had a unit of Light Cavalry, instead of one of the Heavy Cavalry units, but these are still on the painting table.
Stephen (Ayyubid Egyptian) Total 24 points
2 x Mounted Mamluk (Heavy Cavalry with Bows) @ 5 points each
3 x Mounted Turcomen (Light Cavalry) @ 4 points each
1 x Ahdath (Skirmishers) @ 2 points
Yes, Stephen should have had a 25-point warband, but he forgot to add a Leader skill!
Stephen deployed his forces in the North West Corner, with the objective of getting his warband off the South East corner. He had to leave one of his units of Turcomen off table initially, as they wouldn’t all fit into the deployment area.
I had to deploy in the North East and South West corners, with at least one unit in each area. My objective was to prevent Stephen from exiting the board. My plan was to deploy most of my force in the North East corner, including my Skirmishers and Crossbows, with the intention of moving them as quickly as possible to the South East corner to block Stephen’s exit.
Positions after turn 1. Sorry it’s a bit blurred.
I had to deploy at least one unit in the South West corner, I decided to use one of the Heavy Cavalry units and the Light Infantry, I wanted units that could move fairly quickly, but that would also be a threat to Stephen’s flank.
Andy’s “Forlorn Hope”
Stephen sent one of his units of Mamluks and his unit of Ahdath to counter my force in the South West, while the rest of his mounted units headed for the South East corner and safety.
Stephen’s Ayyubid Egyptians spread out
I Sent my Skirmishers forward, headed for the rocky ground to the east of the stream, hoping to be able to shoot at any of Stephen’s troops trying to cross the stream while taking advantage of the rocky ground as cover. I sent my second unit of Heavy Cavalry toward the Northern part of the stream to guard against a unit of Turcomen getting behind me, while I tried to keep my Leader’s unit of Elite Cavalry centrally positioned to enable him to use his failed activation re-roll should my heavier foot fail in a move activation.
Andy’s main force making all speed
On the West of the table my Yeomen made it to the hill only to receive an arrow storm from the Mamluks and Ahdath, sending them battered back off the hill.
Some of Stephen’s main force reached the stream, and came within range of my Skirmishers, fortunately I came out on top of the duel, and a couple of his Turcomen were forced back from the stream with heavy losses. He did get one unit of Turcomen across the stream and headed for the exit point, but by this time my Crossbows were in range and their quarrels took their toll.
Stephen’s Emir crosses the stream
In the West my Yeomen spectacularly failed their Rally attempt and fled the field, leaving the Mounted Sergeants a bit isolated. I decided to move these into the lee of the hill to take them out of sight of the Ayyubids, Stephen moved his Mamluks in parallel, and they eventually came to blows, both units being reduced to below half strength, with my Mounted Sergeants eventually routing.
Meanwhile Stephen’s Emir bravely pressed on crossing the stream, but by this time I had brought my second unit of Mounted Sergeants and my Knights further to the south.
The Mounted Sergeants were able to charge the Emir’s unit, reducing the unit to Emir himself. He must have been blessed with luck as he survived all the Leader casualty rolls he had to take, but did fail a Courage test, forcing him back across the stream.
I failed in an attempt to shoot him down with my Skirmishers, and we then came to a critical point. The Emir had to take a Rally test, if he failed, he would rout as he was the only figure left in the unit, and if that happened then all of Stephen’s remaining units would also have to take courage tests. Of course he passed, and I was unable to inflict a further casualty with archery before Stephen moved him out of range of my Skirmishers.
Stephen’s only full-strength unit now was his Ahdath, who were still well to the west of the stream, he had one unit of Turcomen just over half strength, but the remainder of his units were below half strength.
Stephen’s remnants
On the other hand, I had lost my Heavy Cavalry and the Light Infantry west of the stream, but all my other units were at over half strength and my Crossbows and Heavy Infantry were now blocking the Ayyubid’s exit point, with the latter in Wall of Spears.
At this point Stephen conceded that he could not win the battle, he did not think he could get enough of his troops off the exit point to win the scenario, so he conceded.
At the start of the game, I had made three boasts, ‘I shall slay their leader’ (3), ‘I will destroy more units than I lose’ (2) and ‘They will tremble before me’ (2). I failed to achieve the first two, but I did succeed with the last one, so I netted out at 0 Glory for the boasts (failed boasts cost you 1 Glory, irrespective of their value if you win), but took 5 Glory for the win.
Stephen made three boasts as well, ‘My arrows are deadlier than my spears’ (2), ‘Their arrows shall be lost like tears in the rain’ (1) and ‘They will tremble before me’ (2). He succeeded with the first two boasts, but failed the last for a total of 2 Glory for the boasts.
So, after the first battle it was 1-0 to me, I had 5 Glory and Stephen had 2 Glory.
Battle 2
For this battle I had selected a 25-point warband and Stephen had selected a 30-point warband (he forgot the additional point for a leader skill again).
Having won the first battle, I chose “The Meadows” as the second battle, and the d6 rolls resulted in the Bloodbath scenario with me as the attacker.
Andy (Frankish Settlers (Pullani)) Total 25 points
1 x Knights (Elite Cavalry, Drilled), Leader Braveheart (In challenges only hit on a 6) @ 8 points
1 x Sergeants (Heavy Cavalry) @ 4 points
1 x Foot Sergeants (Heavy Infantry) @ 4 points
1 x Foot Yeomen (Light Infantry) @ 3 points
1 x Crossbowmen @ 4 points
1 x Skirmishers @ 2 points
Stephen (Ayyubid Egyptian) Total 30 points
2 x Mounted Mamluk (Heavy Cavalry with Bows) @ 5 points each
3 x Mounted Turcomen (Light Cavalry) @ 4 points each
2 x Ahdath (Skirmishers) @ 2 points each
1 x Foot Ghilman (Light Infantry, with Javelins) @ 4 points
In this scenario each side deploys in three phases, first any 1- and 2-point units, then 3- and 4-point units, then units worth 5 or more points. The defender deploys first in each phase.
I knew I was going to be outnumbered and I also knew that due to the deployment rules Stephen would have to deploy most of his Warband before I deployed anything heavier than my Skirmishers. So, I decided on a ruse, I planned to concentrate my force in the South West corner and rely on an interior lines defence, trying to prevent Stephen being able to bring all his troops to bear at the same time, but I would try to make it look like I was going for a central deployment.
Stephen started by deploying his Ahdath on his left flank, near some rocky ground. I deployed my Skirmishers about a third of the way across the table, near to a building, I was hoping Stephen would think that these would be guarding the left of my line, when I actually intended them to be the right of my line.
Stephen then deployed his Ghilman and Turcomen, one of the latter to the east of his Ahdath and the other two in the North West corner with the Ghilman unit.
Stephen’s left flank
Now it was time to deploy my main force, I put my Yeomen on the extreme left of my deployment zone, then the Crossbows, then the Heavy Foot. I put the Mounted Sergeants on the right, immediately behind the Skirmishers. These would act as flank guard.
Stephen then deployed his remaining units, two groups of Mamluks, including his leader.
Stephen’s Turcomen, Ghilman and Mamluks
I deployed my Leader behind my Infantry line, intending to position him so that he could influence courage rolls on the main infantry line.
Turn 2 Andy’s Pullani brace themselves for the attack.
On my first couple of moves I advanced my skirmishers to occupy one of the buildings to form a bastion on my right, and advanced the rest of the infantry to form a diagonal line, getting the Yeomen and Sergeants into Wall of Spears.
Andy’s defensive line
Stephen advanced his forces, but he let his Ghilman get too far ahead of his other troops so they came in range of both my skirmishers and crossbows, taking casualties from both and being forced to retreat battered.
Stephen’s Turcomen units on the West flank advanced and shot at my Yeomen, temporarily battering them, and forcing them back. Fortunately for me they rallied at the first attempt and resumed their place in the line before Stephen could exploit the gap. Stephen also got his Ahdath close enough to my Skirmishers to start shooting, but having the advantage of cover my Skirmishers won that shooting contest. Stephen’s Turcomen unit on the East flank came up, so I advanced my Mounted Sergeants to chase them off, if memory serves, I charged them, they tried to evade but failed and had to fight with Armour of 1, all but being wiped out in the first round of combat.
On my left (the West) Stephen tried attacking my line of foot but his units were rebuffed. My crossbows and skirmishers must have been practicing because they inflicted many casualties breaking a couple of Stephen’s units.
With over half of Stephen’s units wiped out or routed, and with the hope of getting a third battle in, Stephen conceded.
This time I only made two boasts, ‘Half of the Enemy shall fall to my Sword’ (2) and ‘They will tremble before me’ (2). I succeeded with both boasts, so I gained 4 Glory for the boasts, and took 5 Glory for winning the battle.
Stephen made three boasts again, ‘I will destroy more units than I lose’ (2), ‘Half the enemy shall fall to my sword'(2) and ‘My arrows are deadlier than my spears’ (2) this time Stephen failed to achieve the first two boasts, but did succeed with the third, which cancelled each other out, so no change in his Glory total.
So, after the second battle I had 2 victories and 14 Glory, Stephen had two defeats and 2 Glory.
Battle 3
For the third battle I chose “The Hills” and the die roll resulted in Scenario 3 “Defending the Indefensible” with Stephen as the Attacker and I as the Defender. The table was set up with 5 hills, one in the centre of each quadrant, and one more in the central area of the table, with a shrine on the central hill. I had to deploy up to 10 points in the central zone, defending the shrine, with the remainder of my force in the Western deployment zone. Stephen’s force would deploy on the Eastern zone with the objective of getting one of his units into contact with the shrine.
Andy (Frankish Settlers (Pullani)) Total 25 points
1 x Knights (Elite Cavalry, Drilled), Leader Braveheart (In challenges only hit on a 6) @ 8 points
1 x Sergeants (Heavy Cavalry) @ 4 points
1 x Foot Sergeants (Heavy Infantry) @ 4 points
1 x Foot Yeomen (Light Infantry) @ 3 points
1 x Crossbowmen @ 4 points
1 x Skirmishers @ 2 points
Stephen (Ayyubid Egyptian) Total 29 points
1 x Foot Mamluk (Heavy Foot, Expert) @ 6 points
2 x Foot Ghilman (Light Infantry, with Javelins) @ 4 points each
1 x Hashishin (Warrior Infantry, Assassination) @ 5 points
1 x Mounted Turcomen (Light Cavalry) @ 4 points
3 x Ahdath (Skirmishers) @ 2 points each
The astute among you will notice the inclusion of a unit of Hashishin in Stephen’s warband, with the Assassination upgrade. These troops and the upgrade are from Lion Rampant: The Crusader States. The Assassination upgrade normally costs 2 points but the Hashishin get a discount so it only costs them 1 point. This allows a pre-game assassination attempt against the enemy leader, requiring a 5 or 6 on a d6 to succeed. Needless to say, Stephen rolled a 6, and my leader left this mortal coil clutching his throat. This meant that I would not get any Leader benefits in the next game.
I decided I would need to keep my fastest units as my “reserve” to give them the best chance of getting into the fray (this may have been a mistake), so I deployed my Foot Sergeants occupying the shrine on the hill, with the Crossbows facing Stephen’s deployment area, and the Skirmishers to one flank. In the Western deployment zone I put my two mounted units and my Yeomen.
Stephen deployed his Hashishin and Ghilman in the northern half of his deployment zone, with his Mamluks and Ahdath in the centre and his Turcomen on his southern flank.
As Attacker Stephen took the first move and advanced most of his troops towards the shrine, I advanced my crossbows and moved the skirmishers behind them to the northern flank. I then started to move my reserves up, thankfully all the units succeeded in their move activations in the first turn.
In the next couple of turns our missile troops exchanged fire, generally to my advantage, Stephen advanced his Hashishin and Ghilman closer to the shrine, and I managed to bring up my Mounted Sergeants on my southern flank and my Foot Yeomen on the Northern flank. My unit of Knights, bereft of their Leader, resolutely refused to advance any further (needing a 7+ to move, and having lost the ability to reroll a failed activation with the assassination of my leader).
On the southern flank our cavalry units came to blows, with my Sergeants coming out on top.
Stephen’s Ghilman advanced towards my Crossbows, taking casualties on their way in, but his Hashishin eventually got close enough to charge my Skirmishers, who managed to evade the charge.
By this time, I had brought up my Yeomen to hold off one of the Ghilman units, and Stephen’s Hashishin diverted their attention to my Crossbowmen who miraculously survived the Hashishin’s charge, driving them back.
Andy’s Pullani defend the shrine
And my Knights, you ask? Still sat stubbornly on the edge of my deployment zone refusing to move.
Stephen closes in on the Shrine, my Knights have hardly moved.Andy’s Knights “resolutely guarding the rocky ground”.
Stephen continued to throw his Ghilman at my Yeomen, and although the latter were reduced to half strength, they held on long enough that the Gilman unit eventually failed its Courage and Rally tests and melted away.
One of the conditions for ending this scenario is when the Attacker has lost 50% of their starting points, and eventually Stephen’s mounting casualties brought him to this point ending the battle.
For this battle I again only made two boasts: I shall destroy more than I lose (2) and Tremble before me (2). I succeeded with both boasts, so I gained 4 Glory for the boasts, and took 5 Glory for winning the battle.
Stephen made three boasts again: ‘My arrows are deadlier than my spears’ (2), ‘I shall strike the first blow’ (1), and ‘I shall run rings around them’ (1). Unfortunately for Stephen he failed to achieve any of these boasts so lost 3 Glory.
My recalcitrant knights did do one good thing, as they refused to move away from my deployment zone it made it all but impossible for Stephen to achieve his ‘’I shall run rings around them’ boast.
So, after the third battle I had 3 victories and 23 Glory, Stephen had 3 defeats and -1 Glory.
In our next session we will fight the fourth battle, where I expect to have a larger force than Stephen, and the final 50-point battle, which we will open up to a second commander on each side.
Boasts
For those not familiar with Lion Rampant, Boasts are additional objectives you can set for yourself in addition to the scenario objectives. The Boasts Stephen and I used in these battles, and their success criteria and Glory value are as follows (failing to achieve a boasts costs 1 Glory, irrespective of its positive Glory value).
Boast
Criteria
Glory
I shall slay your Leader
Your Leader must kill the enemy Leader in a Challenge or Attack. Routing the enemy Leader does not count as a success. If the enemy Leader refuses your challenge and survives the game, you succeed but score only 1 Glory
3
I will destroy more units than I lose
Your Warband must rout/kill more enemy units than you lose (the actual number of models destroyed is not relevant).
2
Half of the enemy shall fall to my sword
Your Warband must rout/kill at least half of your enemy’s total number of units (the actual number of models destroyed is not relevant).
2
My arrows are deadlier than my spears
Your Warband must rout/kill more individual models with Shooting than Attacks (put casualties in two separate piles!)
2
They will tremble before me!
At least two enemy units on the table must be Battered at any one time.
2
I shall strike the first blow
One of your units must declare the game’s first Attack
1
I shall Run rings around them
At the end of one turn of the game, have one of your own units closer to the enemy’s base line than any of their units.
1
Their arrows shall be lost like tears in the rain
None of your units may be ultimately routed or destroyed by missile fire (they may take missile casualties, but this cannot be the cause of their removal from play).
Andy presents a short round up of the games at the second meeting of the year.
Stephen and I started our Lion Rampant Five Battles campaign. We had planned to play two games today, but actually got through three games.
First Battle: Stephen’s Ayyubid Egyptians spread outFirst Battle: Nearing the endSecond Battle: Andy’s Pullani brace themselves for the attack.Third Battle: Andy’s Pullani defend the shrine
A full report on these battles will be posted soon.
Eric ran a Darkheim – En Garde! fantasy skirmish game pitting four factions against each other in a free for all.
Barbarians and BeastmenCultists approach the villageFighting around the ruined chapelThe village
Paul put on a 3mm Eastern front game set in late 1943
Aerial view of the battlefieldSoviets bypass the town
German ambush from the woodsAerial view of the town
Finally, David, Alan and Chris played a Star Wars Armada game.
Imperial Star DestroyersRebels press the attack“They’re behind you!”
That’s all for this week.
The diary for this year’s meetings can be found here.
Tony F reports on the beginnings of an epic journey.
About four years ago, Games Workshop released The Quest of the Ringbearer, the latest source book in their Middle Earth Strategy Battle series. This is centred around a series of 28 scenarios which, if played in succession, tell the story of Frodo’s journey across Middle Earth to destroy the One Ring. It’s a bit of a mash-up between the story as told in the book, and the slightly different version in Peter Jackson’s films.
Phil and I have finally managed to get ourselves into gear and started on our Quest at the first meeting of the year. The initial scenarios are quite short, so we managed to race through the first four, even with the club AGM being held during the meeting ! Aiding us were Andy, who joined Phil on the Evil side, while Jon R played with me on the side of all that is Good. This report will cover the first two scenarios, with the next two in a separate post.
Scenario 1 – Farmer Maggot’s Crop “The hounds of love are hunting”
Farmer Maggot’s cottage
This was a simple starter scenario, with the four hobbits (Frodo, Sam, Merry and Pippin) being on the evil side for once, trying to steal cabbages from Farmer Maggot’s field. Defending the brassicas were Maggot along with his three dogs, Grip, Wolf and Fang. The hobbits had to steal five cabbages from the field and get it back to their stash, while the dogs had to inflict sufficient bites on the backsides of the thieving hobbits to drive them away. Because this was nothing more than a scrumping mission, no-one could ‘die’ – when the dogs took a wound they ran back to their kennel until the Farmer sent them back again, while a hobbit that lost all of their wounds would run away and abandon the expedition.
Starting positions for scenario 1. The hobbits by their stash (giant tomato), Grip, Fang and Wolf by the kennel and Farmer Maggot asleep in his cottage.
In our playthrough, the hobbits got off to a good start, stealing their first cabbage and sending two of the dogs back to the kennel almost immediately. However, Wolf showed early form by biting Sam – in fact Wolf would be responsible for most of the wounds we inflicted. As soon as one of the dogs took a wound it woke Farmer Maggot, and as the mechanics of the scenario meant that the Farmer had to be touching the kennel in order to release any hound that had slunk back to it, Jon and I decided that our best course of action was simply to leave him there so that the dogs would be immediately be back into the fray.
Sam fends off Fang while the others gather cabbages
With two of the dogs temporarily out of action, the hobbits managed to grab a further three cabbages before they returned. When a hobbit was charged it had to drop its plunder, so not all of the cabbages made it back to the stash point when the dogs returned. As all three dogs got into action we started whittling the hobbits’ numbers down, with Wolf playing a starring role, until there was only one left facing all three dogs, with two plunder tokens still needed – a couple of good bites and it was all over.
The scenario was pretty well balanced, we felt – the hobbits managed to make it off with three of the required five cabbages, and could easily have made it further had Jon not rolled something like four successive sixes towards the end of the game.
Scenario 2 – Short Cuts Make Long Delays “It’s in the trees – it’s coming !”
This scenario saw three of the four hobbits lost in the forest on the way to Crickhollow (Merry has already gone ahead). Three Ringwraiths are closing in on them, and only the intervention of Gildor Inglorion can save them. The hobbits started in the lee of a large hedge which runs through the forest; the Ringwraiths started in the centre of three of the board edges, while Gildor was on the fourth, Eastern edge (he got to start 3″ in because the Good side won the previous scenario). The objective was to get Frodo off the Eastern side of the table.
The Ringwraiths are in ‘Sentry’ mode – each turn they must roll a dice and depending on the result they could either move normally, at half speed, stay still or even in some cases be moved by the Good side. Conversely, the hobbits are all petrified of what could be in the woods so they each had to make a Courage test every turn – pass and they could move normally, fail and the Evil side got to move them. Once a Ringwraith spotted a hobbit (which was only at 3″ range in the woods) the alarm was raised and everyone could move normally. So these rolls would be crucial to the outcome – if the hobbits could evade detection for long enough then Frodo could escape.
Sam and Frodo make for the eastern table edge, but Pippin has been spooked by noises in the forest and has fallen behind.
The Ringwraiths pottered around pretty randomly – the one on the Southern edge came up with several 1s on his movement rolls, allowing the Good side to move him away, and he gained the nickname ‘Sh*t Ringwraith’ from has master which stuck for the rest of the day. The Western ‘wraith quickly moved up to the hedge with a decent couple of rolls. Pippin then failed a courage test and the Evil side moved him back towards the hedge and things looked dicey – one more dodgy roll and the alarm would be raised, which would allow the Ringwraiths to quickly close in with their superior speed. But the Western ‘wraith twice failed his rolls to cross the hedge, and spent two turns untangling his cloak from the branches, allowing Pippin to get away. Pippin did fail at least one more courage test but the Good side, being somewhat more decorous, decided not to christen him the ‘Sh*t Hobbit’.
Pippin on his lonesome, waiting for a Black Rider to find him…… but the Ringwraith in question has snagged his cloak on the hedge and spends several turns trying to cross !
This left just the Northern Ringwraith as a threat – but by this time Gildor had moved up to meet the hobbits and was shielding Frodo. Since the scenario only required Frodo to escape, we decided we’d sacrifice the other two if necessary to get him away. So Sam and Pippin moved into blocking positions and Gildor hurried the Ringbearer off the table. Pippin was struck down in the last turn, but it was nevertheless a victory for the Good side again (rolling after the game, Pippin was determined to not be entirely dead, so his sacrifice was worth it).
Sam and Frodo make for the eastern table edge, but Pippin has been spooked by noises in the forest and has fallen behind.
The scenario was tricky for the Evil side, but depending on the random movement rolls for the Ringwraiths it could have gone entirely differently – and getting stuck on the hedge for two turns (only a 1-in-6 chance) effectively took one of them out of the game. What was key for the Good side was that Frodo, with his higher courage value, didn’t fail a single test and so could move towards the edge of the table at full speed every turn, making it in the minimum possible time.
‘Come on if you think you’re hard enough !’ – Gildor shepherds Frodo and Sam to safety ahead of other wraith.
A good turn out for the Society’s first meeting of 2024, which included the Annual General Meeting, as well as half a dozen games.
The games staged were representative of the many periods and genes covered at the Society, consisting of historical, fictional, fantasy and sci-fi games.
Tony and Phil made a start with their “Quest of the Ringbearer” Middle-Earth campaign, playing out 4 scenarios of the journey from the Shire to Mount Doom.
Scenario 1 Farmer Maggot’s Crop
Farmer Maggot’s cottageStarting positions for scenario 1. The hobbits by their stash (giant tomato), Grip, Fang and Wolf by the kennel and Farmer Maggot asleep in his cottage.One of the Hobbits fends off Fang while the others gather cabbages
Scenario 2 – Short cuts make long delays
Pippin gets left behind as Frodo and Sam head for Gildor Inglorion. The Nazgul blunder their way through the woodsSam has three Nazgul to face, Pippin has fallen and Frodo is nowhere to be seen.
Scenario 3 – Buckleberry Ferry
Starting positions for Scenario three, Three Nazgul spread out near the ferry, the Hobbits are in the trees near the top of the picture.Stalemate, the sole surviving Nazgul (with 5 points of Will left) has crossed the Brandywine tying the ferry on the far side of the river. The four Hobbits have taken some damage and can’t face swimming the river with a Nazgul waiting for them.
A more detailed report on these scenarios will appear in due course.
Stephen staged a 15mm American Civil War game using Brigade Fire & Fury, ‘The Battle of Mansfield April 1864’
Union defenders on the hillUnion fall back as the Confederates take the hillLast ditch Union defenceConfederates turn the flank
Alan put on a Pulp Alley game “The Castle of Terror”, teams from the Intelligence Agencies of various countries have been dispatched to investigate secret German activity at Schloß Weidergänger.
The teams approach the castle through the woodsThe enemy of my enemy is not necessarily my friendRussians investigate one of the hutsSentries patrol, “Hast du etwas gehört, Fritz?”
Jeremey and Eric tried out –“Grimdark Future” from One Hour Wargames using their Space Marines and Robot collections.
Space Marines attack!Part of the robot hordeSpace Marines with air supportSpace Marines take a beating
John staged a FoG Renaissance 15mm ECW game pitching Royalists vs Covenanters
Scots Covenanters defend the hillPush of PikeCavalry clash on the wingsKings’s Lifeguard of Foot supported by cavalry attack the Covenanters
And finally, David put on a 28mm Napoleonic Corps game, Russians vs Prussians using General d’Armee rules
Battle lines are formedCavalry clash while infantry hide in the woods.Russian foot attack the Prussians in the woodsAttack on the Cross Roads
Well, that’s it for the round up of our first meeting.
The Society meets on the 2nd & 4th Saturdays of the month at Linton Village Hall. You can find our diary of games here.
For new members/visitors, we will always endeavour to find you a spot in a game if we can.
Club member Marcus reports on another solo game of 5 Parsecs from Home.
The crew of the “Pi” have had some scares so far but come out about as far ahead as an independent crew of scoundrels starting out in a big universe can expect so far. Turn 3 starts with payment of upkeep and debt on the ship. San and Nira trade for some contraband. There is a risk that they could acquire a rival as a result (law enforcement perhaps or a rival gang?) but they get away with it and gain 3 CR. Kel and Wellington explore and pick up a shotgun. Always handy! More importantly they gain a rumour “Meet someone interesting…” In a darkened corner of a relic emporium a wizened alien gives them a strange token following a curious discussion over purchasing some old charts. It’s handed over with the words “Perhaps you can make use of this too…key to the temple, or so they say…” Wellington looks at the ancient looking etched cube in his hand with a curious look. “I have seen something like this before, but I can’t remember where…” perhaps it is just what it looks like, a curious old piece of junk. Perhaps not.
Meanwhile Pascal does some schmoozing and finds a new patron with an offer of a job which must be completed this turn or the next. Your patron has been double crossed in a shady information bartering transaction. The perpetrator has however crashed on a shuttle in the southern forests. Eliminate him and the knowledge he carries. It has the benefit of giving access to the company stores for supply purposes. Ultimately this produces a roll which generates 1 CR of scrap! “I told you that was a load of rubbish Pascal!” Very disappointing. This job also a significant hazard. The crew will face veteran opposition at -1 to panic.
They don’t yet know it but they will face the threat of the “Converted” infiltrators. Their opponents appear normal (as normal as anyone looks in this galaxy of diverse lifeforms!) but are part of the cyborg hive mind advance party…there’s a threat of invasion and galactic war!
You can see the Converted moving in from the north-west quite apparently quite close to the wrecked stealth shuttle. The crew can be seen at the south centre. The yellow counter is a randomly generated “curious item”, worth 1 CR if picked up)
The first couple of turns are spent moving in on the location of the crash. Despite the initial proximity of the converted to the site both crews converge at the location almost simultaneously with San and Kel spotting their opponents.
Rolling a 12355, Kel and Nira act. Kell moves and shoots against an opponent in the open rolling a 6! However, a damage roll of 2 leaves the opponent stunned (yellow counter). Nira moves and shoots the leader in the open with a 5. A damage roll of 4 equals the leader’s toughness for a kill (red token)! The enemy return fire, mainly at Nira, but fortunately they all miss. Just. San now opens up with his plasma rifle and hits. His plasma rifle does +1 damage and the resulting 6 kills another converted. Veyon and Wellington search the shuttle but don’t locate the target, who has taken cover near a bulbous headed insanity plant.
In turn 4 a bad roll means that the crew all move after the converted, who don’t panic because they are (veteran) cold, calculating cyborgs. However, a volley of fire yields no results for the converted as they target San and Nira. Veyon in stealth gear (-1 to enemy shooting) moves into position. She also uses a sonic emitter which impacts enemy rolls with 5” by -1. Veyon shoots with no damage but gets two stuns on her target. Neither San nor Kel can get a hit. Nira rashly charges into close combat trusting in her lethal boarding sabre. Amid the melee of flailing sharp blades perhaps it is the cybernetics that give her opponent the edge, but Nira goes down. She survives the toxic effects of the planet but is a casualty and out of the action.
Turn 5 and having seen Nira go down an angry Kell blasts away at the remaining enemy but misses. They respond by firing at Veyon. She seems certain to be killed but somehow dives to safety (a luck point used, otherwise she would have been toast!) Wellington meanwhile has tracked the target who has moved some way from the shuttle. He shoots but misses. Veyon now return fire at the last of the e. A 5 hit and 5 damage see the last of them go down.
Wellington ultimately brawls with the target and brings the filthy traitor down too.
Far from an easy mission, both Nira and Kel nearly “bought it” (I used a story point to save Nira from a gruesome death). The crew pick up an extra 2 CR danger pay and 8 CR for completing the job. With the infiltrator converted wiped out, there is no evidence of the crew’s involvement and the Converted do not become rivals as a result. The crew also picked up something on the battlefield, a “personal item”. Perhaps representing a time before one of the enemy was converted. There is a chance this can be returned to a relative on visiting a future world, which would be worth a roll on the loot table. In addition the crew gather some loot – Damaged weapons: a ripper sword and 3 frak grenades.
Experience; Everyone gains +3 except Nira who gets +5. Level-up: Nira, Kell and Veyon get +1 combat and Wellington +1 tough. They purchase a military rifle for 3 CR. Finally there is another chance meeting in a bar…(where else?). Could be an addition to the crew perhaps?


You must be logged in to post a comment.