Wars of the Roses – Battle of Stoke Field – Battle Report

Although we were only going to play the Battle of Stoke Field as a tie breaker if the main campaign ended in a draw. We thought for completeness we should play the battle.  The Lancastrians were definitely playing for the last scrap of honour they could muster with this battle having already lost the campaign.
Reading about the battle we decided for Stoke Field, the Yorkists should have at least half their army made up of mercenary and militia units to represent bringing together a rebel army. While for the Lancastrians, half of their army would start on the players baseline to simulate the King’s forces arriving late to the battle. Although not a big battle historically we decided to go big with 1000 points per side, with each side divided up into two commands. Stephen and Andy took up command of the Lancastrians (well Tudor) forces, while Tony G joined me to share the Yorkist (well Rebel) army.

I arrayed my forces in typical fashion with the archers in the front and infantry behind. When we play these high points games I normally have to bring everything I have painted, so I also brought my mercenary pike block and a fair bit of cavalry in the form of Mounted knights and currours. I put the pike block on the right and all of the cavalry on the left to try and outflank the enemy.

Tony G went for a similar deployment, Tony was facing Stephen as the Tudor King who had to deploy right at the far edge of the battlefield. I was facing Andy who had deployed as far forward as permitted.

Very much like the historical battle this meant that within the fist activation of units Andy and I were already in bow range before the King had even got moving. The initial exchange of arrows saw the Yorkists inflict more damage, but didn’t come away unscathed.

Some favourable activation dice also allow the Yorkist currours to quickly advance on the flank and threaten the Lancastrian archers. I’ve used this tactic in a number of battles. The cavalry cannot be ignored so I often find they end up drawing units away from the front line. Andy moved some archers to contest the cavalry, but I decided to be bold and charged my cavalry in.

The charge worked and first blood went to the Yorkists. This was to be the start of a trend on the Yorkist left. With four cavalry units the Lancastrians were in for a hard time having brought no cavalry of their own.

Meanwhile on the Lancastrian left Stephen had started to move his forces forward, but the dice were not being kind and so the advance was somewhat piecemeal.

Back on the Yorkist left and emboldened by the initial cavalry success I decided to continue the charges. These were not as successful, Andy’s archers managed to hold off one attack and he had brought forward his billmen units to halt a further charge.

The deployment for the game ended up turning it into a battle of two distinct halves. The Yorkists forces on their left had manage to almost wipe out the Lancastrian archers and had engaged in several rounds of melee combat with the cavalry charges, while on the Yorkist right not a single dice had been rolled in anger.

I had suggested to Tony as my fellow commander to just wait for Stephen’s forces to advance and not worry about moving forward to engage. With the unique activation system in Sword and Spear armies can often find themselves breaking up during an advance if the dice are not being kind.

On the Yorkist left the cavalry charges continued the Currours continued to be locked in combat but the first of the mounted knights pushed through a unit of billmen and charged off in pursuit of the fleeing Lancastrians.

Seeing the Lancastrian casualties mount up I suggested to Tony to ditch the idea of setting up a defence and to take the fight to Stephens forces. Losing no time Tony got his archers into range and started the customary exchange of arrows.

Tony like me had moved his cavalry into a position of harassment on the right. Stephen had attempted to get his crossbows to within firing range but the restrictions on Crossbows not being able to move and fire hampered his efforts. But Tony decided to follow my example and charge in his currours. Unfortunately the Yorkist fortunes had turned and the cavalry were halted.

Tony soon sent in his other unit of currours but it wasn’t enough and the Lancastrian crossbows had prevailed. But the rest of the Yorkist forces on the right were starting make an impression, adding to the growing Lancastrian loses.

Not wanting to wait for the archery duel to play out Tony charged in some billmen, but they could not dislodge the enemy archers. To counter Stephen charged in his highlanders but they were checked in turn by Tony’s infantry.

After what seemed an age Stephen finally managed to move his three large units of pikes in to melee, this was certainly not to little, but it was too late. The Lancastrian forces had already passed their first morale check, which saw a number of units suffer a loss of strength. They failed to destroy the archers giving me time to move my own pike block into the melee.

The Lancastrian cavalry woes continued over on their right flank. The Yorkist knights had managed to defeat several billman units and were running rampant behind the Lancastrian front line.

Tony continued his assault and managed to defeat the last of the Kings archers pushing them over their break point and handing victory to the Yorkist cause. As the last of the turn was played out the Lancastrians suffered yet more units destroyed despite committing more of their forces in an attempt to even the score.

Stephen’s pike blocks had managed to destroy a the unit of archers with a second unit reducing the Yorkist pike block to half strength.

The Lancastrian Highlanders fought hard with a bonus dice in the melee to try and push aside some of Tony’s billmen, but it ended in stalemate.

In the centre of the field I’d made the mistake of putting a bonus dice on my crossbows (crossbows can’t use bonus dice for shooting attacks), and neither did they have a valid target, so with nothing to lose I charged them into the flank of the pike block. It was far closer than it should have been and the crossbows took the pike block to just two remaining strength points, losing only one themselves.

And thus ended the turn and the battle. This was a really interesting fight with mine and Andy’s forces engaged in the fight from turn two, on one side of the battlefield, while on the other side Stephen and Tony’s forces did not even exchange missile fire until around turn five. By that time the Lancastrians had almost reached their first army morale point. Things could still have been turned around but being so far behind in casualties gave the Yorkists forces a morale boost and the confidence to throw caution to the wind and step up the attacks.

The Lancastrians retreated from this final battle adding to what had been a disastrous campaign, but historically the Lancastrians lost more of the major battles during the war they just managed to win the important ones, sadly that wasn’t to be this time round.

Yorkist Loses
3 Units of Currours (12 points)
1 Unit of Billmen (4 points)
3 Units of Militia Archers (9 points)
Total loses 25 points (Army break point 57)

Lancastrian Loses
1 Unit of Crossbows (3 points)
5 Units of Billmen (20 points)
10 Units of Longbows (30 points)
3 Units of Dismounted Men at Arms (12 points)
Total loses 65 points (Army break point 55)


Battle at Blavatsky Station – August 1944 – Battle Report

Society member Stephen kicks of our posts for 2025 with a WW2 game of Crossfire.

During the Festive period I decided to have a non-Festive WW2 game using Crossfire rules.

It was a late-war Eastern Front game with the Russians on the attack. Each side had a company which comprised three platoons with a company HQ and machine gun. In addition, since the Russians were attacking, I gave the Russians an extra SMG platoon. I made these veterans (an NKVD unit, no doubt) and decided this platoon’s command bonus would help in both close combat as well as morale (obviously led by a commissar – usually Russian commanders only assist in close combat). Since it was a late-war game, to reflect the change in training and doctrine the Russian army went through, I also decided that Russian squads could end movement out of line of sight of platoon commanders but still had to start movement within LOS as usual (normally, Russian squads have to start and end movement in LOS). This reflects the Russian adoption of the British and American structure they went through when the Russian army went on the attack.

The battlefield was set up as follows:

The Germans deployed on table with all units deployed north of the east/west road. The two large barns and the railway station were big enough to accommodate three squads. The other houses and the chapel could only accommodate two squads.

The Germans put their first platoon in the easternmost barn. In the house looking south down the road was the German company command and machine gun – this would make it very risky for any Russian squad trying to cross that road. In the big barn in the middle went the second German platoon. The final German platoon deployed with one squad in the chapel and a squad in each of the wooded areas either side.

The Russians would deploy by activating from the southern edge.

Each side would gain 1 Victory Point for each enemy squad/machine gun killed. The first to 7 VP would be declared winner.

This was obviously going to be a difficult job for the Russians. The sides were more or less equal (Russians with four platoons and the Germans with three) but the Germans had the advantage of being in defence and set up in protective cover.

Right then, on with the game.

The Russians started activation by bringing on their first platoon and occupying the sunken ground on the extreme left. Second platoon came on and took position in the adjacent woods, and the third platoon came on and took cover behind the fence that ran alongside the wheat field. The plan was for the Russians to attack on one flank where they could concentrate their firepower and force the Germans to break cover or risk being rolled up. The Russians held the NKVD sub-machine gun platoon and the company HQ with HMG back – these were due to deploy on the right.

Initiative still lay with the Russians and so the platoon in the sunken ground made a group move to advance across the rail track and into the woods in front of them. At this point the Germans opened up with Reactive Fire. Using a coordinated crossfire, the German first platoon in the woods and chapel let rip – a series of Pinned results ensued but no Suppression, so the Russians maintained initiative. The Russian platoon decided to return the favour – they Pinned the German squad in the woods on the left but also failed to cause a Suppression. This meant they lost initiative and it switched to the Germans.

With all the action taking place on the western side of the battlefield the Germans decided to advance one of their platoons: those on the right, in the other barn, crossed the road and rail track and took up position in the woods. The German first platoon chose to keep up the pressure and poured more fire on the Russians in the woods. They caused a Suppression, so carried on firing, hoping for a kill on the Russians. But they failed to cause another Suppression which meant the initiative switched to the Russians.

The Russians did two things. Firstly, they brought on the NKVD platoon, which came on at the extreme right in the sunken ground there. They also decided to advance their third platoon across the wheatfield into cover behind the fence overlooking the rail track. At this point the German second platoon, in the barn opposite, engaged them with Reactive Fire. Not only that, but the machine gun also had line of sight and fire arc to the Russians in the field. This would be a lot of Reactive Fire. The machine gun was firing independently and fortunately scored a Suppression, meaning the Germans could carry on. The Germans in the barn shot as a firegroup but only caused Pinned results and so initiative went back to the Russians. But the Russian platoon had taken a lot of fire and all squads were either Pinned or Suppressed.

Both Russian platoons that had advanced found themselves with their heads down – all Pinned and Suppressed. So the Russians needed to start putting the pressure on elsewhere. They did this by bringing on the company HQ and machine gun. These took position on the edge of the fence by the farm. The German platoon in the woods on the right had line of sight and took Reactive Fire, but failed to score even a Pinned result – squads failing to score at least a Pin are marked No Fire (NF) and are unable to conduct any more Reactive Fire during that initiative. This gave the NKVD squad a chance – since they would receive no Reactive Fire they could charge forward and try to engage the German platoon in close combat! Being SMG armed and veterans would give them a bonus. So that is what they did. And it paid off very well indeed – the NKVD over-ran and eliminated the German platoon!

The Russian Company Command and machine gun moved into the first of the farm buildings. What they needed to do next, though, was try to rally some of their squads. However, failing a rally roll also means initiative is lost. As it happened the platoon in the wheatfield managed to rally all its squads, whilst the platoon in the woods on the left managed to rally one squad but failed the others. So initiative once more went over to the Germans.

The loss of the German platoon to the SMG platoon really blunted the German options. The other two platoons had little choice but to dig in and see what they could do. As such, both platoons were organised into firegroups and crossfires to make the most of what they had. The Germans in the barn once again Suppressed the Russians in the wheat field but the platoon in the woods and chapel could only cause Pins on the Russians in the wood so they lost initiative.

The Russian second platoon which, up to now, had remained ensconced in the woods behind the railway station were given the order to move up – by bringing the whole Russian company into line it would spread the German fire. As a group they moved into the railway station and took Reactive Fire from the Germans in front of them – the Germans causing Pins on each of the Russian squads!

Now, by causing a Pin a squad may continue Reactive Fire, but should they fail to cause a Pin then they may no longer do Reactive Fire during that initiative. So the Germans could carry on with their Reactive Fire, hoping to Suppress and steal initiative. But they’d seen what could happen if they get a No Fire marker and are charged. So rather than continue Reactive Fire they chose to hold back and allow the Russians to continue with their activations and maybe another opportunity to react may present itself.

The Russian company command and machine gun chose to move up to the next farm building which brought them directly opposite the German company command and machine gun. And these decided to do Reactive Fire against the Russians – causing a Suppression and taking initiative away from the Russians! So the German machine gun kept on chattering away, this time turning to the NKVD platoon in the woods in front of them – a kill! One of the NKVD squads was off. The Germans decided to make the most of their firing so the platoon in the barn resumed fire against the Russians in the wheat field – another kill!

Things were starting to improve for the Germans.

But not for much longer – they attempted more fire against the Russians in the station but failed. Initiative went back to the Russians. There then followed an extended exchange of fire between the Russian and German machine guns – one side would fire, fail and initiative would switch, and this went on for several rounds, changing initiative after just a single activation. This ended up inconclusive. Occasionally one side or the other would be Pinned or Suppressed, but then rally this off and resume firing.

Something needed to be done.

Then during one activation the Russians Suppressed the German machine gun and decided to advance the NKVD platoon into the barn on the opposite side of the road on the right. But as they moved into the open crossing the road the German squads further down opened up with Reactive Fire. Being in the open was never going to go down well and one of the NKVD squads was killed and the other Suppressed! The Germans took initiative, rallied their machine gun, which opened fire on the Russian machine gun and…eliminated it!

Victory Points were now equal – 3 each. If the Russians were going to win they would have to think of something daring. For the time being, though, it was still with the Germans who continued with their fire against the Russians in the station, but a failure to Suppress soon meant it went back to the Russians.

Close Combat is very decisive in Crossfire – a simple win means the opposing squad/s are destroyed. So the Russians looked to bring things to close combat since they had advantage of numbers on the left. The Russian platoon in the woods on the left opened up on the solitary squad beside the chapel, causing a Suppression. With that, they decided to go for it and charged across the road with guns blazing.

As soon as they broke cover the Germans in the chapel opened up with Reactive Fire. They scored a Pin against the first squad meaning they could carry on, but failing to score any more hits meant they received a No Fire marker and the other two Russian squads charged the Germans with the inevitable result – one dead German squad. With their blood up, and a No Fire marker on the Germans in the chapel, they kept up the momentum and sought to charge the squad in the chapel. However, they could only get one squad against them (remember, the chapel has a capacity of two squads and there was already a German squad in there), which meant it was an even combat and on the dice roll. Which favoured the Russians! Another German squad gone.

The remaining German squad of this platoon, in the woods to the right of the chapel, used Reactive Fire on the Russian attackers and scored a Suppression. With initiative, what could the Germans do? Truth be told, they didn’t have many options. The machine gun opened up on the Suppressed NKVD squad and killed it. Victory Points were now 5 to the Russians and 5 to the Germans – still tight. The German machine gun then turned its attention to the Russian company command but failed to score a hit.

So what could the Russians do? They decided to see if they could Suppress the Germans in the barn. They did even better than that and killed one squad. With a platoon in the railway station and another moving up through the woods and chapel, they decided to bring things to a close. The platoon in the station opened up at the German squad in the woods and caused a Suppression – this was what they wanted and made a charge against the Germans. The platoon in the station fixed bayonets and moved out. They drew Reactive Fire from the Germans in the barn and found themselves Pinned down by the roadside! So the Russian squad in the chapel, under cover of the woods, made a final charge against the Suppressed German squad.

And that was that. The German squad was killed which meant the Russians had reached their Victory Points – 7 German squads eliminated.

It had been a very close game and a very enjoyable one, and the Russians had won.

Wars of the Roses – Battle of Bosworth – Battle Report

After 11 battles our Wars of the Roses campaign has finally reached the defining battle of Bosworth Field. With the Yorkist having an unassailable lead of 8 victories to 2, the Lancastrians (now Tudor) forces were fighting for pride.  Given the significance of the battle we decided to go big and have 1000 points per side, with each side divided up into three commands. Stephen commanded the Tudor forces as Henry himself, with Andy as the Earl of Oxford and simply because he was the last player to arrive Tony F played the part of the Stanleys already declaring support for the Tudor cause.
As usual I commanded the Yorkists with a new player to the campaign Mark W acting as the Earl of Northumberland. Our other player couldn’t make it so as well as commanding Richards forces I also took charge of the Duke of Norfolk.

The Yorkists are on the left with Northumberland facing the marshland. Henry Tudor is on the right of the picture facing the farm building

As with the other games in the campaign we looked for anything of historical note that influenced the battle. For Bosworth we decided both players must have at least four mounted units and some artillery. As for the battlefield we had a set of hills for the Yorkist forces to start on with some marshland on the Yorkist right.

I divided the Yorkist army so that Northumberland and Norfolk had equal amounts of archers, billmen and mounted men at arms to guard the flanks.
As per history Northumberland was on the Yorkist left with Norfolk on the right. With Richard in the centre I went for a very mixed force of artillery, cavalry, pikemen and dismounted men at arms.
Stephen had done something similar with his Tudor forces with Stanley and Oxford having similar forces while Henry had only cavalry. Stephen also placed Henry on the Tudor left, Oxford in the middle and Stanley on the right.

The battle got underway and the Yorkists won the first initiative. In a change to Northumberland’s inaction historically Mark  immediately advanced his archers into the marshland to take the fight to Tony and the Stanley forces.

With Norfolk on the Yorkist right flank I started with a steady advance as well rather than wait for the inevitable cavalry charge. Stephen had mounted men at arms in a front rank and currours behind, I wanted to try and get a few volleys from my archers to try and soften them up.

I don’t think I needed to provoke the Tudor cavalry, Stephen took the first opportunity to close the distance. I rapidly advanced some dismounted men at arms and my cavalry to threaten the Tudor cavalry in the flank if it charged the archers. A volley from the archers had little effect.

With the Tudor cavalry on the move, King Richard rode to the artillery to get them into action but the first shots failed to cause any damage.

After a run of bad activation dice, Tony finally managed to advance his archers. This delay allowed Mark the chance to charge in on the far left flank and managed to rout some of Tony’s archers.

Back on the Tudor left flank and Stephen’s cavalry charged against Norfolk. The first charge actually went in against the Yorkist men at arms and came close to routing them. Seeing the danger I took the unusual step of charging some archers into the melee, but failed in turn to rout the cavalry.

In the Tudor centre Andy began to advance his archers and men at arms. Andy also had some artillery that began to creep forward.

Despite managing to get a few shots off the Yorkist artillery was charged and routed by Henry Tudors knights.

After another round of melee Stephen’s cavalry managed to rout some of Norfolk’s archers putting the flank in danger. The Yorkist men at arms would have to do their best as the rest of Nofolk’s units were also locked in combat with the Tudor forces.

On the Yorkist left flank Mark and Tony were beginning to exchange volleys but neither were causing much damage. Mark’s cavalry had continued on pass the Tudor flank forcing Tony to act. In the centre King Richards forces were also starting to trade volleys, I’d brought my mercenary crossbows to make up the number but they had never really done very well for me.

Although they did give a good account of themselves this time, they were the only missile troops in the centre, leaving Andy unopposed attacks against the my infantry. They had managed to dispatch a unit of men at arms so I had no choice but to charge my other dismounted knights forward.

Tudor cavalry in the centre had routed the artillery and in their pursuit also routed a unit of knights, I still had a unit of mounted men at arms. Rather than try and turn them round to counter Stephens cavalry I chose to have King Richard accompany them on a charge straight down the centre against Andy’s archers.

The charge swept the archers aside and to my horror I found history repeating its self, I had forgotten about the pursuit rule. Richard continued charging across the field and into some Tudor billmen. This charge however did not manage to defeat the billmen and so Richard was deep in the enemy’s side of the battlefield, with other Tudor forces closing in.

Meanwhile Stephen’s cavalry in the centre had found its self in melee with a large unit of mercenary pikemen and some militia billmen. Normally this would have spelt doom for the cavalry but the knights were going to prove almost impossible to dislodge.

Things had gone better for Norfolk out on the right flank. A number of Stephen’s cavalry had been destroyed. This freed up some archers who were in a position to fire on the second line of Tudor cavalry making an approach.

I also (with much ridicule from the enemy) moved King Richard from the stricken cavalry charge, back to the centre to support the attack against Andy’s archers. Tactically this also brought Richards forces back into command range.

On the Tudor left flank Stephen managed to get part of his second line of cavalry to charge some billmen who were supported by Norfolk himself. The charge didn’t manage to rout the billmen but also didn’t result in the destruction of the cavalry. But the move did mean I suddenly found my last unit of mounted men at arms facing the flank of Stephens second line of cavalry that had yet to charge.

On the far left flank of the Yorkists Mark had managed to cause Tony’s forces some damage but had eventually come off worse, even the flanking cavalry had succumbed to Tony’s billmen. Mark took the decision to consolidate his infantry and move towards the centre of the field in support of King Richard.

Despite getting a volley off Norfolk’s archers were still charged by the Tudor currours, but unlike the previous charges they failed to rout the archers. They had some billmen in support but they were not needed and the melee was locked in stalemate. However elsewhere on the field the Tudor loses were enough to push them to their first morale test.

Stephen finally managed to get his last unit of mounted knights into combat by charging the mercenary pikemen in the rear. But it wasn’t enough to destroy them and the counter from the pikemen managed to rout the cavalry. But in a close game it was the turn of the Yorkists to also test their morale.

King Richard was once again in the fray supporting his billmen against Andy’s archers in the centre, and remarkably the mercenary crossbows managed to score some good hits on Andy’s dismounted men at arms.

At this point the battle was reaching it’s final stages and both sides were trying their hardest to push the other to breaking point. Mark had advanced his dismounted men at arms into the centre and immediately came under fire from the Tudor artillery. Andy had done quite a lot of damage with his guns but despite having a two bonus dice failed to cause any damage to Marks knights on this occasion.

It was at this point that I managed to get Norfolk’s knights charging against the flank of Stephens remaining currours. The luck of the dice had changed (literally, because after a few bad rolls I swapped my dice), destroying the first currours for no loses and dispatched the second unit pushing the Tudors to their breaking point and handing a close fought victory to King Richard and the Yorkist cause.

This battle ended up being quite close, the score don’t show it but we’ve not had many battle where both sides passed their first morale checks. Stephen did much better in this battle with his cavalry, but that also put them in a position of being outflanked. For Richards command I should not have had such a variation in unit types. Between the guns, cavalry billmen and archers it was hard to co-ordinate things. North sides had some good and bad luck with the dice, but what was noticeable were the amount of failed activation dice in the game.

Although the Yorkists have changed history and won the campaign we will be visiting Stoke for the last battle of this period, just for completeness and to give the Tudor forces one last attempt for glory.

Yorkist Loses
3 Units of Mounted Men at Arms (12 points)
5 Units of Longbows (15 points)
2 Units of Artillery (4 points)
3 Units of Dismounted Men at Arms (12 points)
Total loses 39 points (Army break point 56)

Lancastrian Loses
2 Units of Northern Boarder Horse (6 points)
4 Units of Currours (16 points)
4 Units of Mounted Men at Arms (16 points)
6 Units of Longbows (18 points)
1 Unit of Militia Longbows (3 points)
1 Unit of Dismounted Men at Arms (4 points)
Total loses 59 points (Army break point 57)


Maidstone Rampant

Tony F reports on the club’s first encounter with an alien ruleset.

The club has played a lot of Daniel Mersey’s Rampant rules, both the original Lion and the fantasy Dragon spinoff. So there was a lot of interest when a sci-fi variant, Xenos Rampant was announced. We wanted to see how well the game engine would translate to the new setting with (presumably) more emphasis on shooting than close combat. And to be fair, not everyone thought it would work.

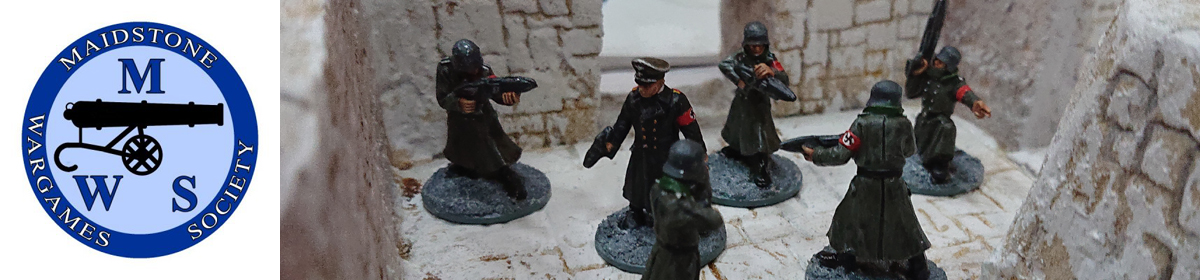
Recently, four of us managed to finally get ourselves organised and gave the rules a try (yes, we know that the book came out months ago – the wheels sometimes turn slowly in Maidstone). Eric and Mike had 30mm armies derived from WH40K forces, while Marcus had a 15mm force of mainly Khurasan miniatures and I cobbled together a force in the same scale from my Hammer’s Slammers armies (you can see those in the header photo).

Mike and Eric ran each other very close in their game, with just a handful of figures left on table at the end (although I’m not sure who actually won!) – sadly I didn’t get any photos. Marcus on the other hand had some dreadful luck with the dice and got a bit of a thumping.

My command team (Brigade Models’ power armour) prepare to unleash all sorts of pain into Marcus’ tank (GZG).

We then switched round and I took on Mike, while Eric switched to a 15mm force of Brigade Models miniatures. Mike and I fought a very tight game, I just prevailed but with very little of my force left on the table.

Marcus’ luck improved a little but he still went down to Eric eventually.

So our conclusions? We felt the game worked well, there are plenty of options to customise units to give your army a unique feel. The familiar game mechanics helped for those who have played other games in the series.

All of our games were 24 points, and we managed two each with plenty of time to spare. Units, especially vehicles, are relatively expensive so none of our forces had more than 5-6 units, and the game ran pretty quickly. So we felt that 36 point games would be perfectly manageable. One thing we found odd was the limit of only one vehicle – none of us could see an obvious reason for this.

We’ve penciled in another session for later in the year, some sort of mini-campaign or tournament. These will be 36 point games, and we’ll ignore the one vehicle rule so expect to see a bit more heavy armour. We seem to have won over a couple of previous refuseniks to give the game a go, so look out for another report in a few months, along with plenty of work-in-progress reports as people build up their armies.

Wars of the Roses – Battle of Tewkesbury – Battle Report

As we near the end of our Wars of the Roses campaign we find ourselves at the Battle of Tewkesbury. As with the other games in the campaign we looked for anything of historical note. For Tewkesbury we decided the Lancastrian player would set up the terrain to represent the fact that the ground was of their choosing.
This was a standard 800 point battle with Stephen commanding the Lancastrians left with Charlotte acting as second in command on the right. Assisting me with the Yorkists, Tony F made a return to the field facing Charlottes forces while I took the field opposite Stephen.

This was the battlefield as setup by the Lancastrians. They formed their battles between two sets of walled fields with some marshland just in front to further impede movement. Their right was made up of a mix of archers and billmen, but on the left Stephen had formed up no less than four units of mounted men at arms, and two units of dismounted men at arms in the centre.

The Lancastrian right flank was protected by some archers, while on the left were two units of hand gunners using the walls as a fortified position.
Seeing the Lancastrian deployment, I took some bold choices with how the Yorkists would deploy.

I placed my mounted men at arms in the middle of the field since no Lancastrian flank was on offer. I also felt there was no point trying to face the mass mounted Lancastrian units. I was convinced Stephen had placed those there to perform a mass charge against my forces. I wanted to provoke the Lancastrians into moving rather than wait until my Yorkist forces had advanced between the two walled areas.

Fearing the Lancastrian mounted units I was determined not to leave my infantry behind the advancing archers. So used my commanders to keep the units moving. Although I had some men at arms and retinue billmen, the second line should it be needed were only militia billmen.

But the Lancastrian cavalry didn’t move and it was clear that they were waiting for the Yorkists to advance past the hand gunners in their protected position or to spend time trying to dislodge them.

Trying again to goad the Lancastrians out of position I advanced my mounted men at arms to within charge range, and suggested to Tony he should do the same out on our left flank.

Still no reaction from the Lancastrians cavalry, so I had no choice but to advance my archers and use a few bonus dice to get a speculative flight of arrows in against the mounted units.

And in a result that shocked everyone the archers volley managed to destroy the flower of Lancastrian nobility!

That got the Lancastrians moving but only piecemeal. Stephen sent a lone unit against some advancing men at arms, who managed to blunt the charge and hold up the cavalry.

But the Yorkists didn’t have it all their own way. Tony’s mounted men at arms suffered at the hands of the Lancastrian archers placed behind the marshland. Tony decided the best counter to the loss of the knights was to advance his archers and billmen and take the fight to the enemy, but took some early casualties from the Lancastrian archers.

With my cavalry in the middle of the field still threatening to charge, Stephen decided to advance both his units of dismounted knights. The activation dice where in my favour and although Stephen had stacked the bonus dice onto his men at arms, it was my cavalry unit that got to charge first, however they failed to destroy the men at arms and got bogged down into melee.

Having managed to destroy the first mounted unit sent against the Yorkist right flank, Stephen sent another into the fight, this time he also managed to get off a volley from the hand gunners but to no effect.

The clash in the centre of the field reached a climax with the destruction of the Yorkist cavalry but not before managing to take one of the Lancastrians dismounted men at arms with them.

Over on the Yorkist left flank, despite the Lancastrian archers favourable position behind the marsh, the rest of the Lancastrian line was starting to take casualties with Tony’s archers punching holes in their ranks.

On came the last of the Lancastrian mounted men at arms, but despite giving his cavalry a bonus dice the Yorkist men at arms again refused to budge and the two sides were locked in battle.

At this point the loses for the Lancastrians pushed them over their first morale check. The test saw a number of key Lancastrian units quit the field adding to their misery.
Over on the Lancastrian right flank Tony was still on the offensive. Having dispatched most of the enemy archers he was advancing his men at arms into the fray.

With one last desperate charge Stephen sent his billmen in against my archers. These were actually my Militia archers and I gave them all the dice I could spare for the fight. The militia took the most damage but it wasn’t quite enough to destroy either of the units.

The final stroke came when my men at arms finally got the better of the last Lancastrian cavalry which pushed them over their break point and handed victory to the Yorkists.

The Lancastrians were left scratching their heads at the end of the battle, asking for clues as to what went wrong. The difference in losses suggested a rout, despite their forces having started in a defensive position.

Maybe the Lancastrians can take heart while marching towards the Yorkists greatest defeat on the fields of Bosworth.

Yorkist Loses
2 Units of Mounted Men at Arms (8 points)
2 Units of Longbows (6 points)
1 Unit of Spearmen (4 points)
Total loses 18 points (Army break point 46)

Lancastrian Loses
2 Units of Dismounted Men at Arms (8 points)
6 Units of Longbows (18 points)
4 Units of Mounted Men at Arms (16 points)
Total loses 42 points (Army break point 40)

Yorkist Victory

First Society meeting of the year

Andy rounds up the first meeting of the year.

A good turn out for the Society’s first meeting of 2024, which included the Annual General Meeting, as well as half a dozen games.

The games staged were representative of the many periods and genes covered at the Society, consisting of historical, fictional, fantasy and sci-fi games.

Tony and Phil made a start with their “Quest of the Ringbearer” Middle-Earth campaign, playing out 4 scenarios of the journey from the Shire to Mount Doom.

Scenario 1 Farmer Maggot’s Crop

Farmer Maggot’s cottage
Starting positions for scenario 1. The hobbits by their stash (giant tomato), Grip, Fang and Wolf by the kennel and Farmer Maggot asleep in his cottage.
One of the Hobbits fends off Fang while the others gather cabbages

Scenario 2 – Short cuts make long delays

Pippin gets left behind as Frodo and Sam head for Gildor Inglorion. The Nazgul blunder their way through the woods
Sam has three Nazgul to face, Pippin has fallen and Frodo is nowhere to be seen.

Scenario 3 – Buckleberry Ferry

Starting positions for Scenario three, Three Nazgul spread out near the ferry, the Hobbits are in the trees near the top of the picture.
Stalemate, the sole surviving Nazgul (with 5 points of Will left) has crossed the Brandywine tying the ferry on the far side of the river. The four Hobbits have taken some damage and can’t face swimming the river with a Nazgul waiting for them.

A more detailed report on these scenarios will appear in due course.

Stephen staged a 15mm American Civil War game using Brigade Fire & Fury, ‘The Battle of Mansfield April 1864’

Union defenders on the hill
Union fall back as the Confederates take the hill
Last ditch Union defence
Confederates turn the flank

Alan put on a Pulp Alley game “The Castle of Terror”, teams from the Intelligence Agencies of various countries have been dispatched to investigate secret German activity at Schloß Weidergänger.

The teams approach the castle through the woods
The enemy of my enemy is not necessarily my friend
Russians investigate one of the huts
Sentries patrol, “Hast du etwas gehört, Fritz?”

Jeremey and Eric tried out –“Grimdark Future” from One Hour Wargames using their Space Marines and Robot collections.

Space Marines attack!
Part of the robot horde
Space Marines with air support
Space Marines take a beating

John staged a FoG Renaissance 15mm ECW game pitching Royalists vs Covenanters

Scots Covenanters defend the hill
Push of Pike
Cavalry clash on the wings
Kings’s Lifeguard of Foot supported by cavalry attack the Covenanters

And finally, David put on a 28mm Napoleonic Corps game, Russians vs Prussians using General d’Armee rules

Battle lines are formed
Cavalry clash while infantry hide in the woods.
Russian foot attack the Prussians in the woods
Attack on the Cross Roads

Well, that’s it for the round up of our first meeting.

The Society meets on the 2nd & 4th Saturdays of the month at Linton Village Hall. You can find our diary of games here.

For new members/visitors, we will always endeavour to find you a spot in a game if we can.

5 Parsecs – The Crash Site

Club member Marcus reports on another solo game of 5 Parsecs from Home.

The crew of the “Pi” have had some scares so far but come out about as far ahead as an independent crew of scoundrels starting out in a big universe can expect so far. Turn 3  starts with payment of upkeep and debt on the ship. San and Nira trade for some contraband. There is a risk that they could acquire a rival as a result (law enforcement perhaps or a rival gang?)  but they get away with it and gain 3 CR. Kel and Wellington explore and pick up a shotgun. Always handy! More importantly they gain a rumour “Meet someone interesting…” In a darkened corner of a relic emporium a wizened alien gives them a strange token following a curious discussion over purchasing some old charts. It’s handed over with the words “Perhaps you can make use of this too…key to the temple, or so they say…” Wellington looks at the ancient looking etched cube in his hand with a curious look. “I have seen something like this before, but I can’t remember where…” perhaps it is just what it looks like, a curious old piece of junk. Perhaps not.

Meanwhile Pascal does some schmoozing and finds a new patron with an offer of a job which must be completed this turn or the next. Your patron has been double crossed in a shady information bartering transaction. The perpetrator has however crashed on a shuttle in the southern forests. Eliminate him and the knowledge he carries. It has the benefit of giving access to the company stores for supply purposes. Ultimately this produces a roll which generates 1 CR of scrap! “I told you that was a load of rubbish Pascal!” Very disappointing. This job also a significant hazard. The crew will face veteran opposition at -1 to panic.

They don’t yet know it but they will face the threat of the “Converted” infiltrators. Their opponents appear normal (as normal as anyone looks in this galaxy of diverse lifeforms!) but are part of the cyborg hive mind advance party…there’s a threat of invasion and galactic war!

You can see the Converted moving in from the north-west quite apparently quite close to the wrecked stealth shuttle. The crew can be seen at the south centre. The yellow counter is a randomly generated “curious item”, worth 1 CR if picked up)

The first couple of turns are spent moving in on the location of the crash. Despite the initial proximity of the converted to the site both crews converge at the location almost simultaneously with San and Kel spotting their opponents.

Rolling a 12355, Kel and Nira act. Kell moves and shoots against an opponent in the open rolling a 6! However, a damage roll of 2 leaves the opponent stunned (yellow counter). Nira moves and shoots the leader in the open with a 5. A damage roll of 4 equals the leader’s toughness for a kill (red token)! The enemy return fire, mainly at Nira, but fortunately they all miss. Just. San now opens up with his plasma rifle and hits. His plasma rifle does +1 damage and the resulting 6 kills another converted.  Veyon and Wellington search the shuttle but don’t locate the target, who has taken cover near a bulbous headed insanity plant.

In turn 4 a bad roll means that the crew all move after the converted, who don’t panic because they are (veteran) cold, calculating cyborgs. However, a volley of fire yields no results for the converted as they target San and Nira. Veyon in stealth gear (-1 to enemy shooting) moves into position. She also uses a sonic emitter which impacts enemy rolls with 5” by -1. Veyon shoots with no damage but gets two stuns on her target. Neither San nor Kel can get a hit. Nira rashly charges into close combat trusting in her lethal boarding sabre. Amid the melee of flailing sharp blades perhaps it is the cybernetics that give her opponent the edge, but Nira goes down. She survives the toxic effects of the planet but is a casualty and out of the action.

Turn 5 and having seen Nira go down an angry Kell blasts away at the remaining enemy but misses. They respond by firing at Veyon. She seems certain to be killed but somehow dives to safety (a luck point used, otherwise she would have been toast!) Wellington meanwhile has tracked the target who has moved some way from the shuttle. He shoots but misses. Veyon now return fire at the last of the e. A 5 hit and 5 damage see the last of them go down.

Wellington ultimately brawls with the target and brings the filthy traitor down too.

Far from an easy mission, both Nira and Kel nearly “bought it” (I used a story point to save Nira from a gruesome death). The crew pick up an extra 2 CR danger pay and 8 CR for completing the job. With the infiltrator converted wiped out, there is no evidence of the crew’s involvement and the Converted do not become rivals as a result. The crew also picked up something on the battlefield, a “personal item”. Perhaps representing a time before one of the enemy was converted. There is a chance this can be returned to a relative on visiting a future world, which would be worth a roll on the loot table.  In addition the crew gather some loot – Damaged weapons: a ripper sword and 3 frak grenades.

Experience; Everyone gains +3 except Nira who gets +5. Level-up: Nira, Kell and Veyon get +1 combat and Wellington +1 tough. They purchase a military rifle for 3 CR. Finally there is another chance meeting in a bar…(where else?). Could be an addition to the crew perhaps?

A year’s worth of gaming (Part 2)

Club member Stephen reviews the games he has played at Maidstone Wargames Society this year. This is part 2 of the article covering July to December. If you missed part 1 it can be found here.

The first meeting after the Open Day can be an important one because it would be the first ‘true’ impression of a club day for anyone returning after the Open Day. We do try to have a few games going and it’s important that games are open to any new member to help them feel included and part of the club. I had a game of Dragon Rampant with Andy.

July – Dragon Rampant

We got in two games. Andy was using his goblins, and I used two new armies – elves in the first game and dwarves in the second. And Andy won both games. Not just won, but won quite convincingly. That’s the thing with new armies – it takes time. You have to get to know each other, trust each other, respect each other. Just like any relationship.

At the end of July came more sci-fi. Another game of Stargrave – Jurassic Moon! I’m sure you can work out the inspiration for that one. Films, TV, and books all provide an endless resource for Stargrave games. Yet again, another sci fi game in my decision to do more sci fi during the year.

In this game Tony’s captain would get killed by a pack of velociraptors, meaning Tony lost his crew and will have to start all over again. Meanwhile, Eric kept throwing grenades at everything. We also used the Side Hustle cards, which provided a great new element to the game.

July – Stargrave – Jurassic Moon

We are now two-thirds of the way through this gaming year, and another sci fi game for me – Battlestar Galactica by Ares Games. This uses the same game engine as other games such as X-Wing. The game was run by Alan, so fulfilled two briefs for the year’s gaming – play more sci fi, and play more games run by other people. Best of all, though, was the chance to game with club members I seldom game with. Alan umpired with Dave and myself taking the Cylons and Pete S and Chris taking the humans. I don’t wish to gloat, but suffice to say that Dave and myself had a very rewarding day!

August – Battle Star Galactica

And then on to a bit of fantasy – Elf King Red. This is a free download set of rules by Rick Priestly. In brief, the game is based around an elf civil war, with each player taking control of a different ‘Circle’ of elves. It’s one of those games with just a few miniatures per player – a leader (or Thane in the rules) accompanied by six companions. Just seven figures per side!

We had a four player game – Andy, Tony F, Phil, and myself. We played two different scenarios (we agreed that each player must devise a scenario, but obviously never played them all). Andy’s scenario involved hunting down a rampant werewolf whilst mine was all about taking control of a temple in the wilderness.

August – Elf King Red

It proved to be a nice fun game. These sort of things always work best with some kind of scenario driven game. There’s a few holes in the rules, which is OK (they’re free, after all), especially if you’re a group of friends and playing the game in the spirit of fun. We certainly coped with any hiccups and any uncertainties were easily resolved. EKR will make a great one-day session of linked scenarios.

It had been a little while, but the first meeting in September was back to our Wars of the Roses campaign – Battle of Hedgeley Moor. This was an encounter I was unfamiliar with, with newly crowned King Edward sending an embassy to the Scots only to be ambushed by the Lancastrians.

September – Sword and Spear – Battle of Hedgeley Moor

You know what, it’s just not fair! I really thought I was going to win this one, it was looking good at one point. But did I? No. You can read the full report here: Wars of the Roses – Battle of Hedgeley Moor – Battle Report – Maidstone Wargames Society (brigademodels.co.uk)

A closer game this time, so I suppose some things are improving.

The second meeting in September was supposed to be Rebels & Patriots but Andy had to pull out at the last minute, so I grabbed some spaceships and we had a game of Starmada instead. Like Full Thrust this is a space fleet game, but it’s quicker and dirtier than Full Thrust and can handle large fleet battles better. We played three games. The first was a simple meeting encounter so we could all remind ourselves of the rules. The grey fleet won this so we decided the next battle would be an attempt to take control of a mining facility. The green fleet repelled them this time and so we moved on to the last game – a chance for the greens to consolidate their position. But the greys won again. We decided this represented a minor victory for the greys. They hadn’t managed to take control of the mining facilities but had done enough to press the greens for trading benefits.

September – Starmada

The first meeting in October was on the 14th, which meant only one thing: HASTINGS! A few years ago we’d re-fought the battle so what we did was have a special Saga day based on the Norman Invasion. Norman and Anglo-Dane armies only.

October – SAGA – Battle of Hastings

The four of us decided to play multi-player games. Each player would keep track of victory points throughout the day and the player with the highest total would be declared winner. The day went to Tim with his Anglo-Danes with Jeremey, also using Anglo-Danes, in a very close second. It seems English resistance to the Normans is alive and well.

Since we meet in such a large hall I often wonder why we don’t do more one-on-one games. There’s enough room. So at the second meeting in October Tony G and myself had a few games of Barons War. This was Tony’s first time, so we kept it small. As such, we got in three games. Barons War provides a really good section on scenarios, which always benefits skirmish games. I won the first, then Tony won the second, which left a third deciding game. It went to Tony! The more I play Barons War the more I enjoy it. Like many rules it’s not always as clear as it could be – though not as bad as some rules out there. But as you play it the more sense it makes. A very enjoyable session.

October – Baron’s War

Right then. So, November. And another ding-dong in our Wars of the Rose campaign.

This was the Battle of Hexham and marked a turning point in the war. Not only was it a turning point in the actual war but it was also a turning point (hopefully) in our campaign. Rather than give details here you can instead read about the remarkable events here.

November – Sword and Spear – Battle of Hexham

The penultimate game of the year was a bit of a 90s throwback – Battletech! This game ticked two boxes for my year’s gaming: more sci fi AND play other’s games as well. Back in the day I used to play a lot of Battletech (and Silent Death). This was Eric’s game and we played a version of Battletech called Alpha Strike which, to be honest with you, bears no resemblance to the original game at all. Which is not a bad thing. Battletech was a very 90s set of rules and I’m not sure I have the stomach for it any more. But Eric had done the right thing by introducing us to Alpha Strike because it is a much more streamlined, playable, and therefore enjoyable game. Splendid fun. And check out Eric’s fantastically painted mechs. When I used to play I would go for lurid colours (I remember doing one in purple and yellow). I much prefer Eric’s muted colours.

November – Battletech Alpha Strike

And so on to my final game of the year. And yet more sci fi. Another game of Stargrave, but this time with a festive feel – I called the game ‘There Ain’t No Sanity Clause’ (full credit goes to The Damned for that). Santa Claus has been kidnapped by hordes of psycho-penguins and the players must spread festive goodwill to release him.

December – Stargrave – There Ain’t No Sanity Clause

Five players took part. They had two goals – as well as collecting loot tokens they also had to collect clues that tell them what they have to do to release Santa. The culmination of the game was a group rendition of We Wish You A Happy Christmas. In addition, if the players give back captured loot tokens to Santa (the loot were presents for all the good boys and girls) then they would receive double experience for those tokens.

A suitably festive ending to the year!

So those were the games I played at the club during 2023. I did well on my pledge to play more sci fi, but not so well when it came to playing other’s games (though I did do that more than usual – so not too bad). You know what, I don’t think I played a duff game all year. I thoroughly enjoyed every game. This is the advantage with being a club member – the variety of games and the quality. I’m going to continue with my determination to join in other games during 2024.


Wars of the Roses – Battle of Hexham – Battle Report

Battle number nine in our campaign was the battle of Hexham. The setup for this battle involved having the Lancastrians with their back to the river known as the Devil’s Water. Both armies were 800 points and as is the established convention with this campaign the victor writes the history, so I’ll leave you with Stephen to go through what happened on the day!

Battle of Hexham
Now I think about it, I feel a bit sorry for Tony F. He turned up, all perky and friendly, and said, ‘So who wants me on their side?’
Jeremey and myself looked at each other. Then we looked at Tony. ‘Neither of us,’ we said. His face changed.

It’s like this you see. There were three of us for the game, so it would be two vs one. Now, if the two players won then the single player would say something like, ‘It took two of you to beat me.’ Or, if the single player won, he would say, ‘Even the two of you together weren’t good enough to stop me.’

So honour was at stake, and this hadn’t occurred to Tony. So we said to him, ‘You decide.’ Tony decided to flip a coin for it – it came up heads: so that meant he would be on Jeremey’s side.

We move on to the Battle of Hexham. This is one of the smaller, lesser known, battles from the Wars of the Roses. However, it’s a very important battle because it marks the end of Lancastrian resistance. The battle was a devastating loss to the Lancastrian cause with the death of the Duke of Somerset, who had been the main supporter of King Henry. There’s not much to the battlefield – a river to the Lancastrian rear (in which many fleeing Lancastrians drowned), but otherwise an empty field (as is the case with many small battles).

I knew my tactics were to advance as quickly as possible to ensure I had space to retreat if pushed back. In general I had my army in a double-line – archers up front with billmen behind. My centre consisted of two pike blocks and two units of dismounted men-at-arms. I knew this would be a tough nut for the army of York to crack. I took a bit of a gamble with my flanks. On the left I had mostly militia troops, with a back bone of a couple of retinue units. On my right I put a solid retinue contingent. Jeremey commented how they had their best troops on their right (which was my left – facing my militia!), so I kept quiet about how comparatively weak that flank was for me. I had no cavalry in my army for the battle, there were two units of mounted knights on the Yorkist side, but they’d been split between left and right. I wondered if that had been a good decision since cavalry can be weak if they don’t immediately prevail, so are best with a bit of company. My commanders consisted of two generals and three captains – Lord Roos with Lord Hungerford and Sir Phillip Wentworth on the left (to take control of the militia) with the Duke of Somerset and Lord Grey on the right.

And so it began.

With Sword & Spear it’s easy to lose track of support troops. One gets so focussed on advancing the front line and using those much needed activation dice in crucial combats that the rear rank gets left behind. I was conscious of this so ensured I moved up troops in pairs – one activation dice on the archers up front and one on the billmen supporting them. I noticed that both Jeremey and Tony didn’t. I don’t say that in an accusatory way, because we’ve all done it and there’s never enough activation dice to do all you want. But I noticed in Sword & Spear that victory will often go to the side who can plug the gaps in their line or have troops in position to exploit enemy gaps, so I was determined I would keep that second line in position.

First blood went to the Yorkists! Oh well, I thought – business as usual! I kept my extreme right flank static because I saw that was where Jeremey had his knights and I could see no reason why I should get closer to them – no, I thought, I’ll let him come galloping across the whole of the battlefield where I’ll have time to form a good line to stop him.

Only two or three turns in to the game and I was the first to lose a unit as well! That had just about cemented in my mind that it was, indeed, business as usual.

Then something rather odd happened. I started eliminating enemy units. Yeah, took me by surprise as well. In the centre and on the right the archery duel began and I was coming out on top! The Yorkist centre was slow to advance (in fairness, due to poor activation dice) and so I decided to take the initiative and move up the pikes and dismounted knights as quick as I could. Jeremey was faffing around with his crossbowmen but before they could do anything I took them out of the game with a flurry of longbow arrows.

Yes, it all seemed to be going just a bit too well. I wasn’t only winning at this point, but I was winning well!

Although my left was mostly militia units, and potentially vulnerable, they were rolling some demon dice when it came to shooting. Whoever was commanding them (presumably a grizzled veteran from the wars with France) they were earning their turnips.

Then it all came to an end.

My dismounted knights in the centre gave a poor account of themselves. They moved up alongside the pikes and I was fairly sure that between them they were going to cause some trouble to the main York line. When they finally got into contact it was not to be. No. Instead of punching a decisive hole in the York line the first unit of knights went down without causing the York billmen so much as a hiccup. Tony’s (superior) troops also started to engage my left flank, and casualties and losses were being taken. The only resolve I could take was on my right where my archers continued to take a toll on the Yorkist troops.

Jeremey had finally decided to put the spurs into his cavalry and they started trotting forward. I saw that, and expected it, but I had a good couple of turns before they made contact so time enough to turn something toward them. The pikes finally went in and…nothing. In fairness there were no casualties on either side, just a shoving match, but I was getting to that point where my early lead was being reversed.

To make matters worse it was now my time to get poor activation dice. What this meant was that Jeremey’s cavalry sped up and managed to outflank me and came crashing into the flank of a unit of archers. Not good, and off went the archers. That was annoying because I had seen that coming and was fully aware of it, I just didn’t get the dice that allowed me to do something about it! Not again though, because I decided to turn troops to face him now whilst I could.

Had it been too late for me though? Because I now went over my Morale break point and had to make tests for all my units. Oh well, it had gone well to start with but I knew it couldn’t last. I stoically accepted this game would be another loss. I did alright on the cohesion tests though. I lost a militia unit that only had one strength left but other than that…yeah, all passed.

The early part of the game had gone to Lancaster and the middle game had gone to York. We now entered the end game and although I was lagging behind it wasn’t by much.

Next turn and the army of York reached their morale point as well. Their cohesion tests didn’t go so well. Jeremey kindly fluffed a lot of rolls and two, maybe three, York units fled the table. That evened things up so it was all to play for.

It was hard for me to press the attack against Jeremey’s flank because so many of his troops had been left behind and those that hadn’t been he started to *ahem* ‘reposition to the rear’ (how brave!) and promptly told Tony that victory for York was now in his (Tony’s) hands. Who needs leaders like that, eh?

Tony acted by getting his cavalry moving and charged them forward. A rash move I thought, but he didn’t have many choices. In fact, it was a fair move – he was only facing my militia troops after all and he had to do something. The pikes in the centre finally achieved a result and punched a line in the York centre but there was nothing there to exploit whilst the other pike block was stuck in a fight. I could now tell the army of York was panicking and trying anything to grab the victory. I tried to play it cool, but I was concerned because if I was to get that win it would be down to my militia troops who were facing Tony’s wing (and remember, Jeremey had earlier let slip that Tony had the best troops). I most certainly wasn’t confident.

And so it happened. We all knew we were on the last, or penultimate, turn and you could tell that each player was looking desperately across the battlefield to see where they could snip off that game-winning unit. We had a quick tot up – York only had to lose one more unit to be defeated whilst the Lancastrians would have to lose two. Very tight. Tony’s cavalry had got stuck in a protracted fight but they finally squeezed out of it and down went a unit of Lancastrian militia.

Just one unit each left to lose.

With victory so close I was desperate not to take a chance. I knew that engaging Tony’s retinue troops in melee with my militia was only going to go one way. So I held back and just hoped the earlier good dice rolls for the militia archers would hold firm.

And you know what, they did! Yup, I drew back my arrows, let fly, and down went some Yorkist billimen!

Victory to Lancaster. Oh, and just for the record, even the two of them together weren’t good enough to stop me on my own!

The most Pyrrhic of Pyrrhic victories for Lancaster, and not much to brag about. But a win nonetheless!

When writing up the battle report I discovered the Yorkists actual loses were 45 points and not the Army break point 46. Yes, technically that means they hadn’t quite Broken, but Jeremey mistakenly marked one of his longbow units at 4 army points, which would have taken them to 46. It is, however, the responsibility of the general to ensure he knows the morale of the troops under him, and if he wavers, panics, and quits the field too early then that’s his mistake and he pays the price.

Yorkist Loses
4 Units of Militia Billmen (16 points)
4 Units of Longbows (12 points)
2 Units of Militia Longbows (6 points)
1 Unit of Crossbows (3 points)
1 Unit of Spearmen (4 points)
1 Unit of Dismounted Men-at-arms (4 points)
Total loses 45 points (Army break point 46)

Lancastrian Loses
2 Units of Dismounted Men at Arms (8 points)
2 Units of Billmen (8 points)
5 Units of Longbows (15 points)
3 Units of Militia Longbows (9 points)
1 Unit Militia Billmen (4 points)
Total loses 44 points (Army break point 45)

Lancastrian Victory

A year’s worth of gaming (Part 1)

Club member Stephen reviews the games he has played at Maidstone Wargames Society this year. This is part 1 of the article covering January to June.

This article is a review of all the different games I’ve played over 2023 just to see, and remind myself, of the variety of games I’ve done. At the beginning of the year I made two decisions – play more sci fi, and play more games that other people put on (my general attitude is ‘I paid for these models and took the time to paint them so I want to use them!’ which means I generally put on a game at most meetings). So this year I wanted to mix things up.

The first game of the year was at the club meeting on January 28th. This was a game of Sword & Spear and part of a campaign (which started in 2022) to re-fight the Wars of the Roses with Jeremey.

January – Sword and Spear – Mortimer’s Cross

I love playing Sword & Spear. I do. But I don’t seem to be any good at it. In all the games I’ve ever played of S&S I think I’ve only ever won twice. Surely it can’t be my superior tactics, that seems to be beyond reproach, right? This game was a re-fight of Mortimer’s Cross (you can find the full, and gloating, write-up here: Wars of the Roses – Battle of Mortimers Cross – Battle Report – Maidstone Wargames Society (brigademodels.co.uk)). As is traditional with S&S, I lost. But you know what, I couldn’t care less because the games are always a lot of fun with plenty of pre-game trash talk and goading, and each game has a story. Playing in good company always helps as well. I’d willingly keep on losing so long as I keep on enjoying it.

February brought another couple of games at the club.

First up was a new game to me – Charlie Don’t Surf by Two Fat Lardies. I find TFL games a bit marmite. I’ve played Chain of Command – loved it. I’ve played What A Tanker – didn’t like it. And this was the first time for CDS. And I loved that as well. The game and models are all Pete S’s, and he’s done a blinding job on them. They are 10mm Pendraken models (I think) and it has just the right look for Vietnam.

February – Charlie Don’t Surf

We’re used to seeing 20mm and 28mm Vietnam games which focus on platoon actions. But Vietnam was bigger than that – often brigade sized actions with the company as the manoeuvre unit. And 10mm captures that perfectly. I had command of the armoured platoon. We put Mark J (newly appointed club chairman) to prove his mettle in command so he took company HQ. The game was a victory for the US side!

The second game in February was planned to be a Barons’ War game with Andy. But in the week leading up I suggested to Andy we could do a ‘compare and contrast’ and have a game of both Lion Rampant and Barons’ War to see how the two handle the same period. You can read a summary of our findings here (Lion Rampant and Baron’s War – Maidstone Wargames Society (brigademodels.co.uk)).

February – Baron’s War and Lion Rampant

First club meeting in March was a Stargrave game. I said I wanted to play more sci fi in 2023 and this was the first sci fi of the year. I found the original scenario online and tweaked it to be what I wanted it to be. Stargrave is a great toolbox of a game – you can make it what you want it to be. This game had both an overland and underground part, which was new for us.

March – Stargrave – The Warp Sextant

I prefer running Stargrave as an umpire, like a RPG. You get a different kind of pleasure as umpire because it’s about providing challenges and running the NPCs/monsters and hopefully providing an enjoyable scenario. Well, for me anyway. In this game Eric’s crew had fought hard to get to the bunker where the Warp Sextant was hidden. But coming out he found Tony F’s crew waiting outside, guns pointed at the entrance. A brief exchange of fire and it was Tony who made off with the treasure. Poor Eric.

End of March it was another chance to lose at Sword & Spear – Second Battle of St Albans. In this campaign I have the Lancastrians which means the onus is on me to win in battles where the Lancastrians came out on top. Such as Second St Albans.

March – Sword and Spear – Second Battle of St Albans

Again, rather than go into details here, anyone wanting to know more about this game can read the battle report (Wars of the Roses – 2nd Battle of St Albans – Battle Report – Maidstone Wargames Society (brigademodels.co.uk)). Suffice to say, it was business as usual! Tony joined me again on the Lancastrian side. I was feeling good about this one, felt I was due a win. And the early part of the game was looking good – the local militia archers engaged the Yorkist artillery and eliminated them for no loss! Yup, first blood to Lancaster. And then it steadily went downhill. Never mind.

More sci fi in April! This time it was Pete M’s Space 1889 game. A different kind of sci fi – Victorian rather than futuristic. The stand out thing were Pete’s scratchbuilt aeronefs, and we spent a bit of time playing ‘guess what bits have been used for the models’. Truly outstanding.

We played two games. I was on the human side for both games, and both games were very close. And Jeremey got a leathering in both games with his colleagues leaving him to do all the work. Excellent game.

April – Space:1889 – Mars

The end of April was Salute and this coincided with a club meeting day. Naturally, it was going to be a quiet meeting with a fair few members at Salute. I ran an American Civil War game (battle of Cedar Mountain) using brigade Fire & Fury.

April – Fire & Fury – The Battle of Cedar Mountain

The Union army is in a difficult position for this battle – making an attack against a much larger Confederate army. John R took control of the Union troops and did a good job – but his artillery ran out of ammo early in the game and he never had the time or opportunity to replenish them. This left him conducting a fighting retreat, and he made a good job of it, slowing down the Confederates.

First game in May was another in our Wars of the Roses campaign – the battle of Towton. Like all the others…I lost. Now, I’m not just saying this, but the dice rolling on our side was pretty poor, compared to the other side rolling really well. No, no! Stop that! It’s true on this occasion. To read more about this game you can check out the blog post (Wars of the Roses – Battle of Towton – Battle Report – Maidstone Wargames Society (brigademodels.co.uk))

May – Sword & Spear – Towton

Next was another sci fi game – Full Thrust. Jeremey and Tony were running the game which meant only one thing: vector movement. My fluffy little head struggles with that and prefers the cinematic movement option.

May – Full Thrust

A mixed bag of results. The first game was two opposed fleets with an asteroid field cutting the table in two – Tony F and myself using some of Brigade’s German ships, and Jeremey and Tony G using some of Jeremey’s scratch built (out of false nails) ships. Tony and myself came out on top in that one. We then played a couple of one ship per player games (first was cruisers, second was destroyers) and the alien nail ships won those games.

Along came flaming June and I decided not to attend Broadside since I was trying to restrict spending and if you go to a show you have to buy something, eh? John Lambert and myself had a game of Crossfire. We played this quite a bit a few years ago but then it fell by the wayside. The models for this game were from my collection – WW2 eastern front.

June – Crossfire – WW2 Eastern Front

The scenario was a late war one – Russian advance through Poland with the Germans on the retreat. Naturally, we were re-learning the rules, but it steadily came back to us. MUST ensure we play more of this one.

June 24th was the club Open Day. My game was a Saga: Crusades games. We played two scenarios, I had Saracens and Andy had Milites Christi. Saracens carried the day and won both games. I love Saga. It’s just the right game for me.

June – SAGA Crusades – The Road to Damascus

You can read more about the Open Day here: Review of 2023 Open Day – Maidstone Wargames Society (brigademodels.co.uk)

That concludes part 1 of the review of 2023, part 2 will be published in a couple of weeks.