A quieter meeting this time, just three games in progress.
Paul and Colin staged a 2mm recreation of the Battle of Waterloo.
French advance covered by skirmishers
Mark J and Tony F were trying out ‘O’ Group with an early WW2 encounter between the French and Germans in 10mm.
German and French Infantry line the hedgesFrench InfantryFrench ArmourGerman ArmourGerman InfantryGermans push back the French right flank
And finally Stephen ran a Stargrave game, with a Valentine’s Day theme. Look out for the Captains’ unbiased reports in a blog post soon.
Some nere-do-wells in the streets of Verona on the planet RomanceThe mean streets of the west side of VeronaCarnage outside the pub.Mariah – the Angel, guarded by Captain Greyfax’s crewCaptain Reynold’s crew passing quietly down a back alley.All is quiet again in Verona
MWS meet on the 2nd and 4th Saturdays of the month (except the 4th Saturday in December) from 10:00 to 17:00 at Linton Village Hall, south of Maidstone on the A299.
Information about the Society, including directions, can be found here.
The diary of planned games can be found here, this is updated throughout the year so please have a look from time to time.
Stephen takes us through a recent free set of medieval rules that appeared in the Wargames Illustrated magazine.
‘Assassins & Templars’ (A&T) was a free set of rules that came with issue 455 of Wargames Illustrated. If you missed it then you can purchase a copy from WI, along with all the paraphernalia required. Or you can download it all free from the WI website (not the rules though – if you missed the free copy you now have to buy it).
Having downloaded the card decks from WI and printed and cut them out, I thought I would have a test game because it was absolutely chucking it down with rain outside.
It has a lot in common with its predecessor: Here’s The Ruckus. Ruckus is focussed on the War of the Roses. Both use the exact same mechanics and if you know one then you know the other. Warbands comprise 12 models. They are led by three ‘Hero’ figures – a single commander (a knight) and two sub commanders (squires, or lesser knights). The remaining 9 models are made up of spearmen, crossbowmen, archers, etc. In A&T they have introduced horse archers. The Hero models each control 1 or more of the retinue troops so on a simple level a warband will comprise three 4-man ‘Spears’.
Hero figures also have specific traits or special skills. The list of traits in A&T is much smaller than Ruckus but I see no reason at all why the expanded trait list can’t be imported into A&T.
Turns are completed by turning cards in the Hero deck. This will tell you which Hero (and Spear) to activate, or it could be a Cunning Plan card. The Cunning Plan deck contains cards that allow extra bonuses – things like a re-roll, etc. But there’s also a Divers Alarums card – these are better thought of as special events.
Both Ruckus and A&T are aimed at ‘narrative games’ where the game is more about the story and the cinematic elements of the game than a simple win or lose. To that end there are rules in there for things such as climbing, falling, swimming, balancing, etc. An important part of this, and an important part throughout the rules, is the concept of the ‘Mishap’.
If you roll a 1 when shooting, for example, you have a Mishap (e.g. bow string snaps) or if you have a Mishap whilst climbing you may fall. This whole section on Mishaps felt ‘tacked-on’ to me. I love the concept, and it’s what gives narrative games their…well, narrative. But there was quite a bit of this in A&T – sub-rules just tacked on (‘If X or Y happens then check table C for the effect). Arguably no big deal, but at the same time it didn’t feel like some things were baked in to the rules. You get the feeling that during the play test something happened and someone suggested, ‘well, if that happens just get them to roll on a Mishap table’. And they just shrugged their shoulders and said, ‘yeah, alright’. And there’s a different Mishap table for each different action.
It’s a free set of rules, so no big deal. Good concept, average execution.
Right then, Heroes have a command radius. If a member of their ‘Spear’ is outside they are considered ‘Feckless’ and, you guessed it, they have to roll on a table to see what they do.
Things are kept nice and simple though. You need a 6+ to hit at long range, and a 5+ at short range (different ranges for different weapons). Melee is a bit more involved, as you would expect with a low-model count. What will happen is that when two (or more) models move into contact they will fight up to three consecutive melee phases. In the first phase, all combatants fight at their full potential. If both are still standing you conduct a second phase of melee immediately, where chances to hit are reduced. If they are both still standing after that then a third, and final, phase of melee is fought immediately – still with a reduced chance to hit and now unable to bring to bear any special skills. All this is to reflect fatigue during combat. This means that there’s a chance to pull something back in melee, but also means that combat is likely to produce a resolution that round rather than drag over multiple rounds. If both are still standing at the end of the third melee phase then both participants back off so they are 1” apart.
Heroes have three wounds with other models having just the one. All models also get a Save roll, in both missile and melee. In missile fire an extra roll (again!) is made for any intervening obstacles for the shot (why that couldn’t be added into the shooting mechanism I have no idea – probably because the game uses D6s and just one modifier can have a big effect. Which begs the question, why not design the game with D10s?)
So how did it play in the end?
Actually, it gave a very enjoyable game.
I used the scenario that came in the rules – there’s a central watering hole and the winner is the first who has sole control of the watering hole or kills the opposing leader. To have control you have to be the only one with models within 1” of the watering hole. Realistically, that’s only going to happen if you completely wipe out the opposition so in actuality killing the opposing leader is going to be the way to win the scenario.
It’s a short game (about an hour), so would be great for a one-day campaign. In the scenario I played there was no need for climbing and jumping etc, so that aspect was missing. I did forget about the shooting Mishaps though. On a couple of occasions 1s were rolled but I forgot to apply the Mishap rules. Just put that down to first-time play where rules do get missed. To be honest, it doesn’t take long to master the game so next time around I am sure I will remember to use the Mishaps. That’s no reflection of the rules.
In the game the assassins moved up. The templars (I didn’t use templar models and just used my Normans as early crusaders, there was nothing really that exclusive to why they couldn’t just be Frankish crusaders), moved up with one of the Spears taking up position by a wall and letting rip with a crossbow. The Assassins and the Templars reached the waterhole at about the same time. Two of the Assassins ganged up on the Templar leader, who took two wounds but was still standing at the end of the melee so all participants were separated. But the Assassins went in again with wounds being taken by both sides – the Templar leader was killed but he also killed his assailants. The Templars had lost their leader, though, so the game went to the Assassins.
Yeah, it’s a good game.
Will we be playing it at the club? I don’t know. Keep in mind that we have a whole Saturday, and I’m not sure the game has legs for a whole day. If you meet in the evening for a couple of hours, then it’d make a great game because you can fit in two or three linked games, which is precisely what A&T is all about.
It’s great as a freebie but, having played it, I’m glad I didn’t spend money on it, although at £5.99 it probably is worth taking a punt on. I think Osprey’s ‘Outremer’ does the job better though, so if I was looking at a medieval game with a dozen figures a side I would probably play that instead.
Maidstone Wargames Society held their first meeting of the year on Saturday. This meeting includes our AGM so often has a good turnout.
Around 24 members were in attendance for the meeting. The AGM was, as usual, short, only around 30 minutes. Also, as usual, the existing committee was re-elected without opposition. Despite the chairman’s pleas to be released!
There was also a very good turnout of games, covering a variety of scales, periods of genres, here’s a short photo round up.
John L brought out his 1:1200 Baltic Galleys for some Naval action.
Another naval game, but a few centuries later and under the water rather than on it, Peter M staged a 1:100th Stingray game, “Anything can happen in the next half hour“.
Paul and Colin brought out some 3mm Ancients for some FoG games.
Tony G and Stephen both fielded Anglo-Saxon warbands for some 28mm SAGA games.
Some more recent conflict now, some late WW2 Chain of Command action staged by chairman Mark J with 28mm vehicles and figures.
And last, but by no means least, Tony F and Phil staged a battle from the Lord of the Rings, again in 28mm.
That’s it for the round up of the first meeting of the year.
MWS meet on the 2nd and 4th Saturdays of the month (except the 4th Saturday in December) from 10:00 to 17:00 at Linton Village Hall, south of Maidstone on the A299.
Information about the Society, including directions, can be found here.
The diary of planned games can be found here, this is updated throughout the year so please have a look from time to time.
Stephen reports on the beginning of a new Lion Rampant Campaign. Andy’s apologies for taking so long to get this onto the blog.
After the debacle of our Crusades campaign I demanded satisfaction from Andy and we agreed to another campaign based around the Norman Conquest.
My Normans rarely see the light of day so this was a chance for me to get them out and gain a bit of glory. Andy took the English.
In the same vein as the Crusades campaign we upped the points values a bit – two 24 point forces, two 30 point, and the final game would be a 48 point bloodbath. Each army gets an extra free point that can only be spent on Leader skills (though more points can be taken from the army total to buy more expensive Leader skills). As before, army lists have to be drawn up ahead of the campaign and assigned to each battle before they are rolled for.
So to kick off we rolled to see who would be Red (Andy) and who would be Blue (me).
And then we rolled for the first encounter of the campaign – we rolled The Village and then rolled again to see which specific scenario – The Taxman Cometh!
So it begins.
For this first game I had a 24 point, fully-mounted, force. I purchased the Strongbow Leader skill. My force consisted of 2 Elite Cavalry (the knights), 2 Heavy Cavalry, and 1 Heavy Cavalry with crossbows.
Andy’s Anglo-Danish force had 30 points, comprising 2 x Elite Foot (1 containing his leader), 2 x Heavy Infantry, 1 x Light Infantry and 3 x Skirmishers. Andy’s leader purchased the Commanding Skill.
Club member Mark placed six tax counters face down on the terrain – these all had a (hidden) value and each side would gain Glory equal to the total value of counters they could get off the table. In addition to this players gain Glory for making Boasts. My Boasts were ‘I shall strike the first blow’, ‘They shall tremble before me’, and ‘I shall burn their homes’. Andy went with ‘They shall tremble before me’ and ‘I shall destroy more than I lose’.
One of the counters had been put in a church and, since I had a mounted only force, we had to make a decision on mounted troops being able to enter a building. The rules say nothing on this. So we rolled randomly and decided that mounted troops could not enter buildings. Although this went against me it made absolute sense and was the right decision. However, this left me with a dilemma – it meant that I would be unable to secure one of the tokens. This shaped my choice of Boasts. I decided that since I would be unable to get it I would try to deny it to Andy by burning down the church! I think you’ll find that such actions are all part of the job description and duties of being a Norman tyrant. (Andy: Sacrilege!)
The first couple of turns of the game were a general advance on both sides. We both did well on Activation rolls and as I recall we both managed to activate all units for the first two turns.
Norman knights out for a ride
Andy had put his skirmishers on his flanks, where two of the tax counters were hidden in the woods, and he managed to secure both. He also made a general advance in the centre with his light infantry, heavy infantry, and dane-axe wielding elite huscarls.
Anglo Danes take the hill
I steered one of my units of heavy cavalry to the woods on my right flank to get the tax counter there, and my mounted crossbows to snatch the tax counter hidden in the woods in the centre.
Shall we shoot or shall we burn something
Those had been the easy ones. The struggle was going to be for the two central tokens – one in the church and the other in some ruins.
View from the Anglo Danish side
Surprisingly, Andy’s unit on his right took their token and fled the table (you only count tokens you get off table). I thought they might stick around for a bit longer to hold the flank. Then he advanced a unit of skirmishers into the ruins to claim a third token.
View across the battlefield
That was annoying, but I saw it coming. I knew it would be difficult to budge them – we classified the ruins as rough going with cover. This made it all the more essential that he didn’t get the token in the church. With that in mind I activated my archers to loose their bolts at the English light infantry who were approaching the church doors. I scored a couple of casualties and this forced him back. With my mind on the Boasts I’d made, I then stuck the spurs into the Leader’s unit and charged the English heavy infantry.
Norman Lord leads the charge
We caused casualties on each other but we both passed our Courage checks and bounced off each other.
On your marks, get set, go!
I then took my chance with the church. A unit of heavy cavalry had moved up and now I made a roll to see if I could burn it. With only 6 men in the unit this meant I needed a 9+. I rolled and scored…11!
Up went the church. This meant it now counted as impassable terrain making it impossible for anyone to get the last tax token. That’ll teach those English rebels, I laughed haughtily.
Normans set fire to the church
Meanwhile, out on my right flank, I could see Andy was trying to find a way of harassing me with his unit of skirmishers. Problem was that in the woods they were safe but out of range. To get in range they had to leave the woods and this would put them at risk of a cavalry charge.
Then something unexpected happened.
On Andy’s activation he charged his heavy infantry into my Leader’s unit. I rolled to counter-charge but failed!
Anglo Dane Elite Infantry charge the Norman Leader
Oh well, I thought – those knights are well armoured and might take a casualty but not the end of the world. And, yes, they did take a casualty. But I rolled a double 1 which meant it was the leader that coped it!
Down he went.
The Normans were now leaderless.
However, one thing was in my favour. The two tax counters I had were high value ones, and I’d also managed to fulfil all my Boasts. So, despite the loss of my Leader, I figured I was still in a strong position.
Problem now, though, was that my mounted crossbows, who had a token, were in a difficult position with both the English heavy infantry and elite infantry getting within charge distance. If I lost them, and their token, then the fortunes of war would be reversed, and I could see in Andy’s eyes that he knew that too.
So the race was now on – get off the table with what I had.
Being mounted had an advantage because I was faster than him. Andy started pulling back his skirmishers with the tokens to secure them, whilst trying to put the pressure on me.
It got a bit hairy when I failed an activation roll to move the crossbows, but Andy was just out of charge range and the following turn they were off and that was the end of the game.
I had secured 5 points of tax tokens and gained another 5 Glory for my Boasts plus an extra 0.5 Glory for facing a larger enemy. This gave me 10.5 Glory.
Andy also scored 5 points of tax tokens, but failed to achieve either of his boasts, so lost a point for each, giving a total of 3 Glory
The first game went to the Normans with a convincing 10.5 to 3 win.
The winner gets to choose the next game and I chose The Road. We rolled for the specific scenario and came up with Meet The Neighbours.
In this game players start in opposite corners and gain Glory for units they get off the opposite corner (plus Boasts).
In this game I had 30 points and my (new) Leader had also taken Strongbow. My force consisted of 2 Elite cavalry, 1 Heavy cavalry, 1 Heavy infantry, 1 foot crossbows with pavises, and 2 skirmishers. My Boasts were ‘Their arrows shall be lost like tears in the rain’, and ‘I shall avenge them’ (I chose his Leader’s unit – after I had lost my Leader I couldn’t let him get away with all the goading that would be coming and had to even things up!).
Andy had a smaller force this time, only 24 points, a single unit of Elite Infantry containing the Leader, 2 units of Heavy Infantry and one of Light Infantry, the force being completed by 3 units of Skirmishers. Andy’s leader purchased the Commanding Skill again.
Boldly he chose ‘Half the Enemy shall fall to my Swords’ and ‘I shall destroy more than I lose’. At least he’d start with an extra 0.5 Glory for facing a larger enemy.
Going into the second game I was cautious. Andy is a very good player and could easily turn fortunes around. So I decided that I would avoid combat where possible (the exception being to nip off the English Leader). My plan was to advance as quickly as I could with the infantry and use the cavalry to protect flanks and threaten any English units if they tried to attack.
That was the plan.
So the game started. The problem we both had is that we couldn’t get all our units in the deployment area, meaning those units off table could only come on with a successful Move activation. Andy went first and made a general, broad, advance. He managed to activate all his units and even bring on the excess unit.
Off to war they go
Things didn’t go quite so smoothly for myself. I started with my Leader’s unit off-table. The first unit I tried to activate failed and without a Leader to prompt a second attempt that was it! The English advanced again.
Back to me. Well, a bit better – I managed to move one unit, which created a gap for me to bring on the Leader. Which I failed. He had another try. Failed again! That breakfast croissant or pain au chocolat was obviously keeping him busy.
Andy advanced again. He swung two units of skirmishers south, toward an area of woodland which meant that if I wanted to advance that way I’d have to endure some bow fire.
By this time Andy was halfway across the table. I’d moved some units but still had others in the deployment zone. It was obvious my plan of getting across the table was going to fail. Andy would be off sooner than me and would win the game with a good score. I had to change my tactics. The only way I could win is if I prevented Andy getting off the table and the only way I could do that was by eliminating his entire army! I went on the attack!
Norman firing line
It was more by luck than design. By the time our two forces came face to face I hadn’t advanced too far but the position I found myself in was an advantageous one. To one side of the road was a hill and to the other was an area of rocky ground. I decided I would put the crossbows on the hill, the skirmishers in the rocky ground, and use the heavy cavalry and spearmen to plug the gap with the knights behind to act as a mobile reserve where they could either exploit a gap in the enemy or charge to the defence if the enemy broke through. It was a strong position which I can’t take any credit for.
The key to this would prove to be the rocky ground. I think Andy recognised that and I could see him manoeuvring units that way to launch an attack. Lines were drawn. Now the battle started.
Anglo Danish thanes and huscarls make a steady advance
My skirmishers in the rocks opened fire (thanks to the Leader’s Strongbow skill) on Andy’s light infantry, causing a couple of casualties. Meanwhile he started moving the heavy infantry around the side of the rocks and his Leader’s unit came forward. The English skirmishers opened up with some desultory bowfire – thankfully the rocky ground provided good cover.
Norman archers in the stones
Seeking an opportunity I thought I’d try my luck. With his Leader within charge range of the Norman heavy cavalry, and an eye on my Boasts, I thought I’d give it a go. In went the cavalry. I caused one casualty against the English (failed the Lucky Hit to bag the Leader) but Andy had given me a fair wallop – I took three casualties. Not only were the Norman cavalry Battered but they were at half strength as well. Oh well, I thought, I’ll use them as an expendable unit and see what more damage they can do to the English Leader (a perfectly acceptable attitude for an invading Norman tyrant).
On Andy’s turn he did something that surprised me – he charged his light infantry into the rocks to take on my skirmishers! Well, I suppose I don’t blame him. If he left them there then it would cause a lot of problems. He had to do something. In response to the charge I decided to Evade. That took me out of the rocks but it caused casualties on the charging English which meant they had to retreat. Meanwhile, to the south, the English skirmishers in the woods and the Norman crossbows on the hills just stared at each other. I moved a unit of Norman knights behind the hill but in position so they could charge if the skirmishers dared come out the woods.
Norman corssbows supported by Norman knights
The fight around the rocks continued. The English heavy infantry moved forward. This could be a potential problem. I had two choices. Ideally, I wanted to shoot with both my skirmishers to loosen them up, and then charge with the Norman Leader’s knights. The skirmishers would shoot on a 7+ and the knights charge on a 5+. If I failed with either of the skirmishers then activation would switch to the English and I’d miss out, so maybe I could just charge with the knights? The Norman Leader had the Strongbow skill, but I’d used that to order the crossbows to shoot at the English Leader’s unit (another casualty on them, but still not the Leader).
Anglo Danes march pass the POND OF DEATH
I decided to put my faith in the dice. I rolled for the first skirmisher unit. Success! They fired. Then I rolled for the second unit of skirmishers. Another success! OK, so the English heavy infantry had taken a few casualties. Now was the time. In went the knights, led by the Norman Leader – let’s just hope it wouldn’t be a repeat of the previous game.
In they go
No, it wouldn’t be. The English infantry took more casualties and failed their Courage test. They fell back, Battered, and below half strength. They’d taken enough casualties that it would be hard to recover.
Feeling cock-a-hoop with my charges I sent the Norman heavy cavalry in against the English Leader again. Another casualty on the English meant they were now at half strength, but in return they eliminated the last of the heavy cavalry. I didn’t care. They’d done their job. It was now starting to look good for the Normans and I could see another victory coming.
Andy realised he had to go for it. The skirmishers to the south moved out of the woods and shot at the crossbows. They caused a single casualty but I fluffed the Courage roll and they had to retreat behind the hill. My skirmishers moved back into the rocks and continued firing at the English light infantry causing more casualties and Andy obligingly rolled a double 1 for their Courage. Off they went. It was now looking very good.
We were moving into the end game. My thoughts turned to Glory points. If I entirely eliminated the English army that would be game end but since I hadn’t got any units off I would only receive Glory for the Boasts I’d made and none for the game objective. It was going to be hard to do anything about that.
Andy points an accusing finger at the Norman spears
Andy still had a unit of heavy infantry in the centre. They lined up against the Norman heavy infantry and went in. It was pretty much a draw, with a casualty on either side. In the meantime my skirmishers kept opening fire on the English Leader, but bad dice rolls meant I just couldn’t cause any casualties. I then sent in a unit of knights against the English skirmishers and completely eliminated them. In response Andy moved the other unit back into the woods where they would be safe. The Norman heavy infantry charged the English heavy infantry and, again, a couple of casualties on either side but the Normans failed their Courage test (and would ultimately fail to rally and rout off table).
Then came the final act. The Norman Leader ordered the crossbows to open up at the English heavy infantry. At close range the bolts thudded in and off they went. The skirmishers drew their bows, took aim at the English Leader and…down he went at last! All the English had left was a unit of skirmishers hiding in the woods.
Ironically, I didn’t want to destroy them. What I wanted to do first was get some of my troops off-table. Andy knew this, so it was in his interests for the skirmishers to either be eliminated or get off themselves to bring the game to an end before I gained too many Glory points. What I also wanted to do was weaken the skirmishers to reduce their effectiveness but without actually killing them. A burst of fire from the crossbows did the trick, reducing them to half strength. Both sides made a rush for the table edge. The English, though, were closer and were soon off, bringing the game to an end. I hadn’t got any of the Normans off.
Final Glory scores were just 3 for the Normans (for successful Boasts). The English had got a half strength unit off, earning 1 Glory, and had the extra 0.5 Glory for having the smaller force. But they had failed both Boasts meaning -2 Glory giving a final total of -0.5 Glory.
A second Norman win! Glory tallies at this point are 13.5 for the Normans, and 2.5 for the English. We still have three games to go. Andy is a good and capable player, so whilst I’m happy with this lead I am not complacent.
Stephen takes us through a Stargrave adventure based around some weird dreams…
‘All that glitters is gold’
Recently a bout of Luna flu has been doing the rounds of the bars and cantinas of many-a-starport. And the less salubrious ones at that. It’s a highly contagious virus but not dangerous – sufferers mainly complain of nausea, tiredness, and delirium.
It seems that some space crews had recently been hit by the virus and the wild dreams sent them on a wild goose chase – and the Galactic Commission intercepted three messages. These come from the Rhythmic which is on record as being an ex-military freighter and captained by a veteran soldier, Gloria Fuster (Charlotte). The other is from captain Garo Braven (Tony) of the Cepheid Variable – a crew made up of mercenaries and mystics. The last is from the Serenity, captained by Mal Reynolds (Andy), and crewed by a prolific group of smugglers, murderers, and pirates.
We’ll let them speak for themselves…
THE RHYTHM: SOLDIER GREEN’S LOG
COMMENCE ENTRY
The Rhythm did not go looking for trouble, but it sure found us.
This morning, we landed in a strange jungle on an unfamiliar planet, home of a fabled Stairway to Heaven. Captain Gloria was convinced the ancient structure was hiding something valuable following a strange vision. Our mission was simple: find the item and bring it back.
Two rival crews from the ships Serenity and Cepheid Variable seemed to have the same idea. Worse, Gloria recognised the gunner of the Cepheid as the same man who’d insulted her mother a few planets over. Even worse than that: there was a shapeshifter in our midst.
Was it the inexperience of working with the Rhythmics, or was Gloria too distracted by her greed? We received orders to take out the gunner and rival crews and loot what we could while Gloria searched for the valuable item. Things soon escalated and became a free-for-all, although whether the Serenity and the Cepheid had an accord is uncertain; this soldier notes that they did not fire at each other for the duration of the battle.
The Rhythmics split at the southern hill, with half going after the Cepheid’s crew and the others facing Serenity. After two bouts of searching for loot under fire, the shapeshifter posing as Mintz made itself known. A Rhythmic duly took it down, and another killed the Variable’s gunner. That’ll teach him to call Mrs Fuster a [AUTO-CENSORED].
To the east, the Rhythmics took on the Serenity’s crew. We wounded one of their crewmen, angering them so that they took out both soldiers Yellow and Blue.
All crews fought fiercely, while Gloria focused on transferring the data loot she’d found to Simmons, fearing that the Serenity’s drone had already taken what she really came for. Soldier Squid was killed instantly by the Serenity, but we retaliated and took out one on their side.
The Cepheid crew continued their own search for loot, but took down Gloria after she’d shot at their Captain. Her first mate Estefan was not far behind her. A brave Rhythmic attempted to climb the Stairway in a last-ditch effort to find the gold and a vantage point. He was eventually killed after his carbine jammed and left him vulnerable on a rocky outcrop, not long after his good friend Han also fell to the Serenity’s guns. Remarkably, the Rhythmics survived the fearsome native creatures that kept appearing to torment the other crews throughout the battle.
The only Rhythmics left standing were Simmons and myself, who returned to the ship with data loot and physical loot respectively. There we found the real Mintz waiting for us. Gloria, Estefan, and two crew members eventually regained consciousness and returned to the ship after the battle. We head on to our next mission, to be confirmed once the crew receive medical attention. I have advised Gloria to take caution before committing to visions in future. After all, there’s still time to change the road she’s on.
ENTRY ENDS.
Gaden’s Log Begins:
Kal Gaden quickly exited from the Cepheid Variable’s tail ramp with the rest of the crew while the autopilot held it in a stable hover a few inches above the surface of the clearing. A quick command on the Captain’s wrist comlink and the ship took itself up into a parking orbit, ready to be recalled when the mission was done.
This was more like it, Kal thought – a well-trained, professional disembarkation with a bunch who looked like they knew what they were doing. Granted, some of the crew were really inexperienced, their only previous venture being the mission on the snow moon to rescue that old man in the red suit. It had turned into a bit of an easy turkey shoot (or more accurately a penguin shoot), but that was exactly what the crew had needed to shake out some of the rust. And they were looking like they had learnt from it – not like that shower of amateurs that he had been caught up with a couple of orbits ago.
As luck would have it, they came down just off of their intended position. The target, an ancient set of giant steps which apparently had a pretty fancy bit of treasure at the top, was on the wrong side of a fast-moving jungle stream. But the Captain led them towards it in close order, and they advanced with their eyes peeled. Sharal, the fastest of the crew, went ahead and hacked into an old data terminal that she almost tripped over, probably kit left behind by a previous expedition. It turned out that she had unlocked a set of plans for some pretty advanced alien armour tech – that alone would make the trip worth it.
At that point the local fauna began to make itself apparent, with a giant scorpion-like creature emerging from the undergrowth. Koor Vane, one of the newer recruits, took it down with a few well-placed shots.
Kal found the entrance to what looked like an old crypt and told the crew he was going to check it out. The inside was full of a blue-ish mist which, as he entered, congealed itself into a form which, if he was superstitious, he’d have called a ghost. But he wasn’t, and instead he peeled off a volley of shots – that went promptly straight through it. Instead he pulled his combat knife and by slicing it repeatedly through the apparation he somehow manged to dispel it, although he didn’t feel any contact with anything solid, just a sense of cold. It was worth the struggle however, as further inside the crypt was a military issue chain gun – a bit grimy, but cleaned up it should work a treat, and Kal knew that Tan Gariss, the crew’s specialist gunner, would appreciate it.
He stepped outside, and only at that point realised that the thick stone walls of the crypt must have been blocking his comms, as all hell had broken loose. The Captain had taken down some menacing bat-like creature with a single giant eye that had appeared over the watercourse, and now there was a full-blown firefight going on. It seemed that a rival mob (the Rhythmics) who held a grudge with a few members of the crew had landed nearby. It stemmed from some long-forgotten bar fight he was told later – and Gariss himself had gone down from a single nasty one, and didn’t look good. The crew was returning fire and Kal could just about make out several figures moving through the foliage a few tens of yards away. Fire from Rook and Kyorla smacked into one of them – it looked like a droid from the way it was moving – but it didn’t go down. The Captain organised the main bulk of the crew into a firing line and they slowly advanced into the jungle, blazing away as they went. Keeping tactical discipline, Sarai took down the leader of the other crew and the Captain himself accounted for their first mate. Kal had to admit he was impressed.
In the meantime, the diminutive first mate Gerbo had disappeared inside a giant stone head. No one followed him and he was vague about what he found inside, but after what sounded like numerous swipes of his void blade, he emerged a few minutes later clutching a fancy looking power sword and nursing a headache – ‘powerful it was, but conquered it I have’ he said in his weird reverse dialect.
The Captain had meanwhile been monitoring the site remotely using the Cepheid’s sensor suite and had found that a drone belonging to the Serenity – nobody had even realised that ship was on the planet – had made it to the top of the spiral stairway, and figured that the treasure was probably gone. Deciding that discretion was the better part of valour, the ship was recalled from orbit and the crew began to make their way back to the clearing. The indigenous wildlife had woken up by that point and tried to make life interesting – Jaon Rook was bitten by a poisonous giant river wyrm which required treatment from Gebro and his medikit, then a troop of what looked like rock apes crept in from their flank – Kal took out two with well-placed blaster rounds, Sarai and Jaon the others. Just as they reached the clearing the jungle itself came alive, and a weakened Jaon was dragged down by creeper-like appendages. Kyorla, the sniper, found her range and the plants’ weak spots and rescued Jaon and the others.
As they rendezvoused back at the grounded Cepheid, Sharal and Koor emerged panting from the other side of the clearing clutching another abandoned data terminal. In the confusion no-one had noticed them slip off into the jungle after more loot, but their diversion again proved fruitful.
The ship lifted off with Jaon and Gariss strapped into the med-bay – both were out of danger thanks to the robo-doc’s ministrations. Although the main prize eluded them there was still a decent return from the mission, and Kal looked forward to a spot of R&R somewhere a bit more civilised with his share of the bounty from the haul.
**SERENITY LOG**
“OK Wash, get us off this goddam planet, I’m headin’ down to sick bay to see how Kaylee’s doing” Mal said as he turned and left the flight deck.
“How’s Kaylee, Doc?” Mal asked as he entered sickbay.
Simon looked up from the MedSuite controls “It was touch and go, but due to the Advanced Medical Suite you had installed last year, she’s still with us.” came the reply.
Mal turned to look at Kaylee lying in the MedSuite, bandaged and with an arm in a sling.
“Well Captain, I cain’t say I’ve never been better, but I think I’ll pull through.” she said, “but I ain’t gonna be much use till this arm’s healed though.”
Mal cast his mind back to the day’s events…
He had had a series of incoherent dreams, but a constant feature in all of them had been a rock pile known as “The Stairway to Heaven” on one of the nearby planets. He was convinced there was worthwhile loot to find on or near the Stairway.
On orbital insertion the Serenity’s sensors picked up two other ships in nearby orbit, the Cepheid Variable, a ship and crew Mal had encountered before, and an unfamiliar ship, the Rhythm.
The name of the second ship prompted Mal to remember a rumour he’d heard about that ship, that one of the crew had been found unconscious on a space station, recounting a tale of being attacked by some form of alien, and seeing said alien walk away transforming into an identical copy of the crew member. Mal had dismissed this account as the ramblings of a deep space afflicted mind, but on the off chance that the crew member was telling the truth, he sent a personal “Your Eyes Only” message to the Captain of the Rhythm, recounting the tale, just in case there was a polymorph hiding amongst the Rhythm’s crew.
The shuttles landed in one of the few jungle clearings south of the Stairway, Mal lead Wash, Kaylee and Derrial towards the Stairway, while Zoe, Jayne, Inara and River headed towards a stream. Simon, Tracey and the Repairbot followed behind.
The jungle was very thick, visibility was restricted and the Stairway itself out of sight, but its position had been locked into the nav units, so they knew they were on the right track.
Almost immediately Zoe and Inara were ambushed by a couple of mobile, carnivorous plants, Zoe received a savage bite, but Inara despatched her opponent. They reminded Inara of something she read in an old novel from Earth-That-Was, “Triffids” she thinks they were called.
Zoe beat off the surviving Triffid, and Inara put it down with a well-aimed shot. Mal reached some physical loot, and unlocked it, but Jayne was less fortunate, rustling in the undergrowth revealed a Bileworm which attacked and stunned him.
Jayne somehow managed to fight off the Bileworm, Mal and Zoe opened up on it but both their guns jammed! Simon, Tracey and Derrial also shot at the Bileworm, Derrial getting in the fatal shot. Meanwhile Kaylee’s Repairbot trundled up to the loot Mal had unlocked and picked it up.
With the Bileworm dead Jayne used his medic kit to neutralise the poison coursing through his veins. Zoe’s team saw movement on the far side of the stream, and came under fire from the crew of the Rhythm.
Mal and Wash reached a Data loot near the Stairway and Mal unlocked it, as some type of rock ape appeared on a butte above them. Zoe launched a Drone and sent it towards the top of the Stairway, but Kaylee was shot by one of the Rhythm’s crew and wounded. Jayne and River returned fire and took down two of the rival crew.
More of the crew of the Rhythm appeared across the stream, firing at Mal & Wash but missing. Mal threw some smoke grenades to block the line of sight, while Wash downloaded the data Mal had unlocked. Although wounded Kaylee took a shot at the ape above Mal, but missed. The Ape descended the butte and attacked Mal.
River crossed the stream to reach a Physical loot, Simon reached Kaylee and treated her wounds. And two more Triffids appeared!
Before River could try to unlock the loot, she was shot and KO’d by one of the Rhythm’s crew. Mal fought off the ape, killing it, and Derrial despatched another Triffid. More gunfire was heard to the north, perhaps from the crew of the Cepheid Variable, but they didn’t come into sight.
Zoe crossed the stream to aid River, while Simon shot and killed another Triffid. Kaylee was slowly making her way back to the shuttles when she was attacked and KO’d by a Wraith-like creature, a swirl of blue mist. Zoe’s drone had made it to the top of the Stairway, and picked up the Treasure of the Ancients.
Mal avenged Kaylee by destroying the Wraith, while Jayne laid more smoke to block the Rhythm’s crew’s line of sight. The Drone laboriously made its way down from the Stairway with the Treasure, heading slowly back to the shuttles.
Zoe hosed down one of the Rhythm’s crew with her RFG, putting him down. The Repairbot safely returned to the shuttles.
More of the Rhythm’s crew appeared from behind the smoke screen; they shot at and took down both Zoe & Jayne.
Yet another of the planet’s fauna, resembling a Velociraptor from Earth-That-Was’ prehistory, appeared, attacking Tracey. After a sustained fight the Raptor took Tracey out of the game.
Derrial spotted one of the Rhythm’s crew climbing the Stairway (not sure why as the drone had already liberated the Treasure of the Ancients). This crewman took a pot shot at Derrial, missing him. Derrial fired back taking him out.
Inara killed the Raptor, but was in turn KO’d by a Ryakan that had been flying around seemingly at random.
As the crew fell back, they lost sight of the remains of the Rhythm’s crew, but the Ryakan still posed a threat. Fortunately, Mal managed to bring it down without it causing further injury.
Given the number of aggressive indigenous fauna and flora the crew had encountered at the start of the mission, surprisingly the remaining members of the crew made it back to the shuttles without any further encounters and returned to the Serenity.
Although over half of the crew were casualties during the mission, most only had scrapes, bruises and concussion, except for Kaylee. Whether the Wraith like creature that took her down had some lingering toxic after effect, Simon didn’t know, what he was certain of was that it was only the Serenity’s Advanced Medical Suite that let Kaylee pull through, even if she would take weeks to fully recover.
Alan takes us through a big game of Chain of Command set in France 1940.
The purchase of a Cigar Box Battle river mat on eBay sparked thoughts about the interesting challenges of a game with one side having to make a strategic withdrawal across a river and the other trying to seize the crossings.
This led to the purchase of not just one, but two bridges from Sarissa Precision, a road and a rail bridge. The latter then led to building the track to go with it and then a station. To make the game work it needed to be big both physically (a 12 foot by 6 foot table) but also from a Chain of Command perspective; this meant at least a company a side. This was the result.
It saw a rag-tag French outfit as the defender facing a determined German company supported by a platoon of tanks. The French were made up of a platoon of Foreign Legion and a platoon of Tirailleurs Sénégalais on one side of the river, needing to withdraw across the bridges and a Motorcycle platoon holding those bridges. The French also had some support in the form of an anti-tank gun and some engineers in a truck – the latter to demolish the bridges before the Germans could capture them intact. Along with two Bouteilles Incendiaires, two roadblocks and a couple of full Chain of Command dice for the withdrawing troops, this was the defending force. The Germans, in addition to their infantry company and tank platoon, had an Adjutant, a Pioneer team in a Kubelwagen, a SdKfz 222 armoured car, an infantry gun and a truck with four rubber boats. It wouldn’t have been an early war game without a Shabby Nazi Trick – the German players selected a fifth column sniper (Jean-Claude). We played through the patrol phase which saw some interesting jockeying for positions around the buildings on the German side of the board. With jump off points then positioned we were ready for the meat of the game.
The Foreign Legion were covering the French left flank and the Tirailleurs Sénégalais on the right. The Germans began their advance with the platoon on their right flank making serious progress until they encountered the Legion. The other German platoons soon found that the Tirailleurs weren’t going to be easily dislodged and put them under heavy concentrated fire. The roadblock constrained the easiest route for their Panzers and so the main armoured advance was through the farmland to the right of the road.
Repeated exchanges of fire were telling on the French forces as they tried to hold the Germans long enough for their engineers to deploy and mine the bridges.
Eventually they began to fall back but not before taking serious casualties. Meanwhile Jean-Claude who had been placed in the church tower (it’s traditional!) was causing the French some unexpected problems.
With the French C-in-C desperate to blow the now mined bridges he ordered a full withdrawal but this was easier said than done with the Germans covering most of the routes to the bridges.
The Tirailleurs were aiming for the road bridge but when they got there the C-in-C ordered them to switch to the distant rail bridge so he could blow the former.
Meanwhile the German pioneers were making heavy weather of destroying the roadblock and the motorised elements of the German force were still held up as a result.
In the end only a single Legion section got to safety before the second bridge was blown and with neither side having been able to meet their victory conditions we declared the game a draw.
Marcus fesses up to his Stargrave woes and how he’s gone about recruiting a new crew.
I’ve had some problems playing Stargrave. It’s not the game. I am sure it isn’t perfect, but we love playing it at the club. It’s not even my club-mates, who keep shooting me. It’s my crew. Well, that’s not fair. I do like my crew. But they look quite…similar. Too similar. And it hasn’t helped that I used the original Stargrave roster from the book, downloading it from the Osprey site. In the middle of a game I would find myself shuffling and flipping over sheets trying to work out which character was being fired at, or acting, and not exactly sure which one I was looking out without checking.
The concept of that crew was something like the Bynars from Star Trek: The Next Generation (the episode 1.15 “11001001”) with an added dose of psionics. The crew comprised some small Copplestone Grey’s, the brains, and the mean looking, vat-grown “Big Greys”, which were from the now defunct Griffin Miniatures. I had never managed to get around to using these before. It took me long enough to get around to painting the mean Greys, although I really like them.
The Old Crew. Left to Right: 101, or is that 110..?
I might use them in Xenos Rampant in the future, although we have been using 15mm figures for that so far. But I digress.
In an effort to solve the problems in my personal organizational abilities I needed two things:
Firstly, a one page roster so that all that stats were right in front of me. I had tried looking at creating roster cards, but they just didn’t seem to work for me. I wanted everything, the whole crew, on one side of A4. Fortunately club members, noticing my travails, kindly offered me a selection.
(Editor’s note: If you print this roster, make sure you open the “More Settings” option in the print preview screen and have “Fit to Printable Area” selected.)
Secondly, I needed to recruit a new crew. A more individual crew of characters.
And it really isn’t that hard to stat a crew up, at least not if you can be decisive about it! In a nutshell, recruit a Captain and First Mate from the various specialities (akin to schools of magic in Frostgrave) available and spend 400 Cr. on recruiting the rest of your eight crew.
The specialities I referred to are “abilities”. The Captain chooses five, with three of four from the characters background e.g. psionics as i referred to for my first crew, or veteran. There is quite a range with new backgrounds being added in the inevitable supplements to the core rules. It makes for an interesting comparison with Five Parsecs from Home, which regular readers of the blog will know I have also been playing solo (I should really complete another episode soon!) However, in Five Parsecs the choice of crew characteristics is all based on random rolls reminiscent of the old school Traveller RPG. It’s much more about the whole crew even if the Captain is the first among equals. In Stargrave it is very much about the Captain and a little about the First Mate. In truth, everyone else is disposable to a greater or lesser extent. The First Mate chooses four abilities, with two or three from their background. Previously I chose two Psionicists, but this time I chose a Cyborg Captain and a Veteran First Mate.
Why did I make this choice? I am not entirely sure. I was looking through the core rules on character creation with the intent of choosing a new crew but the process became influenced by the models I had available or fancied using and the narrative that began to create in my head. I think that is a good thing!
I initially had the idea that I would use figures from a Kick-Starter project that I had received: Star-Schlock. This at least started out rooted in influences of the pulpy Sci-Fi TV of the 80’s. Buck Rogers in the 25th Century crossed with Star Trek and maybe a dose of Star Wars and 80’s Flash Gordon, in particular.
Gillian Grey and Willard White
Some similarity occurred to me between the Star Trek: TNG era and Buck Rogers slightly more campy second season. Something akin to the rescued Borg Seven Of Nine in Star Trek Voyager. I had the idea of using some unused cyborg miniatures which I had from the old Scotia Grendel Urban War range, the VOID Syntha biomechs, making them a kind of Star Trek Borg analogue.
I had already started painting some of these after a long time in the lead pile. I was intending to put them to use in Spy-Fi games as some kind of, well, Fembot for want of a better word. Yeah Baby!
Then I hit a problem.
A diminutive “White Rat” with Willard
It was only when I compared the completed Syntha miniatures to the Star Schlock figures I noticed a considerable size discrepancy! That was pretty much the deal breaker although at this point I realized that I was in some danger of repeating the same folly using some Star Schlock rank and file figures; a lack of clear characterisation.
Repeating the same problem. Do they look a bit similar?
I was now fixed on using the Syntha as Borg analogues but the sizing discrepancy made me think about using at least some more old school miniatures. Hence a look at EM-4’s range of early Grenadier sculpts. It was a chance to pick up some older, characterful miniatures that I had regularly seen pictures of, or seen new versions of older sculpts, but had never quite managed to add to my collection. Since i was basing this crew around the escaped cyborgs I wanted a crew that at least in part were themed around interconnection, robotics and coordinated firepower. At least that was the plan.
The White Rat and the Black Rat – They escaped a lab based programme where they were literally lab rats, sent out to do some exotic missions at the behest of the ailing Authority, until those orders ceased.
The Black Rat
Also known as Six of Seven, Black Rat is to be my captain. She had somehow managed to escape some Authority “black-ops” experiment as government broke down. She has very little knowledge of her origins, but is on a quest to know more.
I chose to give her:
Camouflage (she is wearing a stealth suit)
Target lock (allowing her or another member of the crew to automatically hit the target of a grenade/grenade launcher attack, even if not in line of sight.)
An energy shield (absorbing some shooting damage)
Control robot (interface with a robot and take control)
Drone. I am rather partial to using drones, not that they have done me much good so far. (Draw line of sight from the drone)
She also has a carbine (2 spaces), a pistol, light armour, a deck for hacking and a filter mask.
Harriet “Harry” Barber
I originally had a figure in a beret picked out for this role, but Harry has grown on me. I first saw the figure many years ago. It normally has a truncheon and I think is supposed to be a “space police” figure. I removed the truncheon and added a small pouch in its place. In my mind there is a similarity to Glynis Barber in the 80’s series “Dempsey and Makepeace” where her character was called Harriet Makepeace. She is some kind of ex-security figure (the kind of security that doesn’t use a truncheon or wear a uniform) who along the way helped the Black Rat escape from her captors.
Fortune. (She is a bit of a Han Solo and you might call her lucky, or perhaps it is her roguish charm?)
Armoury (Harry has a way with weapons and can field power armour without the upkeep cost or increase the damage on one standard firearm)
Remote Firing (Can select a robot in the crew to make a +3 line of sight shooting attack)
Repair Robot (Yes, Harry is good with robots too)
Harry also has a filter mask (always handy), light armour, a carbine taking up two spaces and picks for breaking into physical objects.
Harriet “Harry” Barber
Moving on to the Standard and Specialist figures, these are much easier to select as they are very much modular, “plug in” selections.
The “White Rat” (Three of Seven) – Commando
Naturally, also being a cyborg and a comrade of Six (or part of the same hive mind), the White Rat needed to pack a bit of a punch. They were specialist operatives after all.
Ratchet the Robot
Picked up from some abandoned facility and reprogrammed by Harriet, Ratchet is an armoured trooper. Thanks to Harry’s Armoury skill she can offset the upkeep cost. Originally I costed out Ratchet as a grenadier, making that rather large gun a grenade launcher of some kind. I changed to admittedly costly power armour as a result of choosing the armoury skill for the First Mate.
Ratchet the Robot
Troopers (3)
There have been various iterations of this crew, but they always seemed to revolve around having three troopers. These are Viridian, (with the green skin and yellow jacket), Sal Buco (long green coat and pistol) and Cy An (Blue skinned alien). At the outset they all have a carbine, heavy armour and a knife. Yes, I know Sal appears to have a pistol. Does anyone remember the pistols in the original “Man From Uncle”? Well Sal has picked up something like one of those. He can attach an extended barrel, long magazine and collapsible stock. Hey presto: a carbine. Originally Sal was going to be a simple recruit, but I had another idea…
Sal and Cy
Hacker – Zero One
A nod to my old crew. Zero One now stands out in a crowd. It is my hacker equipped with a pistol, light armour, a deck for hacking (of course) and a knife.
Viridian and Zero
Recruits (2)
Finally, my two recruits. Originally I was going to fit in a guard dog, but the dog cost 10 credits and frankly can do less. I am not a min/maxer, but when you want to fit in certain options the free figures give more flexibility. And a bit of colour. These miniatures came from the Hydra “Retro Ray-Gun” range. It is a nice range although the figures tend to be a little larger overall. But these two are I think teenagers. I painted them up with no clear objective for using them. I watched Firefly again recently and it occurred to me that these two, the “Citrus Kids” could be analogues to Simon and River Tam (except he isn’t a doctor and she isn’t a psychic killing machine). That points to the one thing which might be slightly dissatisfying with the rules. As I pointed out earlier, if you aren’t a Captain or First Mate, there isn’t going to be much progression, beyond adding a better bit of kit. That said, I don’t think that is what this game is for and is why I like a bit of solo Five Parsecs.
Recruits have a pistol, light armour and a knife.
Recruits – The Citrus Kids
So that is the crew of the “Dirty Rat”. I’m looking forward to seeing how they do in an outing at the club mysteriously entitled “Oubliette”, very soon. I am sure there will be a report.
Andy completes the write up of the Crusades mini campaign.
First off, I must apologise to my fellow gamers, it has taken me far too long to complete this report.
Stephen and I continued the Five Battles Campaign from Lion Rampant Version 2. This time we were joined by two other members, joining Stephen with the Ayyubid Egyptians was club treasurer Mark, and joining me with the Frankish Settlers was new member Charlotte.
Photo credits: Charlotte, Stephen and Andy.
To recap the first day, we played three games, with my Pullani (Frankish Settlers) forces winning each battle. I had 3 victories and 23 Glory, Stephen had 3 defeats and -1 Glory. You can read about these games in a previous blog entry here.
The second day would comprise two more battles, the final battle using double size armies
When planning these games, we had prepared five warbands with differing points values for the five battles, and had assigned each warband to a battle before the campaign started. Stephen had used his larger warbands in the battles on the first day of the campaign, so would be at a disadvantage in the first game of day two.
Having won the final battle on day one, I got to choose the first battle on day two; I chose “The Road” and the die roll resulted in “The Convoy” scenario with Charlotte and I as the attacker (see part 1 for the battles that make up the campaign).
In this scenario the attacker has three convoy tokens that must be conveyed from one corner of the table to the opposite corner. For our game these comprised of a cart, a group of pious monks and a group of civilians. Each token had to be assigned to a unit, although more than one token could be assigned to the same unit. Escorting units were restricted to a maximum move of 6”. The convoy tokens have no effect in the game, other than marking the escorting units.
Stephen and Mark’s forces (Ayyubid Egyptian) comprised:
1 x Mounted Mamluks (Heavy Cavalry with Bows) Leader Blessed (Once per game, reroll any one full set of dice by any player) @ 7 points
3 x Mounted Turcomen (Wild Turk Light Cavalry) @ 4 points each
1 x Foot Ghilmen (Light Infantry with Javelins) @ 4 points
1 x Ahdath (Skirmishers) @ 2 points Total 25 points
Andy and Charlotte’s force (Frankish Settlers (Pullani))
1 x Knights (Elite Cavalry, Motivated), Leader Strongbow (Once per turn, unit within 12” automatically passes shoot activation) @ 8 points
2 x Sergeants (Heavy Cavalry) @ 4 points each
1 x Foot Sergeants (Heavy Infantry) @ 4 points
1 x Foot Yeomen (Light Infantry) @ 3 points
1 x Crossbowmen @ 4 points
2 x Skirmishers @ 2 points each Total 31 points
The scenario requires the attacker to deploy the units escorting the convoy tokens first in one corner of the table. The defender then deploys their forces, placing at least 4 points of units in each of the other three corners of the table.
We deployed our Foot Sergeants with the Monks and Civilians, and the Foot Yeomen with the Cart in the south east corner of the table, along with a unit of Skirmishers. We couldn’t fit anything else into the deployment area, so our remaining units would have to enter the table as a Move activation.
Andy’s convoy and escorts deploy (Andy)
Stephen and Mark deployed their main force of the Mamluks and two units of Mounted Turcomen in the North East corner.
Stephen’s main contingent (Andy)
In order to satisfy the requirements to deploy at least 4 points in each of the other two corners they deployed a unit of Mounted Turcomen in the South West corner
Stephen’s flanking force (Andy)
And their Ghilmen and Ahdath in a village in the North West corner (our exit point).
Stephen’s blocking force (Andy)
Prior to the first turn of the game the units escorting the convoy are allowed to attempt one move activation as a “head start”. Our Yeomen succeeded in their attempt and moved forward with the cart, but the Foot Sergeants refused to budge.
Our first turn was more successful, the first unit of Skirmishers and both escorting units succeeded in their moves, and we also managed to bring on both units of Mounted Sergeants, one on each flank. Our Crossbows and our Knights also made it onto the board. We deliberately kept our Leader’s Knights close behind the Crossbows to maximise the use of the leader’s Strongbow ability. The only unit that failed to come on was the second unit of Skirmishers.
Andy’s contingent advances, well, some of it! (Andy)
Stephen and Mark brought their Mamluks and Turcomen forward from the North East corner, to get in a position where they could block our path to the North West corner.
Stephen’s main force advance (Stephen)
In the North West corner, the Ghilmen found a wall to hide behind and the Ahdath occupied a building.
Stephen’s Ahdath occupy a building (Stephen)
I think Stephen wanted to use his only infantry units to block our exit from the table, but it did mean that in the early stages of the battle he would only have four units totalling 19 points to try and slow down our force of 31 points, or 24 points if you exclude the units escorting the convoy.
In our next couple of turns Charlotte and I concentrated on getting our units forwards, and didn’t advance the convoy escorts. We had a unit of Mounted Sergeants on each flank, with both the Crossbows and Skirmishers near to the Leader’s unit. Actually, looking at the photos I think we forgot to deploy the second unit of skirmishers!
Andy’s force spreads out (Andy)Stephen’s main force continued to advance ahead of us, with one unit of Turcomen lagging behind, and the lone unit of Turcomen advancing towards our left flank getting close enough to shoot at our Mounted Sergeants and inflicting a casualty.
On our Northwestern flank one of Stephen’s Turcomen units engaged our Mounted Sergeants, but with the help of our skirmisher’s shooting honours were even with both units being reduced to half strength.
Stephens main force skirmishes with Andy’s right flank, casualties on both sides. (Andy)
Meanwhile Stephen’s Mamluks came within range of our Crossbows, and with our Leader’s Strongbow ability guaranteeing a shooting activation each turn our quarrels took out a couple of figures, the Mamluks eventually came to blows with our left flank Mounted Sergeants, both sides taking casualties and falling to half strength but his Leader didn’t succumb to any lucky blows!
Stephen’s leader’s unit, or what’s left of it, and a unit of Turcomen (Andy)Remnants of Andy’s Left Flank face off against Stephen’s leader (Charlotte)
Meanwhile our convoy stayed back near the hill guarded by the Crossbows and Knights.
Stephen’s Turcomen closed on our Crossbows, and managed to kill one of them, but the Crossbows stayed firm and their return fire decimated the Turcomen.
Stephen’s Mamluks charged our Mounted Sergeants again, but this time his luck ran out and his leader fell.
One of the units of Turcomen got close enough to the Yeomen to shoot at them and caused a casualty, but they passed their Courage test.
Our Crossbowmen continued to shoot at anything that came within range, guaranteed by the Leader’s Strongbow ability and both the Mamluks and Turcomen were practically wiped out, only a couple of figures were left, allowing the convoy and escorts to advance off the hill.
The convoy advances, slowly (Charlotte)
The only functioning units Stephen and Mark had left were the Ghilmen and Ahdath in the village blocking the Pulanni’s exit. Although our Mounted Sergeants had been sorely damaged, our Crossbows and Skirmishers had only taken a few casualties and it was apparent that eventually we could position our Crossbows where they could shoot at the Ghilmen and Ahdath every turn from outside the range of their bows and javelins, and even with the benefit of cover they would eventually be whittled down, allowing us to escort the Convoy off the table.
So, at this point Stephen and Mark conceded the game.
Stephen and Mark made three boasts: “They will Cower before me” (3 Glory, failed). “They will Tremble before me” (2Glory, failed) and “My Arrows are Deadlier Than my Spears” (2 Glory, success). The failed Boasts cost 1 Glory each, so that made a total of zero Glory for the Ayyubids.
The Pullani only made two boasts, “They will Tremble before me” (2Glory, failed), and “I will Destroy more than I Lose” (2 Glory, success), making a total of 1 Glory to add to the 2 glory points per Convoy marker escorted off table. That gave the Pullani an additional 7 Glory.
After the fourth battle the Pullani had 4 victories and 30 Glory, the Ayyubid Egyptians had 4 defeats and -1 Glory.
The final battle.
From the outset of the campaign, we had agreed that the final battle would be a major clash using the Bloodbath scenario, and that each side would bring 50 points, split into two contingents, each with a leader. The two contingents did not have to have equal points.
On the Ayyubid Egyptian side the two contingents were:
Emir Mark al-Harris.
1 x Mounted Mamluks (Heavy Cavalry with Bows) Leader @ 6 points
2 x Mounted Turcomen (Wild Turk Light Cavalry) @ 4 points each
2 x Foot Ghilmen (Light Infantry with Javelins) @ 4 points
1 x Ahdath (Skirmishers) @ 2 points Total 24 points
Emir Stephen a’t-Ucker
1 x Mounted Mamluks (Heavy Cavalry with Bows) Leader @ 8 points
Skills: Blessed (+2 points) and Strongbow (+1 points)
2 x Mounted Turcomen (Wild Turk Light Cavalry) @ 4 points each
1 x Hashishin (Warrior Infantry, Assassin) @ 5 points
2 x Ahdath (Skirmishers) @ 2 points each Total 25 points
Notice the sudden appearance of the Strongbow skill in both contingents?
The Pullani contingents were:
Count Andrew:
1 x Knights (Elite Cavalry, Motivated), Leader @ 9 points
Skills: Commanding (+2 points)
1 x Sergeants (Heavy Cavalry) @ 4 points each
1 x Foot Sergeants (Heavy Infantry) @ 4 points
1 x Archers @ 4 points
1 x Holy Characters @ 2 points
1 x Skirmishers @ 2 points Total 25 points
Holy Characters are a unit type from the Crusader States supplement, they are similar to Skirmishers, but with only a 6” move, no shooting capability and lacking all the Skirmisher’s special rules, they do however allow, once a turn, a partial re-roll of dice for units within 6”. Re-roll 2 dice if 12 were rolled, otherwise re-roll 1 die.
Countess Charlotte:
1 x Knights (Elite Cavalry, Motivated), Leader @ 8 points
Skills: Strongbow (+1 point)
1 x Sergeants (Heavy Cavalry) @ 4 points each
1 x Foot Sergeants (Heavy Infantry) @ 4 points
1 x Foot Yeomen (Light Infantry) @ 3 points
1 x Crossbowmen @ 4 points
1 x Skirmishers @ 2 points Total 25 points
Summary of Leader skills
Strongbow: Once per turn, one unit within 12” of Leader’s model automatically passes a shoot activation)
Commanding: Each turn may re-roll one failed Move, Attack or Shoot activation withing 12” of Leader’s model.
Insipid: The Leader does not give the usual +1 modifier to Courage tests to unis within 12” of Leader’s model
Blessed: Once per game, re-roll any one set of dice, rolled by any player.
Stephen included his Hashishin in his contingent again, this time their dastardly plan failed and the Assassin sent after Count Andrew met a grisly end.
There would be no subtlety about the final battle, no scenario objectives other than defeating the enemy.
On the Christian side Andy deployed his contingent on the right flank. Archers on the left of his front line, then the Foot Sergeants, Skirmishers on the hill and Mounted Sergeants on the right flank.
Andy’s Knights and Holy Characters (the monks) were kept in reserve.
Andy’s contingent, the monks are the Holy Characters (Andy)
Charlotte deployed on the left flank, she kept her Knights and Mounted Sergeants in the centre of her deployment, with the Foot Yeomen on her left and Foot Sergeants on her right. Her Skirmishers and Crossbows were deployed in front of her cavalry, both within 12” of her Leader, to make best use of her Strongbow ability.
Charlotte’s contingent (Andy)
Opposing us Stephen deployed opposite Charlotte, and Mark deployed opposite Andy. We didn’t take many pictures of the Ayyubid deployment, but here’s a close-up of Stephen’s Turcomen and Hashishin Ahdath,
Stephen’s Turcomen and Ahdath in the village (Stephen)
Mark wasted no time advancing his cavalry towards Andy’s troops, lots of mounted archers approaching!
Mark’s cavalry approach Andy’s troops (Charlotte)
The exchange of arrows was fairly one sided, with two of Mark’s attacking units taking casualties with no loss to Andy’s forces.
Andy & Mark’s contingents, latter has taken some casualties. (Andy)
On the other side of the battle, Stephen advanced his Ahdath and a unit of Turcomen towards a village, with his Leader’s Mamluks supporting them, while his Hashishin and other Turcomen unit failed to advance. Charlotte’s crossbows and Yeomen also entered the outskirts of the village, with the Knights and Sergeants following up.
Charlotte’s and Stephen’s contingents (Andy)
Back on the Christian right flank, Andy and Mark’s troops came to blows, Mark’s cavalry charged Andy’s Archers, and after the latter took 4 casualties, they failed a courage test with a very low roll and routed from the field. The same fate befell Andy’s Skirmishers.
Andy then committed his cavalry; the Knights drove off one of Mark’s Turcomen units and then charged Mark’s Leader’s unit. After a couple of rounds of combat Mark’s leader fell dead as his unit was wiped out, meanwhile Andy’s Mounted Sergeants forced back Mark’s other Turcomen unit.
Andy’s Holy Characters took the hill previously occupied by his Skirmishers, a touch of religious frenzy perhaps?
Andy’s contingent, his Archers and Skirmishers have routed, but the Ayyubids have also suffered losses (Andy)
On the other side of the battlefield, Charlotte’s and Stephen’s troops exchanged missiles, both Charlotte’s Crossbowmen and Skirmishers took a beating, being reduced to half strength and failing their courage tests and becoming battered, but one of Stephen’s Turcomen fled the field. One of Stephen’s Ahdath also fell to half strength, but were made of sterner stuff and passed their courage test. Each side also suffered slight losses to their mounted troops.
Charlotte’s crossbow and skirmishers reduced to half strength and battered. One of Stephen’s Ahdath reduced to half strength. (Andy)
Their battle continued, Charlotte’s missile troops rallied, but didn’t seem keen to get back into the fray. Her Yeomen drove off one of Stephen’s Turcomen units. Stephen had advanced his Hashishin, and Charlotte’s Knights charged them and battered them sending them falling back, however this left her Knights exposed to Stehen’s Mamluks and Turcomen.
Charlotte’s Knights advance as the skirmishers flee. (Andy)
Stephen’s Hashishin recovered their composure, but Stephen decided it was time for his leader to show his mettle, and brought his Mamluks forward to face Charlotte’s Knights, supported by a unit of Turcomen.
Stephen’s contingent commit against Charlotte (Stephen)
Charlotte brought her skirmishers back to support her Knights, taking up residence in some bad going and just in range of one of Stephen’s Ahdath, who took more casualties from the skirmishers and fled the field. Charlotte’s skirmishers then turned their attention to the Mamluks.
The final clash (Andy)
Finally, the Mamluks and the Knights came to blows, and eventually wiped each other out. Fortunately, Charlotte’s units all passed their subsequent courage test forced by the loss of the leader.
On the other flank, Andy’s Mounted Sergeants and Mark’s Turcomen came to blows, the Turcomen winning this battle and the Sergeants fled the field.
Andy’s Knights however made short work of the Mark’s other Turcomen unit, routing it.
By now both Mark and Stephen had lost their leaders and just over half their original points value, so were both forced to take Courage tests on their remaining units (although Andy was also close to that point as well). Several of their damaged units failed the courage tests and became battered.
At this point, with several battered units and both of their leaders now dead or having fled the field, Mark and Stephen conceded the final battle.
Totting up the losses the Ayyubids had lost 28 points of troops, 14 each for Mark and Stephen, while the Pullani had lost 18 points, 10 points of Andy’s contingent and 8 points of Charlotte’s.
This gave the Pullani 5 Glory for the victory, now on to the boasts.
Stephen’s boasts were: “They Will Tremble before me” (2 Glory, success). “My Arrows are Deadlier Than My Spears” (2 Glory, success) and “I shall Slay Their Leader” (3 Glory, failed). The successful boasts gave Stephen 4 Glory, but he lost one for the failed boast making a total of 3 Glory
Mark’s Boasts were: “We Shall Avenge Them” (2) (success), “My Arrows are Deadlier Than My Spears” (2) (failed) and “They Will Tremble before me” (2 Glory, failed). The successful boast gave Mark 2 Glory, but he lost one for each of the failed boast making a total of 0 Glory
The final battle gave a total of 3 Glory for the Ayyubids.
Andy made two boasts, “They will Tremble before me” (2Glory, success), and “I will Destroy more than I Lose” (2 Glory, failed), giving Andy a total of 1 Glory
Charlotte made only one boast, “I will make them run” (1 Glory, failed), so she ended up on -1 Glory
The final Glory tally for the Pullani was 5 for the victory, 1 for Andy’s boasts and -1 for Charlotte’s boasts, a net gain of 5 Glory
After the final battle the Pullani had 5 victories and 35 Glory, the Ayyubid Egyptians had 5 defeats and 2 Glory.
A conclusive campaign win for the Pullani!
Stephen wants revenge and has already issued a challenge, the same 5 battles campaign, but this time set during the Norman Conquest of England! We have put these in the diary for later in the year.
Boasts
For those not familiar with Lion Rampant, Boasts are additional objectives you can set for yourself in addition to the scenario objectives. The Boasts we used in these battles, and their success criteria and Glory value are as follows (failing to achieve a boasts costs 1 Glory, irrespective of its positive Glory value).
Boast
Criteria
Glory
I shall slay your Leader
Your Leader must kill the enemy Leader in a Challenge or Attack. Routing the enemy Leader does not count as a success. If the enemy Leader refuses your challenge and survives the game, you succeed but score only 1 Glory
3
I will destroy more units than I lose
Your Warband must rout/kill more enemy units than you lose (the actual number of models destroyed and their points value is not relevant).
2
My arrows are deadlier than my spears
Your Warband must rout/kill more individual models with Shooting than Attacks (put casualties in two separate piles!)
2
They will tremble before me!
At least two enemy units on the table must be Battered at any one time.
2
We Shall Avenge Them
Secretly choose one enemy unit, you must rout of kill it during the battle
2
I will make them run
One of your units must be the first to fail a Courage test
In the year AD1058 there was a Norse invasion of England. The Anglo Saxon Chronicle doesn’t have much to say about it, just ‘In this year came a pirate host from Norway; it is tedious to tell how it all happened.’
And that’s it.
So Eric and myself decided to refight this tedious invasion using Saga.
I created a matrix of games from The Book of Battles, the game moves on to the next fight depending on who wins each encounter. If you also fancy giving this a go then below is a copy of the matrix. You can work out what to do – who is attacking and defending should be apparent from the previous game and what works best to create a story.
Game Matrix
Eric had Vikings led by Sigvald Ironhand, and I had Anglo-Danes (the English) led by Edward Oswaldsson. We used Warlord Experience from The Book of Battles to have games with a bit of depth and also to help create a narrative flow.
Sigvald and his raiders
First game was Feasting & Pillaging. Three objectives were laid out (loot from the nearby church) with the Vikings trying to steal as much as they could and the English trying to take it away from them. We went with 6 points each. The English had three points of hearthguard, two points of warriors, and one of levy. The Vikings had two points of hearthguard, two of warriors, and two of levy.
Edward and his hearthguard
The English hearthguard massed on their right flank, with the levy and the warriors on the left intending to use some woods as cover. This was because the Vikings had put their bow-armed levy in the middle meaning that a lot of missile fire would meet anyone there. I think Sigvald was being a bit cautious to start with since his raiders didn’t make the most of their moves – coming forward only slowly. Meanwhile, Edward knew that speed was of the essence and so started double-timing his troops, huffing and puffing as they went, to try and secure the church valuables.
Vikings skulk behind the stones
The Vikings advanced through an area of standing stones (clearly this site had been of religious significance for centuries), which also slowed their advance. This allowed the English hearthguard to capture one of the objectives. However, in the centre the English warriors realised that if they were to stop the Vikings then they would have to expose themselves to some bowfire if they were to secure one of the objectives. So they made a dash for it! The bowfire came but no casualties were taken. The Vikings hadn’t been idle though. Their warriors came forward and they managed to capture the last of the objectives.
Vikings with the vestments
The English levy, hiding in the woods, were within striking distance of the Viking thieves. But they had a dilemma – they could stay where they were and loose their slings or they could rush out of the woods and charge the Vikings. If they were going to stop the Vikings then a flurry of sling bullets was unlikely to take them all out – clearly they were going to have to get stuck in!
Anglo-Dane levy make a charge
They made a valiant attempt. The Vikings took casualties but they also gave them out. The English levy lost this exchange and were pushed back. This gave the Vikings the chance to make off with the treasure. On the left Sigvald had moved his Vikings through the stones and saw Edward ordering his hearthguard to make off with the loot. Another unit of English hearthguard had moved to shield the laden hearthguard and took a round of bowfire on the chin. Ouch! Down went three hearthguard.
Go on lads, I’m right behind you
And that was it – game over. The English had managed to get two of the objectives off the table, whilst the Vikings were in control of just one. Victory points came out at 36 to the English and 32 to the Vikings. Edward gained 3 experience points and took the level 1 Exploration ability. Sigvald gained 2 experience points which wasn’t enough to gain any abilities.
So checking the game matrix we see that, with an Anglo-Dane win, we move on to the Ambush scenario. The Vikings, having only partial success with their raid on the church of St Hildaburga, are now trying to flee the scene. The English are going to see if they can cut them off, finish the job, and take back what’s been stolen (which includes some slaves!)
Viking slave traders
We had 4 points each in this game. The English took two points of hearthguard, one of warriors, and one of levy. The Vikings had one point of hearthguard, two points of warriors, and one point of levy. In this scenario all units start off-table and you have to choose when and where to bring them on. There are three units of baggage moving across the table and the aim is to capture the baggage.
The English went first and brought on about half their units. They came on roughly in the middle, the thought being that by the time they got to the road so would the baggage. Sigvald’s Vikings did similar. I then made my first mistake – I brought the rest of my units (mainly hearthguard) on at the far edge of the table. My thoughts were they could block the baggage if anything made its way through. Turned out this wouldn’t happen – both the Vikings and English would intercept the baggage in the middle, this meant I had put one of my units out of the game because they were too far away.
Viking hirdmen advancing
Eric had learnt something from the previous game – sometimes it pays to double move a unit and take the fatigue. Especially in the games we’d played so far, where speed and movement were important. So that’s what he did and soon took control of one of the baggage items. In the middle my levies stepped on to the road to block another of the baggage items. This is where I made another mistake. Because I decided to pull them back (still don’t know why) rather than leave them where they were so they could start peppering the Vikings with their slings. Thus taking another of my units out of the game!
Then something bad happened that was out of my control – I rolled my Saga dice and the result meant I would be unable to activate my warriors (sorry, can’t remember what symbol I needed). I had one of the helmets so went for the Activation Pool, rolled them, and…they all came up the same as well! This meant that I could not move the warriors who I intended to charge the Vikings carrying the baggage. I did move up the hearthguard and Edward though.
And on Eric’s turn he did what any man of honour would do – sent in Sigvald so we had a warlord versus warlord scrap!
Trial by combat
This did not go well. Sigvald had 12 combat dice and Edward was on 10. That’s even enough and with the warlord’s ability to turn hits into fatigue I expected us both to come out of this alive but with a few cuts.
But no.
Edward got two hits on Sigvald. But Sigvald got ten hits on Edward, of which eight went through!
That’s a dead warlord.
At the end of the game it was 21 Victory Points to the English and 34 to the Vikings. A convincing win. Edward gained 2 experience points and Sigvald gained 3 and took the level 1 Tenacity ability.
Seems quiet enough for the time being
So we move on to our last game – Guard The Loot.
The Vikings, having escaped the English ambush, are now nearly home and dry. All they need to do is get their plunder aboard the boats and off they go.
The rules of this scenario mean that each player places 3 objective markers. At the end of the game you get Victory Points based on how many you control – those placed by your opponent are worth more than ones placed by yourself.
We had 5 points each. The English (now led by Edward’s son, Gyrth Edwardson) had three points of hearthguard, one of warriors, and one of levy. The Vikings had two points of hearthguard, two of warriors, and one of levy.
I made a slight mistake in my deployment. There were six objectives on the table but I only had five units. This meant it would be impossible for me to control all six objectives, but if I’m honest, I reckon that would be hard to achieve anyway. So not that bad.
We’d set up with a river running across the table with a bridge in the middle. This was slightly on my side. Normally you roll for how passable the river is at the beginning of the game but we decided we’d roll for it when a unit reaches the river. We decided we’d roll separately for the river either side of the bridge.
Vikings secure control of the booze
Both the Vikings and English soon gained control of two objectives each. The Viking warriors found some crates in the woods and Sigvald and his hearthguard found some more near a hill. The English levies took control of some cargo beside the river but rather than cross to another piece of loot just the other side of the river they chose to stay where they were so they could shoot at any Vikings that tried to claim it. Edward and his hearthguard soon took control of some barrels. The fight was going to be for the remaining loot. I had placed one of the loot tokens on the bridge which, being on my side of the table, meant I should be able to grab it. However, due to the scores I knew I had to push it and gain as much loot as possible and, ideally, the ones Eric had placed (worth more Victory Points) if I was to win the day.
So what do we do now
I pushed a unit of hearthguard and warriors toward the bridge. The intention was that the hearthguard would cross over where they could make a grab for one of the other pieces of loot and the warriors would come up to control the loot on the bridge. With Edward controlling one piece of loot I decided the other unit of hearthguard would cross the river to ultimately attack the Vikings with the loot in the woods. I let Eric roll for the river. Impassable! Yup, a steep, slippery, bank and deep, fast-flowing, rapids made it impassable. So I made the decision to double-time them to the bridge where I could launch an attack on the Viking side of the river. Meanwhile Eric moved a unit of hearthguard to control the loot by the river. The English levies opened up with their slings but…nothing!
Here we go! Here we go!
Now things hotted up! The first unit of English hearthguard crossed the bridge and made for the Vikings in the woods. Eric did the brave thing and backed up. And the Viking levies opened up with their bows. I used the Shieldwall ability to raise armour to 6 and thought that would be enough to stop the arrows. But no – three casualties caused! I then moved the warriors on the bridge along the banks of the river (and behind a hill to protect them from any arrows) so I could contest control of the loot there. This meant Eric only had control of two loot tokens whilst I had control of three, and the possibility of taking control of a fourth. Would that be enough to win the day?
Give us back our barrels
On the last turn Eric decided to go for it. Realising the difficult position he was in it was clearly an all or nothing situation. He counter-attacked on the bridge, meaning the English lost control of the loot token there, and then he brought up a unit of hearthguard to charge the warriors who were threatening control of the loot by the river. In this fight it went the Viking way – no Viking losses but two dead English warriors. This meant the warriors had to withdraw and therefore the Vikings would regain control of that loot token.
And that was the end of the game. The Vikings had just managed to snatch victory from the jaws of defeat – they had three loot tokens worth 9 Victory Points and the English had control of just two loot tokens worth 6 Victory Points. A close one.
But final Victory points for the day came to 63 for the English and 75 for the Vikings. A narrow Viking win. They had got away with some loot but not as much as they could have.
Andy rounds up a busy weekend for the Society. Photos by Andy unless stated otherwise, header photo by Stephen.
Last weekend saw both a Society meeting and our annual trip to the Cavalier Wargames show run by Tunbridge Wells Wargames Society.
Only three games at the meeting on Saturday, perhaps due to some members only being able to get out on one of the days.
First up, David ran a Napoleonic Corps game using General d’Armee rules and figures from his collection. This was a popular game with half a dozen members partaking.
Eric ran a Judge Dredd RPG, only a couple of photos of this one I’m afraid.
Judge Dredd RPGJudge Dredd Bar room Brawl
Finally on Saturday Andy and Stephen finished off their Lion Rampant Five Battles campaign, joined this time by Treasurer Mark and new member Charlotte.
Game one.
This was a Convoy mission, the Christians had to escort three “baggage” markers diagonally across the table, a cart, some monks and some civilians. The Muslim forces had to stop them.
Much reduced cavalry face off (Charlotte)Andy’s convoy and escorts (Charlotte)Egyptian Light Cavalry (Charlotte)
Game 2. This was to be our “Big Battle”, with two commands on each side. Here the objective was simply to defeat the opposition.
Andy’s warbandAndy’s Warband (Charlotte)Charlotte’s and Stephen’s warbandsStephen’s view point (Stephen)
We will post a write up of the final games in the campaign in the near future.
CAVALIER
On Sunday half a dozen or so members travelled to Tonbridge for Cavalier.
The Society’s game for this year was masterminded and built by Phil, and was a 3D representation of a map game published in the 1977 Warlord Comic Summer Special portraying a Luftwaffe raid on Southern England during the Battle of Britain.
Phil’s board, 560 individually marked squares!Airfields and ammunition dumps are three of the targets for the LuftwaffeA close up of the townA copy of the original game can just be seen at the bottom of the photo
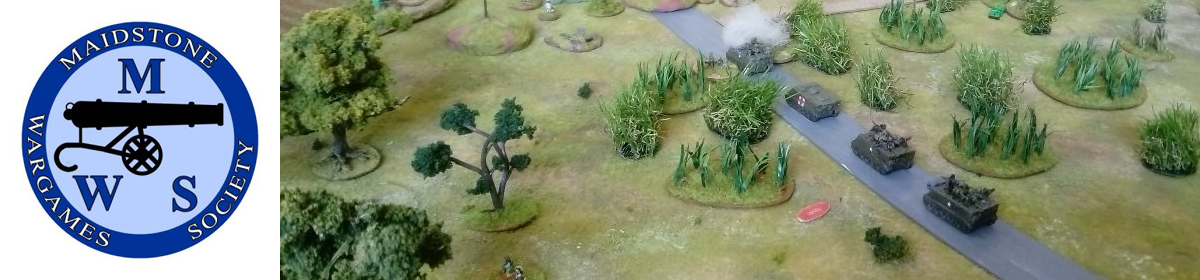


 It saw a rag-tag French outfit as the defender facing a determined German company supported by a platoon of tanks. The French were made up of a platoon of Foreign Legion and a platoon of Tirailleurs Sénégalais on one side of the river, needing to withdraw across the bridges and a Motorcycle platoon holding those bridges. The French also had some support in the form of an anti-tank gun and some engineers in a truck – the latter to demolish the bridges before the Germans could capture them intact. Along with two Bouteilles Incendiaires, two roadblocks and a couple of full Chain of Command dice for the withdrawing troops, this was the defending force. The Germans, in addition to their infantry company and tank platoon, had an Adjutant, a Pioneer team in a Kubelwagen, a SdKfz 222 armoured car, an infantry gun and a truck with four rubber boats. It wouldn’t have been an early war game without a Shabby Nazi Trick – the German players selected a fifth column sniper (Jean-Claude). We played through the patrol phase which saw some interesting jockeying for positions around the buildings on the German side of the board. With jump off points then positioned we were ready for the meat of the game.
 Repeated exchanges of fire were telling on the French forces as they tried to hold the Germans long enough for their engineers to deploy and mine the bridges.


You must be logged in to post a comment.