Everyone loves a bit of space opera and so several members jumped at the chance of a game of Full Thrust. Jeremey takes us through the battle of Moon 22.
Rather than have a straight up fight I thought I’d create a scenario to add a bit of flavour. We had two players per side Marcus joined me against Tony and Stephen. As we didn’t have an umpire I created four different scenarios centered around two damaged freighters and the collapsed Moon 22, each scenario had a different objective and each team would draw one at random. The remaining two were not revealed so that neither team could guess what mission the enemy had.
Tony’s fleet were all from Brigade Models, while my fleet was one I’d scratchbuilt. This was in fact their first action. Tony and Stephen’s mission was to get alongside the damaged freighters and then escape with the cargo. The mission facing myself and Marcus was to destroy as many of the enemy fleet as possible while trying not to lose any ships.
At the start of the battle each player ended up splitting up effectively creating four battle groups. Both groups made straight for eachother apart from Tony who kept some ships back and headed for the freighters.
Having exchanged a bit of fire Marcus and Stephen’s ships got very close. We were using the slightly harder vector rules from the Full Thrust Fleet Book 1 which led to a miscalculation for Marcus’ ships where they stopped short and turned their backs to the enemy. In the meantime Stephen also turned some ships round in anticipation the enemy would fly past.
On the other side of the battle I engaged Tony’s ships in a fierce fire fight. I got lucky with the re-rolls on one attack causing significant damage.
Meanwhile Marcus and Stephen were still engaging eachother. Marcus was concentrating on the smaller ships in order to score more points towards the objective but at the expense of leaving Stephen’s bigger ships including their bigger guns.
It became obvious what mission Tony and Stephen had when Tony managed to get some ships close to the freighters. Seeing this I quickly moved some ships in order to get Tony’s ships in line of sight.
I manged to destroy one of the ships but the others began to escape. Marcus had taken quite a beating from Stephens ships and decided to jump out rather than allow his ships to be destroyed.
With Marcus’ fleet leaving I made a run to catch up to Tony’s escaping ships. However I still had two big ships bearing down on me and so left a ship to cover my fleet.
Little did I know how severe the damge to Tony’s ships was, fire from my rear guard ship took out Tony’s flagship.
Tony’s ships were accelerating fast leaving only one chance to stop them. Unfortunately the dice were not with me and I manage to destroy only one of the fleeing ships.
With Tony having got only one of the two ships away and the loses suffered by mine and Marcus’ fleets the game ended in a draw.
It was good to get a game of Full Thrust in and for a chance to use my scratch built fleet. Also the moon used in the battle was an old sponge ball I found and the space mat was actually a table cloth.
Peter dives into the si-fi universe of David Drake.
“…And so, Major Kovacs, PRA Intelligence has confirmed that the rebel fanatics have used their mineral wealth to hire what looks like the whole Ariete Division (some 15,000 men) to back their ludicrous independence claims and rescue their faltering defence. It seems likely that they will try to strike at some of the outlying abandoned mine-workings before heading to the coastal plains, in part to get some more income but also to give our troops a ‘bloody nose’ in the hope that it’ll make the govt sue for peace. It is your mission, therefore, to buy some time whilst we organise a major push – and to show those ‘Arietes’ that Paley is not such an easy proposition!”
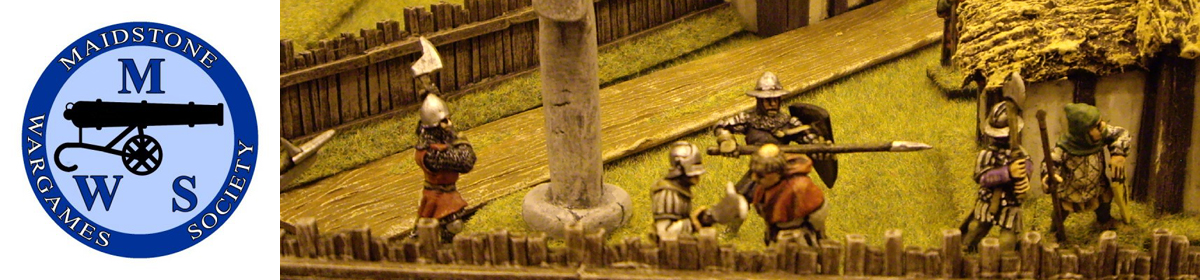
Saturday 12th March saw another game set in the SF universe of ‘Hammers Slammers’. The scenario this time was taken from the ‘Paley Campaign’, with rebel forces aided later on by the Mercenary ‘Ariete’ Division to try and turn the civil war in their favour.
The game represented a reinforced probe as ‘Ariete’ began their drive in a pincer aimed at the mining settlement of Smiricky VII, defended by elements of the PRA 7th Armoured Regt. Only short-range recce was available, as the PRA had not inconsiderable AA assets… The forces used were as follows:
Ariete Division, ‘Trieste’ Armoured Regt
2x ‘veteran’ armoured detachments, each of 10x TUs (Tactical Units)
Tank platoon = 2x ‘Cougar’ heavy MBTs, +1x ‘King Cougar’ super-heavy MBT
Mech infantry platoon = 3x ‘Lynx’ heavy APCs (one with large-calibre ‘close-support’ HE cannon), carrying 1x TU of heavy infantry
1x medium ‘Puma’ tank (with upgraded main weapon and light ATGM)
Commanders
Captain Christopher Sime
Lt ‘Juan Cornetto’ Treadaway
PRA 7th Cavalry Regiment – ‘The Iron Fist in the Iron Glove’
2x ‘trained’ detachments, each of 15x TUs
Tank platoon = 4x F6 ‘Hellcat’ medium MBTs
Mechanised infantry platoon = 4x light F20 ‘Tigercat’ APCs, each with 1x TU of assault infantry
Support platoon with 2x F4 ‘Wildcat’ (AAA version), and 1x new F35 ‘Sabrecat’ mounting a large ex-naval cone-bore weapon as enhanced anti-tank
All vehicles, whilst lighter than their opponents, had decent frontal armour and plenty of anti-tank light ATGMs….
1‘Company HQ’ F100 ‘Top-cat’ which allowed for the redistribution of ‘action points’ between the two sub-commands (the other ‘guard’ vehicles and bridgelayer were just for show – this time).
Neither side had any off-table artillery assets (the PRA has an abundance of multiple-launch semi-guided rocket artillery, like WW2 ‘Katyushas’ or MLRS)
The ‘company HQ’, whilst certainly handy, was also an excuse to put some more nice models out. All of the vehicles were (sort-of) scratch built from other ranges – more of which anon. Meanwhile, what happened….?
Unfortunately, the main PRA player (your erstwhile webmaster, as it happens…) had caught COVID just before the game, and so yours truly had to sub. As the task was a fairly static one, however, with a purely reactive defence, it was not too bad. So, after initial briefings and extremely useful reminders of the key rules by JT, the PRA were deployed in hasty defensive positions across a wide general arc covering the four main roads in to the site. The undoubted qualitative advantage of the Mercenary Arietes – command/control as well as equipment – was offset to an extent by the close terrain and the PRA being in defence.
Captain Sime got off to a good start with his tank platoon crashing through the woods astride the NE track, whilst the armoured infantry skirted to come in from the north. Certainly his three tanks had a good view of the defenders – it’s just that it also worked the other way, as he found to his cost when one of the new self-propelled AT guns sent a (very lucky) round crashing through the side of the lead giant ‘King Cougar’, which promptly exploded!
Whilst this unfortunate set-back had more effect on the player’s morale than overall result, it did lead to a more cautious probing and longer-range ‘softening-up’ of defending infantry bunkers, other PRA vehicles etc (especially the SP/AT!), which in the end was more to the Ariete’s advantage. The PRA main weapons only had a decent chance if they could get some side-armour shots, and so were hoping to ‘mix-it’ when the enemy got closer.
As the Ariete gradually eroded the PRA armour, a late probe by the Heavy APCs almost came to grief when they were caught in a close-range cross-fire from one of the multi-barrelled SP/AAA and hidden PRA tank-hunter infantry in the mine buildings. Sadly by this time the PRA was running short of command points due to earlier losses, so could not afford the luxury of using said CP to enhance shooting, aiming etc, and the ambush came to naught. Well, other than generating lots of – fortunately small calibre – return fire from Chris into the buildings, until ‘Ariete HQ’ tactfully reminded him that they were supposed to not blow the bloody doors off the valuable mine workings……
On the NE flank, again the Ariete got off to a less than sparkling start when Lt Treadaway used a fistful of his command points in an attempt to execute a massed ‘Follow me!’ option, which would have seen half his force roll together as one in an unstoppable steel tide….. However, seems the tide was out that day as John failed the key roll and no-one else followed his lead! Not only that, but a probe down the road by a scout vehicle with an APC as backup came to grief when, having blown up some armoured trucks near the mine workings, they were ‘set-upon’ by another crossfire from the PRA tanks and SPs, from which only the infantry inside the APC survived.
As with the other flank, however, gradually the Ariete worked their way forward through the wooded terrain, taking out first the truly terrifying F35 SP/AT, then each of the PRA heavy armour in turn. There were some close shaves during return fire, and the sky was full of – fortunately – light ATGMs, for a while. In the end, the Ariete was simply too powerful and commanders good for the PRA engaged, and as they loss level tipped over the key 50% level, the PRA decided that their delaying mission had been achieved. It must also be said that the Ariete had gained a new respect as well as insight into the mettle of their PRA opponents, and much thought would need to go in to the next encounters.
Part 2 of this article will outline more about the terrain and especially vehicle models, together with all the scratch-building mania which went into this project. Until then, it’s a case of a geeky ‘spot the bits’ competition. Oh, and very big plus points for anyone who IDs the dark brown roads…
My thanks to my fellow MWS members for hosting the game, and both Chris and John for playing.
Club member Marcus reports on Warlord Games Blood Red Skies…
I recently acquired Blood Red Skies (BRS), largely because my youngest son was given a box of Spitfire’s by a generous hearted warlord employee at the Broadside show last December. He was very excited (thanks Warlord!) and proceeded to watch videos on You Tube. This created a conundrum for me, however. I had seen BRS and been tempted, especially when Warlord offered the club a store-wide discount last year. I do like my aerial gaming. In fact, I have plenty of modern (well, post war) aircraft and some WW2. However, and here is the issue, they are all 1:600. A further problem was that Warlord had switched from the “Battle of Britain” box set to “Midway”. Now personally I prefer the Pacific theatre with all that combined naval and air action, but children like what they like. Anyway, I ended up with a Midway basic box set, Me109’s and Me110’s and duly began painting them up (because who else is going to eh?!) One I had finished two aircraft for each side we gave it a go and soon got the hang of it. I say that; I lost!
At the heart of BRS is a simple mechanic; a flight stand that can hold three positions. Pointing up, the aircraft is climbing and “advantaged”. Level flight is “neutral”. Diving is “disadvantaged”. Aircraft move in advantage order; from advantage to disadvantaged and in pilot quality within each of those states from 5 (Ace) to 1. A simple mechanic, which we certainly got all wrong the second time around. There is also some novelty in the shooting/victory mechanic. You shoot with your dice depending on pilot quality and aircraft weapon rating. The defender can try and block hits with a combination of pilot and agility (occasionally speed for deflection shots). Boom chits result from unblocked hits, but don’t necessarily equate to a destroyed aircraft. An aircraft might be downed but the chits are more like damage tokens. However, collect more damage tokens than aircraft on the table and you lose. There are also a limited number of cards in each player’s hand which can be played on aircraft with the correct traits or as theatre and doctrine cards to affect the game. We also forgot about the tailing rules, which immediately disadvantage an aircraft tailed, for the first part of the game (I’m really bad at this aren’t I?)
This time we played with four aircraft each: 4 Spitfires for me and 4 Me109’s for the Oberleutnant.
Naturally, since we forgot a good portion of the simple ruleset, we seemed to spend a fair bit of time charging about not getting any shots in at all.
Early turn, how do you fly these things?More formation flying, and an RAF near miss!
Lot of manoeuvring each turn to very little effect and a couple of shots that had no effect in turns 6 and 7.
Turn 6Turn 7
Then we started to see some action…
A bit of a daisy chain. “What about that tailing rule?”On the tail of a SpitfireFirst blood at last – that’s more like itTit for Rata tat tat!In for another shotGetting the hang of this now
…revenge on the Oberleutnant for that loss in the first game.What do I think of BRS so far then? Clearly I know nothing, as evidenced by my account, but the jury is out for me. The Oberleutnant seems to like it in a way he wasn’t when asked if he wanted to play with my other aircraft, but was over games such as “Galactic Heroes” and “What a Tanker!” There has been some interest at the club in playing some Pacific games although I would need a couple more boxes of aircraft to get into the “sweet spot”; many of the designed scenarios to average out at around 18 aircraft. That isn’t cheap. The best price I could find on some Pacific boxes of 6 aircraft is around £22.40. I can buy 6 fighter aircraft for £3 from Tumbling Dice in 1:600 (in fact, I have some painted). Also, at 1:200, sometimes, a bit like “X Wing” the models get a bit crowded and things have to be fudged a bit more often. The latter game makes a good comparison; some expensive models, a bit crowded when you get lots of stuff on the table. BRS is quite expensive and you do get more (just not pre-painted) models, not as complicated generally and you can get quite a few models on the table in a decent time-frame. I think that somewhere in between is what I really want. I’d really like to see a Tumbling Dice/Wings at war carrier variant sometime.
But, if the Oberleutnant likes it, can it be a bad thing? And if it gets an outing at the club, that’s got to be good too right? We will just have to see how it progresses with BRS…
First up we have a 6mm Field of Glory game, Later Hungarians vs Ottoman Turks.
The FOG Trophy, what they are all fighting for.Battle lines are drawnCavalry closeup
Alan ran a 28mm Vietnam game using FNG rules. It wasn’t a good day for the Americans! (Ed: I only managed to take one useable phot0, however Alan sent us some of his to add to the post.)
US Patrol advancesA quiet(ish) villageView from the the side of the villageUS scout across a stream
Peter ran a 15mm(ish) Hammer’s Slammers game, using a collection of 1:87 Roco Minitanks, mixing and matching turrets and chassis from WW2 and modern vehicles.
Peter’s winter wonderlandTwo out of three downArmour advancesBrew up!
Finally we have a four player Dragon Rampant game, Skeletons and Goblins against Dwarves and The Forces of Nature (Tree and Rock men), including Jeremey’s massive Tree Giant.
Andy’s Dwarf Scouts start the advance, the rest of the force stay put!Stephen’s undead Giant would dwarf almost anything, except Jeremey’s bark leviathan.Tony’s Warg riders start to outflank Andy’s DwarvesStephen’s skeleton archers take the high ground as his cavalry charge Jeremey’s rockmenDwarves finally advanceStephen’s skeleton cavalry losing to Jeremey’s rockmen
After the disasterous dice rolling displayed in the previous battle Jeremey offers Tony the chance to get even.
A victory entirely down to how bad your opponent rolled isn’t much to celebrate and so I offered Tony the chance of a rematch to banished those dice rolling demons. This was a smaller battle, mainly because I had to provide both armies. I made the sides identical with 12 units in each army. As before I took charge of the Yorkists and Tony the Lancastrians.
Tony deployed his forces in the traditional way of archers out front with billmen and men at arms behind. He also positioned all of his cavalry on the Lancastrian left flank. Although Tony’s set up was more in keeping with the period, I decided to deploy in a single line with my archers interspersed between my other infantry. I did this because we were using the Sword and Spear rules which do not allow general infantry units to move through each other. Tony scores a point for taking the historical high ground and I lose points for playing the rules not the period. I also split my cavalry up with a unit on each flank.
Much to my surprise given the last battle we fought Tony advanced with his cavalry straight at my archers despite them having a number of billmen units in support.
Meanwhile both sides advanced their frontlines to begin the archery duel. Initially this looked like it was going to favour Tony’s deployment because more of his archers were lined up against my billmen and men at arms, giving the chance to cause the Yorkists some damage before the infantry came to blows.
At this point Tony’s cavalry crashed into my archers but did not do enough damage and so the melee continued. Despite not getting the result Tony expected from the charge (partly because of the billmen support of the archers) they would end up locked in combat for quite a while.
As with the previous battle the Yorkists won the archery duel but this time the Lancastrian archers did at least cause some damage on a number of Yorkist units.
With the archers once again wiped out Tony began moving up his infantry units to get to grips with their Yorkist counterparts.
On the Lancastrian left flank the mounted men at arms finally managed to destroy the Yorkist archers but were locked in melee with the Yorkist billmen. I was surprised to find the cavalry still intact after this combat, I was hoping to have destroyed the cavalry who are tough when charging but not for prolonged combat.
With the destruction of their archers and the loss of some other units the Lancastrians were on the brink of breaking after just three turns. It was at this point that Tony’s now legendary bad dice rolling returned. A bold charge across the road with enough dice to provide a bonus produced nothing higher than a 3! This saw the destruction of the billmen and the breaking of the Lancastrian army.
We didn’t have enough time to refight the battle on the day, so instead Tony and I decided to ignore the army break point and continue the battle to the death.
Clearly that’s all Tony’s Lancastrians needed to suddenly start rolling dice like they meant it. A ferocious clash took place on the Yorkist left flank as their billmen and men at arms charged across the road.
On the Yorkist left flank the cavalry were maneuvering into position to prevent either side from outflanking the other. In the background you can see the Lancastrian cavalry still trading blows with the Yorkist infantry.
With the Lancastrians new found successes punching holes in the Yorkist front line, drastic measures were needed to stop the advance. This ended up with the generals of each side supporting their men at arms.
The fight continued and despite the Yorkists getting more men at arms into the fight the Lancastrians overwhelmed the Yorkist men at arms but failed to kill the Yorkist general in the fight.
Realising the danger the Yorkist general moved to reinforce the other men at arms unit. But this move also abandoned the hard set Yorkist billmen on the Yorkist left who were quickly destroyed, leading to the collaspe of that flank.
With the Yorkist Archers now in danger of being overrun, the Yorkists had some good news with the cavalry duel out on the Lancastrian left. This allowed the Yorkist mounted men at arms to rush to the aid of their general.
Despite this last minute charge and the final defeat of the Lancastrian men at arms by the cavalry, the Lancastrians still had enough men under arms on the battlefield to declare victory.
This was an interesting battle. By continuing to fight on after the standard victory conditions were met (rather quickly I might add) the battle flowed back and forth. The Yorkist cavalry proved superior on the day (with credit given to the Lancastrian mounted men at arms that lasted three round of melee against some billmen). And the initial archery duel clearly went to the Yorkists. But the Lancastrian infantry proved unstoppable on the day.
This battle did make me question the Sword and Spear break point rules. Maybe there should be a sliding scale to represent historical battles where armies break early on to those where armies fought to the bitter end.
Two short WW1 naval scenarios that we played out last year….
These were refights of two clashes that took place in August 1915 off the Middelkerke Bank, just out to sea from the French/Belgian border. Home grown computerised rules were used and each action took less than an hour to play out.
These were first surface actions between the newly formed German Torpedobootsflottille Flandern, based at Bruges, and the torpedo boats of the French Défense Mobile, charged with guarding the French side of the Dover Straits approaches from Dunkerque.
In the first action, which took place on 9 August 1915, two German TB’s, A.4 and A.16, spotted suspicious vessels steaming towards them from the direction of Dunkerque. They had been spotted by the small French TB’s 341 and 342, which were on outpost patrol and had steamed at full speed to investigate suspicious smoke.
The German boats were bigger and more heavily armed, but with very small targets and no fire control for their small calibre guns, they had to get very close to have a reasonable chance of getting hits and carefully time their fire for best effect.
A twisting turning action resulted with the boats jockeying for position, whilst having to avoid the shallow sand banks in the area.
The 341 got position first and fired a torpedo, which hit and sank A.4.
341 and 342 cashed in their luck and beat a hasty retreat as a third German boat, A.12, came up from the direction of Ostende to join the fight.
In the real world of 1915, the action had been short and indecisive. The Germans had broken off the action shortly after opening fire when an unidentified shore battery opened up on the scene.
However this was just a warm up for the German commanders, who were new to the rules. They chalked the result up to experience.
This set the scene for Scenario two, which took place in the same area.
Back in the real world of 1915, the French had beefed up their patrols as a result of the first incident. On the night of the 22nd, two Torpilleurs d’Escadre (small destroyers), Oriflamme and Branlebas, went out on an ambush patrol to the Middelkerke Bank Buoy. At 11pm they spotted the silhouette of a German boat in the darkness. This was A.15, inbound to Ostende.
In this refight A.15 was very badly outgunned by the French destroyers and too slow to escape them, so her only hope was to land a lucky torpedo hit. Learning from the first encounter, the players who were now in command of the French destroyers closed, holding their fire until they were close enough for their shots to tell, with a good stockpile of ready ammunition to hand. As they manoeuvred A.15 managed to get off a snapshot with one of her two torpedoes, but this missed Branlebas. The response was swift and decisive as first Oriflamme and then Branlebas opened a devastating fire, which quickly knocked out A.15’s only gun and her other intact torpedo tube. The lack of return fire told and a nasty list to port tipped them off to the amount of damage they had done. The French destroyers pressed in close to for the kill. A.15 finally sank beneath the waves.
The result was almost identical to the real life result, which saw Oriflamme and Branlebas press their attack and sink A.15 back in 1915, Oriflamme obtaining a hit with a torpedo. This was the third boat the German force had lost in action since being formed and highlighted the poor design of the A.1 class TBs. They were too weak to fight and too slow to run. It had been the first real opportunity for the Défense Mobile to engage enemy vessels since the war began and they had certainly seized it and driven their attack home. The German force in Bruges would need better boats if it was going to be able to successfully take on the British and French surface forces in the Channel.
Small scenarios like this often make for interesting games than large fleet actions that can get bogged down in big long range gun duels. The action/reaction nature of a night action is created by making each boat dice for initiative. Those with higher initiative get to choose whether to move before or after those with lower initiative. If one side is more alert than the other a modifier can be applied. The boats used were 1/3000 scratchbuilds made from plastic card sheet and rod, except for Branlebas and Oriflamme, which were conversions from Navwar models of the earlier Arquebuse Class. The scale allows the game to be played out comfortably on a small table.
Stephen organised a SAGA Age of Vikings Battle day, several games through the day across a couple of tables. In Stephen’s words:
Hail! Hail! Bleddyn ap Owain, Lord of Bangor, rides victorious! Hail! Hail! Lord Bleddyn has met the Normans and Scots in battle and comes home victor. Glory to his name! Honour to his household! From this day forth let him be known as Bleddyn The Dragon! Hail! Hail!
The header photo shows Bleddyn and his warriors off raiding. Here are a few more from the various SAGA battles.
Norman cavalry about to have a bad dayWelsh mounted
Scots advanceMore ScotsAnglo-DanesNorman Archers
Marcus ran another rules development game for his Spy Fi underwater combat rules, based on Galactic Heroes. Bond and friends vs Largo. It didn’t end well for either of them!
Layout for game 1, blue markers are points of interest, die rolls would determine what is found.Largo’s henchmen gang up on Felix LeiterLargo’s shark drone attacks a Royal Navy diver.Largo’s henchmen advance
Dave ran a Gaslands race day
Gaslands race trackRear endedOil slicks make life harder
And, finally, Paul ran a 3mm Ancients game using his own rules.
Stephen gives an account of a Song of Blades and Heroes game…
In this game of Song of Blades and Heroes (SoBH) I had a group of adventurers made up of a hero (Erik Jorgensen) with two sidekicks (Gudrun Frisk and Torsten Brand), a druid (Odinkar Thostenson), a berserker (Ingulf Bloodaxe), and several warriors who were looting a ruin looking for treasure.
There were three treasure tokens scattered throughout the ruins, and looking after them were the undead residents of the ruins!
Treasure!
SoBH is fun, quick, and dirty, and always gives an enjoyable game. Movement and weapon ranges fall into one of three categories – short (75mm), medium (120mm), or long (180mm). Models have only two characteristics – Quality (used for activating, morale, casting/resisting spells, etc) and Combat (used for both melee and missile). It’s that simple. When activating you can choose whether to roll 1, 2, or 3 activation dice. Each success allows you to take one action. Roll two or more failures when activating a model and initiative passes over to your opponent (yes, that’s right – if you only roll one activation dice for each model you’ll get to activate all your models, but you’ll move slowly and find it hard to do heroic deeds. At some point you’ll have to start rolling more dice!). Dead simple.I split the human forces into three groups with the aim that each group would make a grab for a different piece of treasure. Two of the groups had an archer each, plus one of the hero’s sidekicks, and two warriors. The third group had the hero, the druid, and two warriors. Berserkers can not form groups so have to go solo, but the berserker was positioned with the hero’s group and he would go the same way as them, just wouldn’t be able to do a group move.
So, on the first turn, Ingulf (the berserker) moved up through the ruins, passing between two buildings. The rest of the humans also moved up. Humans usually move medium, but in difficult going (e.g. ruined buildings) they are reduced to short. When initiative passed over to the undead occupants the first thing to move up was a skeleton minotaur. With a move of long, and three successes to boot, it came loping up at top speed and charged Ingulf.
This would turn out to be a very significant move and would cause Erik’s group a tremendous amount of problems.
Skeletons protect the treasure
The rest of the undead forces also moved up. A group of skeletons occupied the ruins where one of the treasure tokens was, meaning Torsten and his followers would have a fight on their hands. And Gudrun and her group, moving through a burnt out building, found themselves facing a pair of skeleton archers and another gang of skeletons armed with spears, swords, and axes.
The skeleton minotaur was more of a threat than anyone realised, because Ingulf went down – not killed, but knocked down. To save his bondsman, Erik ran up to engage the minotaur, to give Ingulf chance to get back on his feet. But the minotaur’s heavy axe was not going to stop – and down went Erik Jorgenson. Not just knocked down, but the lack of movement and amount of blood could mean only one thing: Erik had been killed!
Erik comes to Ingulf’s aid
This caused a morale roll on all the humans. One or two were shaken by the death of this noted hero and moved backwards, to consolidate. One of the warriors, an archer called Frode, was so shaken by Erik’s death that he fled the field entirely.
Now the skeletons launched an attack on Thorsten’s men. Not only that, but a pair of ghouls, carrying an axe in each hand, also moved up on Thorsten. Gudrun and her group had to put up with arrows whizzing past their ears as they picked their way through the ruins, but none of the arrows actually hit their mark.
Gudrun leads by example
Things took a turn for the worst in the middle. Ingulf had stood up, but the minotaur’s axe would have another victim, and Ingulf too fell dead beneath the hefty blade. Not just that, but Skade, a warrior, was also felled. This left just the druid, Odinkar, on his own against the minotaur skeleton. Not a good position to be in.
On the right, with Thorsten and his men, the battle with the skeletons continued with Thorsten facing off against three of the skeletons on his own. Colden looked to be in dire straits, with the two ghouls coming for him. Surprisingly, he managed to hold his own, dropping one of the ghouls to help even things out.
Skeletons and ghouls attack Thorsten and gang
Gudrun and her mob got stuck in a prolonged fight on the left. The skeleton archers continued to shoot arrows and continued to be ineffective. This gave Gudrun and the others the chance to finish off the other skeletons before charging the archers.
Odinkar the druid, meanwhile, was in quite a predicament. The minotaur took a swing at him and fortunately for Odinkar he missed. The druid then cast a spell, Fist of Thorns, to give him a bonus in the melee. This worked, and pushed the minotaur back. Odinkar is no fool though, and realising he’d had a lucky break, he turned around and made a run for it toward Thorsten and his men. Meanwhile, hearing the panicked yells and calls coming from the druid, Asmund (an archer in Gudrun’s team) came running over to help Odinkar with the intent of shooting the minotaur. But Odinkar took matters into his own hands – he cast another spell, calling out to the wilds to come to his aid, and a wolf came from out the wilderness to help him. To give the wolf a chance against the minotaur, Odinkar cast another spell – Transfix, and the skeleton minotaur found itself suddenly wrapped in brambles and briars, unable to move.
Give the dog a bone
This is what was needed. The wild wolf pounced at the stricken skeleton minotaur and brought it down – destroyed at last. It had come at quite a cost though. Odinkar breathed a heavy sigh of relief.
Torsten and Colden were doing well. Thorsten had managed to destroy two of the skeletons and so it was only a matter of time until the third went down. This gave another of Thorsten’s men, Fritjof, the opportunity to rush ahead and grab one of the treasures, ensuring the band of thieves would get away with at least something!
Mine, all mine!
On the left, with Gudrun, things had also started to improve – Gudrun and Hakon had advanced to a ruined church. Ahead, Hakon could see a group of zombies, slowly shuffling forward. Gudrun stood back, as the better fighter it made sense for her and her blade, Naegling, to stand ready in case of attack whilst Hakon grabbed the gold chalice out of the church. But as Hakon rushed into the ruins the noise and commotion alerted a swarm of bats who quickly swamped the young viking with bites and sharp claws.
A swarm of bats assails the treasure seekers
Would things ever get easy? Not for Hakon, who was overwhelmed by the bats and was taken down. The wolf, meanwhile, had come charging forward and fortunately for Gudrun attacked the zombies. There was nothing for it – Gudrun drew out Naegling and sliced into the wicked bats.
Zombies shamble forth
Well, the game had more or less come to an end. Gudrun finished off the bats and quickly made off with the treasure as well.
Gudrun finds the treasure
The group had paid a vicious price for their loot – Eric Jorgensen was no more, neither was Ingulf. Other warriors had also fallen to the otherworldly guardians of the ruins. One more treasure token remained, but the group decided to cut their losses – two out of three ain’t bad. Just as well for them, because the final treasure token was also under guard…
Lucky for them they never got this far
SoBH is a great game – just right for throwing a few miniatures on the table with minimum preparation and fuss. My game had taken no more than an hour and half. You can use whatever miniatures you want, and is a good excuse for using some of those old 80s role playing figures you may have lurking around but can find no use for.
Andy does a quick photo roundup of last weekend’s meeting.
First off a game of Mortem et Gloriam, 6mm Pontic vs Early Imperial Romans.
Pontic Commander’s viewPontic and Roman forces closeLight Cavalry clash
Andy and Stephen had another attempt at SAGA – Age of Crusades, 28mm figures, Crusaders vs Mutatawwi’a
Some of Andy’s crusadersMore of Andy’s Crusaders, red tokens indicate fatigueStephen’s Mutatawwi’aStephen’s Assassins, with priest and Warlord in supportMore of Stephen’s Mutatawwi’aTroops deployed for the second game, 8 points a-side, from the Crusader point of view.
Alan ran a big Chain of Command game, 28mm figures, with a combined British and Norwegian force trying to hold off a German advance.
All is quiet on the northern frontGermans advanceMore GermansBritish defendersNorwegiansLight German ArmourGerman Heavyweight?German troops hold the wall.
And finally, corporate clashes in deep space, Tony, Chris and Eric try out A Billion Suns. Not a straight up space battle, but operations spread across multiple tables with each player having different contracts to fulfil.
A pair of freighters
Approaching a jump gateTwo British Heavy Cruisers exit a jump gateRescuing some lifepodsBritish Destroyer Squadron
Last year, as a bit of a lock-down#2 project, I decided to make a small desert village for 6mm sci-fi games. All of the components come from Brigade Models (quick disclaimer here – I’m one of the owners of said company) but the techniques would work with any other manufacturer’s buildings. The wall pieces were taken from the Town Walls range, while the buildings are mostly from the Desert Outlands set. The photos in this post are all thumbnails – click on them for larger versions.
The first decision to make was how large it was going to be; I decided that it would have to fit in a 4l Really Useful Box, which gave me a maximum of a 348x220mm footprint and a height limit of 68mm. I based it on a sheet of Foamex, which is great for terrain projects as it doesn’t warp like MDF or hardboard when you apply paint. This came in 300x200mm sheets, so one of those did the job nicely.
I spent a while laying out wall pieces until I had a configuration that I liked – I wanted to avoid a simple rectangular wall. I positioned a gateway and sanded down the base at that point so it sloped away, and added a pair of watchtower pieces to the walls. Once I was happy with this I glued them down with a clear glue (Uhu). I smeared some wall filler around the joins to fill in the odd gap, this has a similar texture to the wall pieces so blends in better. I then laid out the buildings – I wanted enough space around them to be able to position figures and vehicles, so didn’t cram them in too tightly. In the end there were nine altogether. Again I fixed them in place with clear glue.
Now that the main components were in place, I was able to texture the ground. Inside the walls I simply glued a layer of sand using PVA, with the odd small stone around the edges. Outside the walls I mixed up a batch of emulsion paint, sand and PVA and applied this with an old paintbrush. I mixed in some larger grades of sand and small stones (sold in homeware shops for basing candles) so that I achieved a much rougher texture than the inner area.
The next stage was to add lots of small details to the buildings. I used a few parts from the Brigade 2mm scenery range, there are bits of girder bridges, barns, support frames from an airship hangar, a Roman lighthouse (makes a good chimney) and an obelisk in the main square. There’s the odd roof-mounted water tank and aerial from the 15mm range. There’s also a radio antenna which is the broken off top of a much larger 3D (mis)printed mast. This part proved to be a nightmare as I kept knocking it off – in hindsight it would have been better to paint it separately and attached when everything else was finished, but I kept supergluing it back on.
I also fitted some supports for fabric canopies made from paperclips and wire staples – I drilled into the buildings, walls and base with a 1mm bit and superglued them in. I didn’t add the canopies themselves yet to make it easier to paint around them.
Everything was then sprayed in Halfords white primer, followed by a coat of Army Painter Skeleton Bone. The walls and buildings were them washed with GW Agrax Earthshade, while the ground was washed with Seraphim Sepia. This gave the buildings a distinctly different shade from the ground, even though they were painted with the same base colour. Walls, buildings are ground were all heavily drybrushed with bone or stone paints from the Citadel Dry range.
Other details were painted in – doors and windows, various roof accessories and so on, mostly using Citadel contrast paints which worked well over the pale bone base colour. With this done I was now able to make the canopies from small pieces of paper towel – the type of nasty, non-absorbent cheap towels that we used to get in school toilets! I soaked the pieces in dilute PVA and draped them across the supports, making sure that they drooped as naturally as possible in between. Once the glue dried they were pretty solid. I painted them in either dark red or dark brown using GW contrast paints.
The finished conurbation was christened Mos Arun; ‘Mos’ from the Star Wars Tatooine naming convention, and ‘Arun’ taken from the road name where I live. I’m planning a series of other small building bases to accompany it in the near future, which will also appear on this blog in due course. All being well, they should appear at the club’s Open Day later in the year.
You must be logged in to post a comment.